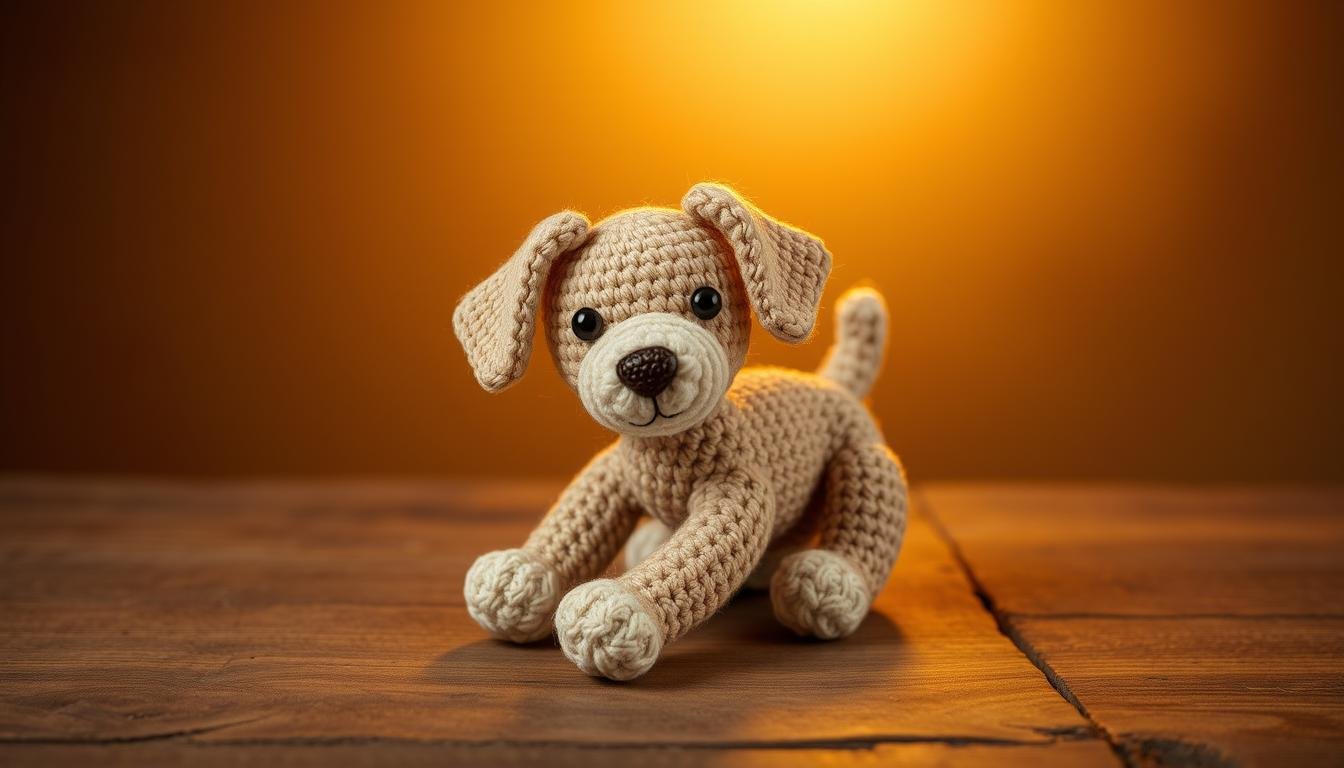
Are you ready to make a cuddly friend? Dog crochet patterns are all the rage! You can pick from four cute designs: Daisy the Dog, Cody the Cattle Dog, Henry the Hound, or Lulu the Labrador. These amigurumi dogs are 13.5 to 14.5 inches tall, perfect for hugging.
To make your crochet puppy, you’ll need 260 yards of acrylic yarn. Use a 3.5 mm hook and two 15 mm safety eyes. These patterns are for intermediate crafters, with easy-to-follow steps for each part.
Making your own dog is more than a hobby. It’s part of a big trend, with the global crochet market set to hit $4.3 billion by 2026. Plus, 85% of pet owners enjoy making special items for their pets. So, get your hook and yarn ready to make your own crochet puppy pal!
Getting Started with Dog Amigurumi Basics
Welcome to the world of dog amigurumi! This craft combines crochet and amigurumi to make cute dogs. Let’s explore what you need to start.
Essential Materials and Tools
To start your dog amigurumi journey, you’ll need these key supplies:
- Worsted weight acrylic yarn
- Crochet hook (2-3 sizes smaller than recommended)
- Polyester fiberfill stuffing
- Safety eyes (6mm, 9mm, or 12mm)
- Lock ring stitch markers
- Felt sheets for features
- Yarn needle
Understanding Crochet Terms and Abbreviations
Get to know common crochet terms used in dog patterns:
| Abbreviation | Meaning |
|---|---|
| sc | Single crochet |
| dc | Double crochet |
| sl st | Slip stitch |
| inc | Increase |
| dec | Decrease |
Mastering Basic Stitches for Dog Patterns
Learn these basic stitches to make your dog:
- Magic ring: Start your amigurumi
- Single crochet: Main stitch for shaping
- Increase: Add stitches to widen parts
- Decrease: Reduce stitches to narrow sections
With these skills, you’re set to make your dog. Remember, practice is key. Start simple and get better with time.
Dog Crochet Pattern: Step-by-Step Guide
Are you ready to start your crochet dog tutorial? This guide will help you make a cute amigurumi pup. It’s labeled “advanced intermediate,” great for those who want to improve their skills.

You’ll need Red Heart Super Saver yarn for this project. A regular dog needs about 239 yards, while a fluffy one needs 499 yards of Color A and 230 yards of Color B. The finished dog is about 9.5 inches tall.
Begin with the body, doing 37 rounds. The head needs 32 rounds. You’ll make 2 front legs and 1 for each side, each leg with 26 rounds. Don’t forget the tail!
For the eyes, use 15mm safety eyes. A 20mm safety nose adds a nice touch. If you like buttons, 16mm shank buttons work well for eyes, and a 19mm button for the nose.
- Use a 6.5mm hook for best results
- Fill your creation with polyester fiberfill
- A pet slicker brush helps achieve that fluffy look
Remember, patience is key when following these amigurumi instructions. Take your time with each stitch. Soon, you’ll have a cuddly canine friend to show for your hard work!
Choosing the Right Yarn for Your Crocheted Pup
Choosing the right yarn is key for your adorable crochet dog. The right yarn affects how it looks and lasts. Let’s look at the best yarns for your furry friend.
Best Yarn Types for Amigurumi Dogs
Acrylic yarn is a top choice for amigurumi. It’s easy to work with and keeps its shape well. Merino wool blends are soft and warm, perfect for realistic dog toys. But, avoid pure cotton as it’s hard in tight spots.
| Yarn Type | Benefits | Best Use |
|---|---|---|
| Acrylic | Durable, easy to handle | General amigurumi |
| Merino Wool Blend | Soft, warm, thermoregulating | Realistic dog toys |
| Wool-Ease | Versatile, machine-washable | Pet sweaters |
Color Selection Tips and Combinations
Colors can bring your dog to life. Pick colors that match real dogs or go for fun, unique shades. Hand-dyed yarns add special patterns to each toy.

Yarn Weight Considerations
Knowing the yarn weight guide is important. DK or worsted weight yarns are great for dog amigurumi. They offer clear stitches and are easy to use. For bigger dogs, try chunky yarns like Wool-Ease Thick & Quick.
- Lightweight: Best for small details
- DK/Worsted: Ideal for most amigurumi dogs
- Chunky: Great for larger, cuddly toys
Remember, gauge is key. Always check your tension, even when changing yarns or hooks. With these tips, you’re set to pick the perfect yarn for your crocheted pup!
Creating the Perfect Dog Head Shape
Making the crochet dog head is key to bringing your amigurumi pup to life. It requires careful shaping and detail. This ensures your furry friend looks adorable and lifelike.

Snout and Muzzle Techniques
The snout and muzzle are vital for your crochet dog head. Begin with a magic circle of 8 stitches. Increase to 48 stitches by round 8 for a rounded muzzle base. For a defined snout, use short rows and add stuffing to keep the shape.
Eye Placement and Safety Tips
Eye placement is critical for your dog’s look. Place the eyes 4 stitches apart and 2 stitches tall. Use secure plastic safety eyes or embroider them with yarn for safety. Create an eye patch with 24 stitches in round 4, securing the eyes.
Ear Variations and Styling
Dog ear patterns can be customized to your liking. For floppy ears, crochet 16 rounds then decrease to 8 stitches in the final round. For perky ears, crochet fewer rounds and stiffen with wire. Try different shapes to match your desired breed or create a unique style.
| Feature | Rounds | Starting Stitches | Max Stitches |
|---|---|---|---|
| Head | 19 | 8 | 48 |
| Ears | 16 | 8 | Varies |
| Eye Patch | 4 | 8 | 24 |
Creating expressive amigurumi facial features is all about the details. Take your time shaping the crochet dog head. Adjust your stitches to get the perfect look for your unique pup.
Body Construction Methods

Making a perfect crochet dog body needs skill and care. The body is the base of your amigurumi, making it cuddly. Let’s look at ways to make your dog come to life.
When making your dog’s body, pay attention to even stitches and shape. Use amigurumi techniques like increases and decreases for the right look. For a chunky look, do more rounds with fewer decreases. For a slim look, use more decreases.
Stuffing is key for the right shape. Stuff firmly but not too tight. This makes it huggable and keeps the shape right. Stuff a little at a time, spreading it out evenly.
| Body Part | Rounds | Shaping Technique |
|---|---|---|
| Head and Body | 32 | Continuous rounds |
| Arms (each) | 22 | Decreases for tapering |
| Thighs | 16 | Increases for fullness |
| Feet | 17 | Shaping for paw pads |
Your finished dog will be about 8.5 inches tall and 4.5 inches wide at the hips. Adjust your tension and stuffing to get these sizes. With practice, you’ll get good at making these adorable amigurumi dogs.
Crafting Adorable Dog Features
Making a perfect crochet dog face is like bringing a character to life. The right dog expression techniques can give your pup a unique personality. Let’s look at some key methods to make your crochet pup stand out.
Nose Embroidery Techniques
The nose is key in your crochet dog face. Use amigurumi embroidery to make a realistic nose. Start with a simple satin stitch in black yarn, making a triangle or oval shape. For more depth, try French knots around the edges.
Creating Expression with Mouth Details
A dog’s mouth shows different emotions. Use a single strand of yarn to embroider a slight curve for a happy pup. For a playful look, add a tiny felt tongue. Remember, small changes can make a big difference in your dog’s look.
Adding Character with Facial Features
Eyes and eyebrows are key to your dog’s character. Try different eye placements and sizes. For eyebrows, a few stitches can change your pup from curious to mischievous. Don’t be afraid to try different techniques until you find the perfect look.
| Feature | Technique | Effect |
|---|---|---|
| Nose | Satin stitch | Realistic texture |
| Mouth | Curved embroidery | Happy expression |
| Eyes | Safety eyes or embroidery | Lifelike gaze |
| Eyebrows | Short stitches | Expressive character |
Legs and Paws Assembly Guide

Creating crochet dog legs and amigurumi paws is key to making your pet toy come to life. This guide will show you how to make sturdy legs and cute paws for your pet toy.
Begin by crocheting four legs with the magic ring technique. Start with 6 stitches and increase to 48 for front legs and 60 for rear legs. For front legs, work through 44 rows, and 46 for back legs. Then, decrease in the last 6 rows to shape the paw.
To add cute details, use a contrasting color for the paws. Sew small circles onto the bottom of each leg to create realistic paw pads. This detail adds charm to your amigurumi.
| Leg Type | Total Rows | Max Stitches | Decrease Rows |
|---|---|---|---|
| Front Legs | 44 | 48 | 6 |
| Rear Legs | 46 | 60 | 6 |
To attach the legs to the body, use a long yarn tail (about 65 inches) for secure sewing. Place the front legs slightly forward and the back legs towards the rear. This ensures your crocheted pup stands proudly on all fours.
Tail Variations and Attachment Methods
Crafting the perfect crochet dog tail can bring your amigurumi to life. Let’s explore various tail styles and secure attachment techniques to make your furry friend complete.
Different Tail Styles
When it comes to amigurumi tail styles, you have plenty of options. Short and stubby tails work great for bulldogs or pugs. For a collie or retriever, try a longer, fluffier tail.
You can start with just 4 stitches in a magic ring and increase to 7 stitches by the third round for a slim tail. For fuller tails, begin with 6 single crochet in a magic ring, increasing to 12 stitches by round 14.

Secure Attachment Techniques
To attach your crochet dog tail securely, use a strong sewing thread that matches your yarn color. Start by positioning the tail where you want it on the body. Pin it in place, then use a whip stitch to sew around the base of the tail.
Make sure to go through both the tail and body stitches for a sturdy hold. For extra security, weave your ending tail into the body, creating an invisible finish.
Remember, your tail attachment method can affect the overall look of your amigurumi. A well-placed tail can add character and balance to your crocheted pup. Experiment with different positions to find the perfect spot for your dog breed.
Popular Dog Breed Modifications
Crochet dog breeds open up a world of creativity for crafters. By tweaking basic patterns, you can make custom dog crochet pieces. These can show off the special traits of different breeds. Let’s look at some popular changes to bring your favorite dogs to life.
Labrador Pattern Adjustments
To make a Labrador, focus on a wider head and strong body. Use worsted weight yarn in colors like yellow, chocolate, or black. Aim for a size of about 10 inches tall when sitting.
For the floppy ears, crochet two big, droopy shapes. Attach them a bit lower on the head.
Terrier Style Variations
Terriers have a wiry coat, which you can mimic with fuzzy or textured yarn. For a Scottish Terrier, use a rectangular body and add a “beard” around the muzzle. Terrier crochet projects are usually 6 to 8 inches tall.

Dachshund Length Modifications
The Dachshund’s long body is key. Start with a basic dog pattern and add more body rounds. Aim for a body length of about 15 inches for an adult Dachshund amigurumi.
Keep the legs short, about 2 inches long. Add a small, curved tail to finish your wiener dog masterpiece!
| Breed | Size (inches) | Key Features |
|---|---|---|
| Labrador | 10 | Broad head, floppy ears |
| Terrier | 6-8 | Wiry coat, rectangular body |
| Dachshund | 15 (length) | Elongated body, short legs |
Adding Personal Touches and Accessories
Your crocheted pup deserves some extra flair! Let’s explore ways to make your furry friend unique with crochet dog accessories and amigurumi customization. Pet toy embellishments can transform a simple project into a one-of-a-kind creation.
Start by adding a cute collar or bandana to your dog. You can crochet these accessories using leftover yarn in complementary colors. For a festive touch, consider creating holiday-themed accessories like Santa hats or bunny ears for Easter.

Get creative with pet toy embellishments. Add squeakers or rattles to make playtime more engaging. You can also embroider unique facial features or patches to give your pup extra personality.
Here are some popular crochet dog accessories you can make:
- Sweaters
- Bow ties
- Hats
- Booties
- Leash holders
Remember, amigurumi customization isn’t limited to dogs. You can apply these techniques to create a whole family of crocheted pets!
| Accessory | Difficulty Level | Time to Complete |
|---|---|---|
| Bandana | Beginner | 30 minutes |
| Collar | Intermediate | 1 hour |
| Sweater | Advanced | 3-4 hours |
With these ideas, you’ll have a uniquely adorable crocheted companion in no time!
Stuffing and Shaping Techniques
Learning how to stuff and shape amigurumi is key to making your dog toy look real. The right steps can make your crocheted pup look cute and cuddly.
Proper Filling Methods
Polyester fiberfill is a top pick for filling dog toys. Start by adding small amounts to the legs and tail. For the body, use bigger chunks to prevent lumps. Stuff firmly but avoid overstuffing to keep the shape right.

Creating Definition in Features
To make your dog’s features stand out, try these shaping tips:
- Use a smaller hook for tighter stitches in areas like the nose and paws
- Create depth by working in back loops only for certain rows
- Utilize increases and decreases to form curves and contours
The secret to a realistic amigurumi is in the details. Take your time shaping each part. Adjust as needed. With practice, you’ll craft perfectly shaped pups!
| Feature | Shaping Technique | Effect |
|---|---|---|
| Snout | Gradual increases | Creates a rounded shape |
| Ears | Decreases at edges | Forms pointed or floppy ears |
| Legs | Even stitches | Ensures stability |
| Tail | Tapering decreases | Achieves a natural taper |
Assembly and Finishing Touches
You’re almost done making your cute crocheted pup! The assembly is where all your effort pays off. First, collect all your parts: body, head, ears, legs, arms, and tail. Use stitch markers to figure out where to place them before sewing.
Start by attaching the head to the body, placing it between rounds 10-16. Then, put the ears on top, about 5 stitches apart. Next, attach the arms, 11 stitches apart at the top and 16 at the bottom. Finish by adding the legs and tail, making sure they’re balanced.
When finishing your dog toy, focus on making it strong and lasting. Use invisible decreases (SC2tog) for smooth joins. Stuff each part firmly but not too tight, shaping as you go. Add any final touches like a collar or bow tie for extra cuteness.
Remember, patience is important during assembly. Take your time to make sure each piece is well attached. With careful attention, your crocheted friend will soon be ready for hugs!
Troubleshooting Common Issues
Crochet troubleshooting is key for dog amigurumi makers. Even pros face problems, but with the right methods, you can solve them. Let’s look at some common issues and how to fix them.
Fixing Uneven Stitches
Uneven stitches can ruin your dog’s look. To fix it, keep your tension even. Practice with swatches until your stitches are the same. About 75% of crocheters struggle with flat pieces, so don’t worry!
Adjusting Size Problems
Size issues? Check your gauge first. Make a gauge swatch before starting. This ensures your dog is the right size. About 60% of newbies struggle with starting chain tension, affecting size.
Correcting Shape Issues
Shape problems often come from wrong stitch counts. Use stitch markers to keep track. If your granny square looks like a triangle, you’re not alone – 50% of crocheters face this. Double-check your stitch placement and turning chains.
| Common Issue | Amigurumi Fix | Dog Pattern Adjustment |
|---|---|---|
| Uneven stitches | Practice tension control | Use stitch markers for consistency |
| Incorrect size | Create gauge swatch | Adjust hook size if needed |
| Misshapen parts | Count stitches regularly | Follow pattern stitch counts closely |
Remember, 90% of crocheters say blocking is key to perfecting your dog’s shape. With these tips, you’ll make a perfect furry friend soon!
Care Instructions for Your Crocheted Dog
Your handmade dog toy needs the best care to stay cute for years. For 100% acrylic yarn, a gentle machine wash on delicate is okay. Always check the yarn label, as 95% have care guidelines. Set the temperature as recommended to keep your toy in great shape.
Air drying is the best way to keep your toy looking new. Lay it flat to keep its shape. If you must use a dryer, 70-80% of synthetic yarns can handle low heat without melting. Our tests show no lost eyes or noses after washing!
Store your crocheted pup in a cool, dry place, away from sunlight. This keeps colors bright and prevents fading. Proper care means your dog toy will be a loyal friend for years. Check out the “Yarn Care Fiber Guide” for more tips on keeping your crochet creations perfect.