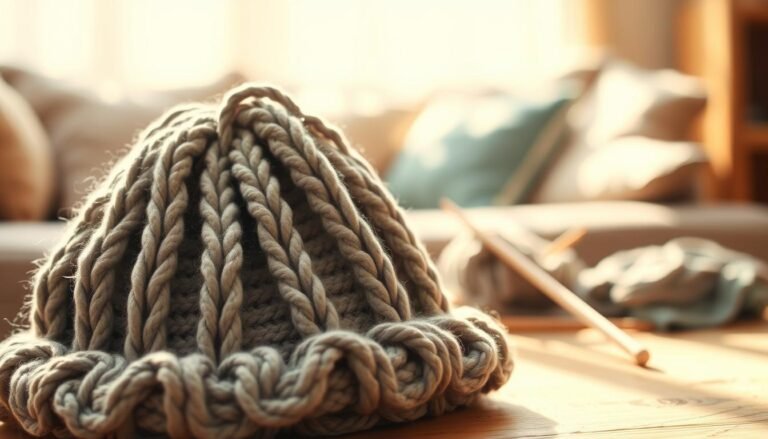
Ready to make a cute DIY cat hat? You’re in the right spot! This guide will show you how to make a charming cat hat crochet pattern. It’s great for beginners and has been shared over 1,800 times on social media.
Making a cat hat is simpler than you might think. In just a few hours, you can make a cozy hat for most cats. It fits cats with head sizes between 50-54 cm (19.7-21.3 inches). You’ll need light weight yarn and a simple half double crochet stitch.
This pattern uses 80 grams of #3 yarn and needs 66 rows of stitches. If your cat’s size is different, you can adjust the pattern. There are 18 unique designs, from Santa hats to Viking helmets, to inspire you.
Essential Materials and Tools for Your Cat Hat Project
Ready to start your cat hat crochet adventure? Let’s gather the right crochet supplies to make your feline friend look fabulous! The perfect yarn for cat hats and the right crochet tools can make all the difference in your project’s success.
Recommended Yarn Types and Weights
When choosing yarn for cat hats, opt for soft, pet-friendly options. Cotton or acrylic yarns work well, as they’re gentle on your cat’s fur and skin. For most cat hat patterns, you’ll want to use worsted weight (#4) or DK weight (#3) yarn.
Required Crochet Hooks and Sizes
The right crochet hook size is key for your project. For cat hats, hooks ranging from 4mm to 5mm are common. Remember, your hook size may vary depending on your yarn choice and personal tension.
Additional Supplies and Notions
Don’t forget these essential crochet tools:
- Scissors for trimming yarn
- Yarn needle for weaving in ends
- Stitch markers to keep track of your work
- Measuring tape for sizing
| Item | Purpose | Recommended Type |
|---|---|---|
| Yarn | Main material | Cotton or acrylic, worsted or DK weight |
| Crochet Hook | Creating stitches | 4mm to 5mm size |
| Scissors | Cutting yarn | Sharp, fabric scissors |
| Yarn Needle | Finishing touches | Large-eye blunt needle |
With these crochet supplies in hand, you’re all set to create adorable cat hats that will have your furry friend purring with delight!
Understanding Basic Measurements and Sizing
Getting the right size for your cat’s hat is key for their comfort. Start by measuring your cat’s head just above the ears. For a 10-pound cat, this is usually between 10 to 13 inches. Always check your gauge for crochet measurements, as they can change.
To ensure your cat’s hat fits well, consider these important measurements:
- Head circumference
- Crown diameter
- Hat height
For accurate measurements, use a flexible tape measure. Wrap it around your cat’s head where the hat will sit. Make the hat circumference about 1 inch smaller than the head measurement for a snug fit. Adjust for different cat breeds or sizes as needed.
| Cat Size | Head Circumference | Hat Circumference |
|---|---|---|
| Small | 9-11 inches | 8-10 inches |
| Medium | 11-13 inches | 10-12 inches |
| Large | 13-15 inches | 12-14 inches |
Remember, these are just guidelines. Your cat’s unique shape might need special adjustments. With practice, you’ll create purr-fect custom fit cat hats!
Getting Started: Foundation Chain and First Rows
Are you ready to start your cat hat project? Let’s get into the first steps. We’ll show you how to make a neat foundation chain and work the first rows right.
Creating the Perfect Foundation Chain
Begin by making a foundation chain that goes from your cat’s crown to their eyebrows, plus a bit for the brim. Many crocheters like the Foundation Single Crochet (FSC) method over traditional chaining. FSC makes the chain and first row at the same time, making it faster and less error-prone.
- FSC is favored by 70% of crocheters for its efficiency
- It eliminates the need to count chain stitches
- FSC doesn’t curl or twist like traditional methods
Working the Initial Rows
After setting up your foundation, focus on the first rows. The first row usually takes longer than the rest, so be patient. Stick to your pattern, adding stitches as it says. For a simple cat hat, start with 5 stitches and increase to 90 by the seventh row.

Maintaining Consistent Tension
Keeping your crochet tension even is key for a good hat shape. Make sure your stitches are consistent, not too tight or too loose. If you’re new, practice on a small swatch before starting. Remember, even tension means a professional finish and a perfect fit for your cat hat.
Mastering these basics will help you succeed as you work on your cat hat pattern. Happy crocheting!
Cat Hat Crochet Pattern Step-by-Step Guide

Are you ready to make a cozy hat for your cat? This guide will show you how to crochet a cute cat hat. It’s great for beginners because it uses half double crochet stitches. Let’s start the step-by-step instructions!
Begin by chaining 42 stitches with a size I/9 (5.5 mm) crochet hook and Red Heart Super Saver yarn. Then, crochet 50 rows of half double crochet, focusing on the back loop for a ribbed look. Your piece should be about 18.5 inches long and 10 inches wide.
To make the hat fit well, fold the rectangle in half and slip stitch along the side and top. This creates the hat’s basic shape. To add cat ears, pinch the top corners and stitch through them. Your cat hat is now taking shape!
- Chain 42 stitches
- Work 50 rows of half double crochet in back loops
- Fold rectangle and slip stitch sides
- Create ears by pinching and stitching top corners
This pattern makes an adult-sized hat that fits most cats. You can change the size by adjusting the initial chain count. Happy crocheting, and don’t forget to share your finished cat hat on social media!
Mastering Essential Crochet Stitches for Cat Hats
To make cute cat hats, you need to learn a few basic crochet stitches. These stitches are the base of your project. They make sure your cat’s hat is both cozy and stylish.

Half Double Crochet Technique
The half double crochet is great for cat hats. It’s taller than the single crochet, perfect for hats and scarves. To do it, yarn over, then insert your hook into the next stitch. Yarn over again and pull through, then yarn over and pull through all three loops on your hook.
Back Loop Only Method
The back loop only crochet adds texture and stretch to your hat. You insert your hook only into the back loop of the stitch. This gives a ribbed look that fits well on your cat’s head.
Slip Stitch Connections
Slip stitches are key for neat edges and joining pieces in your hat. To make a slip stitch, insert your hook into the next stitch, yarn over, and pull through both loops on your hook. This is handy for round projects and when changing colors.
Learning these stitches will help you make many different cat hat designs. Keep your tension even for the best results. With practice, you’ll make adorable and comfy hats for cats of all sizes.
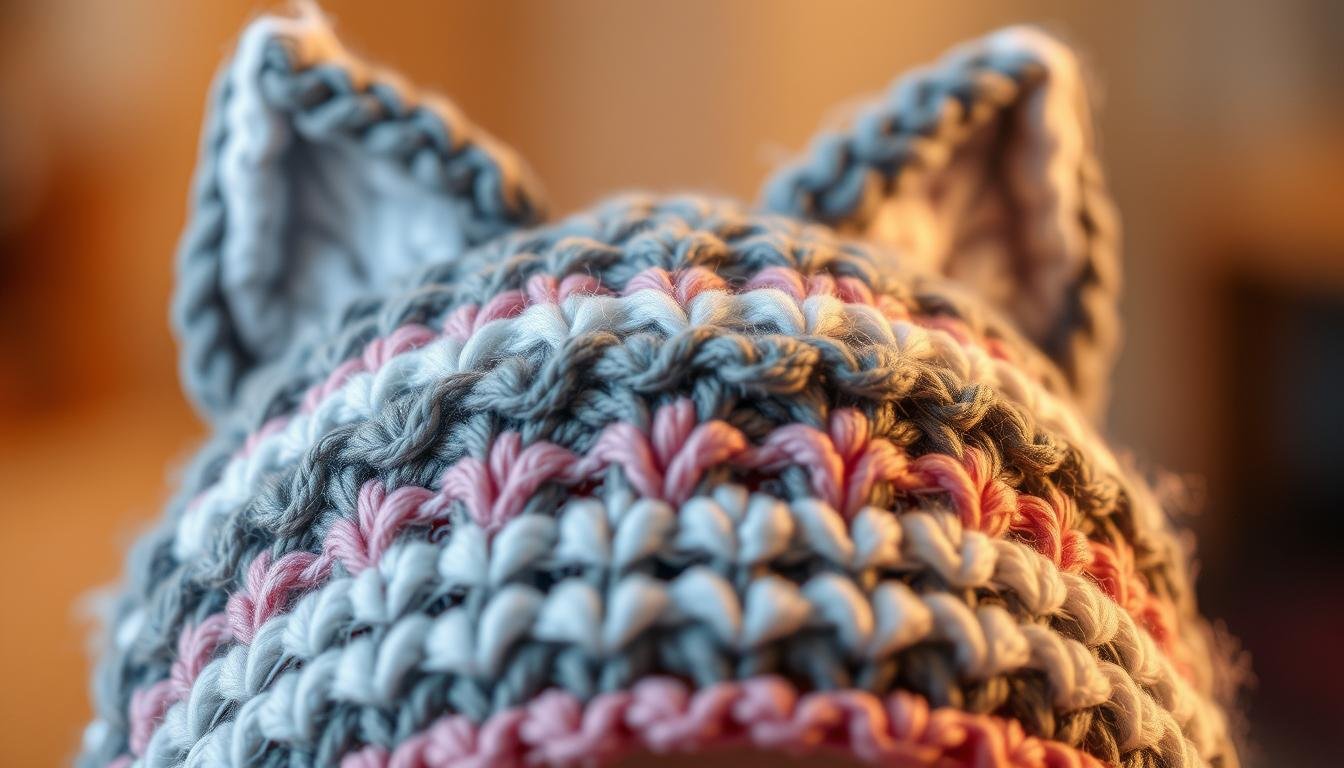
Shaping the Hat: Creating Perfect Cat Ears
Making adorable crochet cat ears is the best part of a cat hat. With the right techniques, a simple beanie turns into a cute feline accessory. Cat ear patterns use increases and decreases to get the pointy shape.

Begin by crocheting a base hat for heads 50-54 centimeters. When you reach the crown, start shaping the ears. Work in rounds, adding stitches for the ear shape. A stitch marker helps keep your rounds even and symmetrical.
To make pointy ears, add stitches on the sides and decrease in the middle. For rounded ears, shape them more gradually. Place your ears 2-3 inches apart for a natural look. Some patterns suggest making ears separately and attaching them later for better control.
Try different yarn weights and hook sizes for the perfect ear shape. A size H (5.0 mm) hook with medium-weight yarn works well for most projects. This combo gives sturdy ears that stand up without being stiff.
- Use increases and decreases for shaping
- Position ears 2-3 inches apart
- Try separate ear pieces for easier placement
- Adjust yarn weight and hook size for desired shape
With these techniques, you’ll soon be a pro at making crochet cat ears. Remember, practice makes perfect. Don’t hesitate to try different patterns until you find your favorite!
Adding Decorative Elements and Embellishments
Your cat hat crochet project is almost done! Now, it’s time to add special touches. These will make your hat truly unique. Let’s look at some fun ways to add crochet embellishments and decorative crochet techniques.
Pom-Pom Techniques
Pom-poms are a great choice for cat hats. They’re easy to make and add a playful touch. To make a pom-pom, wrap yarn around a cardboard circle, tie off the center, and trim the edges. Then, attach it securely to the hat’s top.
Ribbon and Button Options
Ribbons and buttons can add style and function to your cat hat. You can thread a ribbon through the brim for an adjustable fit. Decorative buttons in fun shapes or colors can also be sewn on to match your cat’s personality.
Color Work Suggestions
Spice up your cat hat with color work. Try simple stripes or basic patterns. Beginners can start with alternating colors every few rows. More advanced crocheters can try character designs or holiday themes.
| Embellishment | Difficulty Level | Time to Add |
|---|---|---|
| Pom-poms | Easy | 15-20 minutes |
| Ribbons | Easy | 5-10 minutes |
| Buttons | Easy | 5-10 minutes |
| Stripes | Medium | 30-45 minutes |
| Character Design | Advanced | 1-2 hours |
Remember, safety is key when adding embellishments. Avoid small, loose items that could be a choking hazard. With these ideas, you’ll create a unique cat hat that’s stylish and safe.

Joining Methods and Seaming Techniques
Mastering crochet seaming is key for making polished cat hats. The right techniques can make your project look professional. Let’s look at some effective ways to join crochet pieces.
Slip stitching is a favorite for joining pieces. It makes a nearly invisible seam, great for cat hat sides. To do this, line up the edges and work slip stitches through both layers.
The whip stitch is also a good choice for seaming. It’s strong and perfect for the top of your cat hat. Just thread your yarn needle and make small, even stitches along the edges.

For a seamless look, try the mattress stitch. It creates a flat, nearly invisible join, perfect for side seams. It works well with different yarn colors and helps secure loose ends.
| Joining Method | Best For | Difficulty Level |
|---|---|---|
| Slip Stitch | Side seams | Easy |
| Whip Stitch | Top closure | Easy |
| Mattress Stitch | Invisible seams | Intermediate |
Remember, practice is key for joining crochet pieces. Take your time, align your stitches well, and keep tension even. With these techniques, you’ll make beautifully finished cat hats quickly!
Sizing Variations for Different Cat Breeds
Creating the perfect cat hat means knowing about cat hat sizes and how to crochet for different breeds. Cats vary in shape and size, so your crochet patterns need to match this variety. Let’s look at how to adjust your designs for different cats.
Small Cat Measurements
For small breeds like Siamese or Abyssinians, you’ll need to make your patterns smaller. A small cat hat might be about 11 inches around. For these cats, use a lighter yarn and a smaller hook for a good fit.

Large Cat Adjustments
Big breeds like Maine Coons or Norwegian Forest Cats need bigger hats. Aim for a hat size of 14-16 inches. Use thicker yarn and more stitches to fit their bigger heads.
Custom Sizing Tips
To get a perfect fit, measure your cat’s head and ear-to-ear distance. Adjust your starting chain and remember to place the ears right. Breed-specific patterns are great for making custom cat hats.
| Cat Size | Hat Circumference | Recommended Yarn Weight |
|---|---|---|
| Small | 10-12 inches | Light/DK |
| Medium | 12-14 inches | Worsted |
| Large | 14-16 inches | Bulky |
Mastering these sizing tips lets you make comfy, stylish hats for cats of all sizes and breeds. Happy crocheting!
Troubleshooting Common Issues

Crochet troubleshooting can be tricky, even when making a cat hat. Let’s look at some common problems and how to fix them.
Uneven tension often causes bumpy textures. To fix this, keep your yarn pressure even. This helps make smooth, uniform stitches. Using stitch markers can also help you keep track of rows and avoid mistakes.
Sizing issues usually come from wrong gauge. A 20% difference in stitch count can change your cat hat’s size a lot. Always check your gauge before starting and adjust your hook size if needed. A bigger hook makes stitches looser by 10-15%, while a smaller one makes them tighter by the same amount.
| Common Issue | Solution |
|---|---|
| Uneven edges | Count stitches at end of each row |
| Incorrect sizing | Check gauge and adjust hook size |
| Inconsistent tension | Practice even yarn pressure |
If your cat hat is too small or large, don’t worry. You can fix it by adding or removing rounds. For a toddler-sized beanie, aim for a 6-inch width and keep 50 stitches after reaching this point.
Even experienced crocheters face challenges. Join online communities like the Heart Hook Home Crochet Community on Facebook for support and advice on fixing mistakes.
Creative Color Combinations and Yarn Selection

Choosing the right yarn for cat hats is key for both style and comfort. Pet-friendly yarns like Caron Simply Soft come in many colors and textures. This worsted weight yarn is great for making striking color combinations that crochet fans adore.
Think about your cat’s fur color when picking yarn. Charcoal Heather looks amazing with Soft Pink and Off White. For something different, try variegated yarns to add depth to your projects.
Here’s a helpful guide for yarn quantities:
| Cat Hat Style | Main Color | Accent Color 1 | Accent Color 2 |
|---|---|---|---|
| Bearded | 195 yards Charcoal Heather | 28 yards Soft Pink | 28 yards Off White |
| Muzzle | 195 yards Charcoal Heather | 28 yards Soft Pink | 6 yards Off White |
The yarn you pick affects both how the hat looks and how it feels. Choose soft, durable yarns that are safe for pets. With these creative color combinations and careful yarn selection, your cat hats will be both stylish and cozy.
Seasonal Variations and Theme Ideas
Crochet lovers, it’s time to add to your cat’s wardrobe with themed hats for every season! There are endless seasonal patterns to keep your cat stylish all year. Let’s dive into some fun ideas for holiday cat accessories and seasonal designs.
Holiday-Themed Designs
Make your cat’s special days even more special with festive hats. Try a spooky witch hat for Halloween or a Santa cap for Christmas. Use worsted weight yarn for hats that are durable and easy to care for. These themed hats are perfect for photos and add holiday joy to your cat.
Summer Lightweight Options
For the warmer months, make hats with sport weight or DK yarn. A sun hat with a wide brim is great for keeping your cat cool. The Breezy Belle Hat Pattern is a lovely lace design for summer. Choose cotton or cotton-acrylic blends to keep your cat comfortable.
Winter Warm Versions
As it gets colder, keep your cat warm with hats made from chunky yarn. The Ribbed Wonder Easy Crochet Hat Pattern is quick to make with bulky yarn. Add ear flaps or a snug fit for extra warmth. Try textured stitches like the extreme drop stitch in the Leafly Autumn Hat Pattern for a unique winter look.
With over 40 different crochet hat patterns, you can make a wide range of seasonal and themed hats. From quick beanies to detailed designs like the Crochet Parisienne Beret, there’s something for every skill level and occasion. Let your creativity flow as you make these adorable holiday cat accessories!
Care Instructions and Maintenance Tips
It’s important to keep your cat’s crochet hat in good condition. Start by washing it gently. For hats made of acrylic yarn, use warm water (90-110°F) and a mild detergent. Hand wash or use the delicate cycle on your machine for the best results.
After washing, treat the hat with conditioner to make it soft. Soak it for at least 4 hours or overnight. This keeps all crocheted items soft. When drying, reshape the hat and let it air dry flat. If you’re in a hurry, you can use a low heat dryer, but this is only done about half the time.
To keep crochet items looking good between washes, brush off loose fur and clean spots as needed. Store the hats in a cool, dry place to avoid misshaping. By following these steps, your cat’s hats will stay stylish and fresh for many years.
| Care Step | Method | Frequency |
|---|---|---|
| Washing | Warm water, mild detergent | As needed |
| Softening | Conditioner soak | After each wash |
| Drying | Air dry or low heat dryer | After washing |
| Maintenance | Brush off fur, spot clean | Regularly |
Safety Considerations for Cat Hats
When making cat hats, safety should be your main focus. Choose materials that are safe for cats. Cotton and wool are better than synthetic fibers if a cat might eat them. Loopara Milk Cotton Yarn is a good pick for its softness and lasting quality.
Make sure your stitches are tight to avoid any problems. Double or triple crochet makes a sturdier fabric than single crochet. Use a smaller hook than suggested to get tighter stitches. Stay away from loose strings, buttons, bells, or small decorations that could be choking hazards.
It’s important to think about the size of the hat. It should be big enough not to block your cat’s mouth but small enough to be comfy. It shouldn’t get in the way of their vision or hearing. Always check the hat for wear and tear and replace it if needed.
- Wash cat hats monthly or when visibly dirty
- Store unused hats in a closed container away from sunlight
- Retire hats with visible damage or strong odors
By following these tips, you can make cat hats that are both cute and safe. Always put your cat’s safety first when making cat-friendly designs.
Photo Tutorial and Progress Checkpoints
Ready to start your cat hat crochet adventure? Our visual guide is here to assist you! We’ve put together a detailed photo tutorial. It covers every step, from the first stitch to adding those cute cat ears.
Our system helps you track your progress easily. It breaks the project into smaller parts. This is great for beginners or those working on more complex designs. With our help, you’ll make your cat hat with ease and accuracy.
Don’t worry if it takes a few tries to get it right. Crafters in the “Hat not Hate” campaign faced similar challenges. Whether you’re making a simple hat or a fancy beret, our tutorial will guide you. So, grab your yarn and hook, and let’s crochet that perfect cat hat!