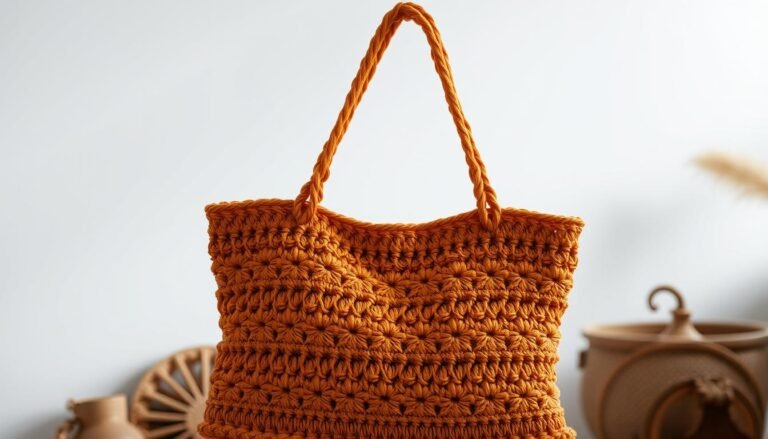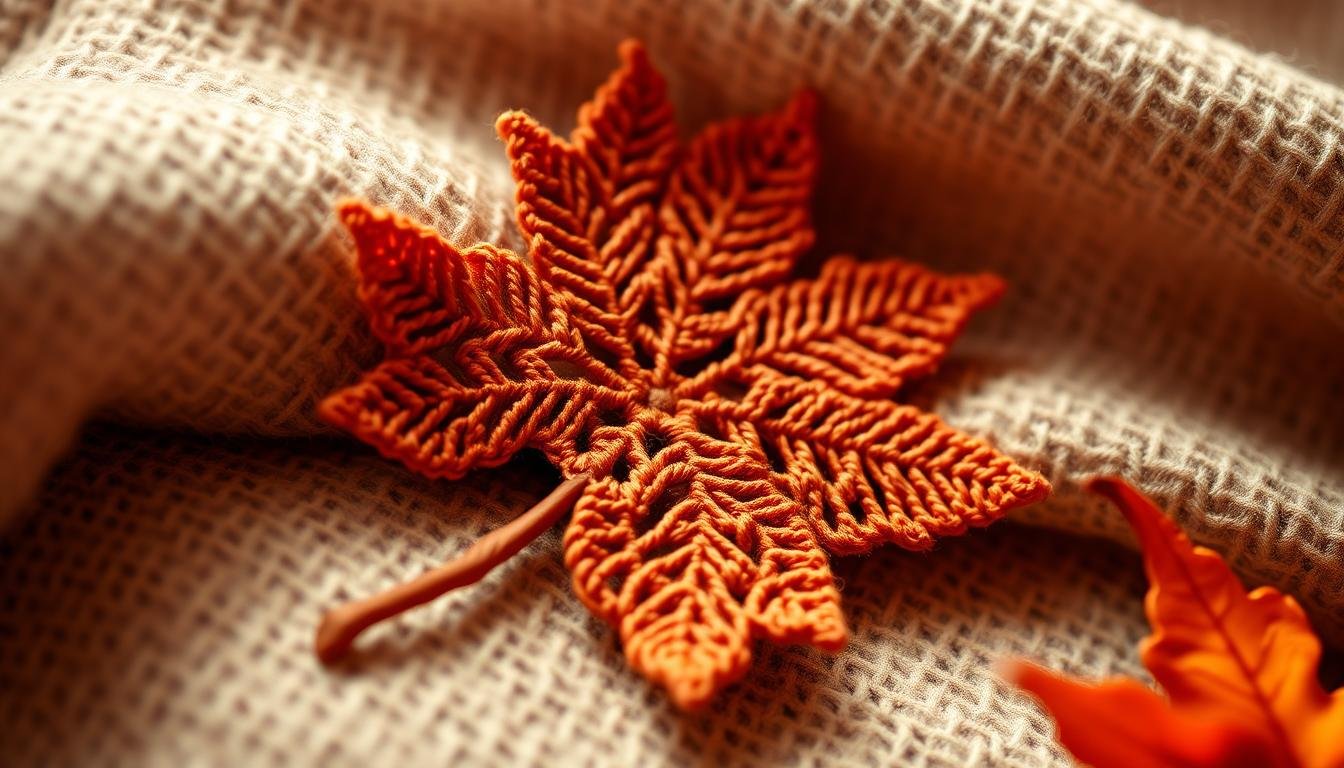
Welcome to our cozy corner of fall crafts! We’re excited to show you how to make stunning maple leaf decorations. This pattern is great for both beginners and experienced crafters.
Our tutorial will guide you through every step. You’ll learn how to pick the right yarn and add the final touches. You’ll make beautiful leaves using simple crochet stitches.
These decorations are perfect for decorating your home or as gifts. You’ll need just 40 yards of medium-weight yarn and a size H/8 (5.0 mm) crochet hook. Your leaf will be about 6 inches long.
The pattern starts with simple stitches and gets more detailed. It’s a fun project for all skill levels.
So, grab your supplies and let’s begin. By the end, you’ll have a new fall craft and lovely maple leaves to enjoy the season!
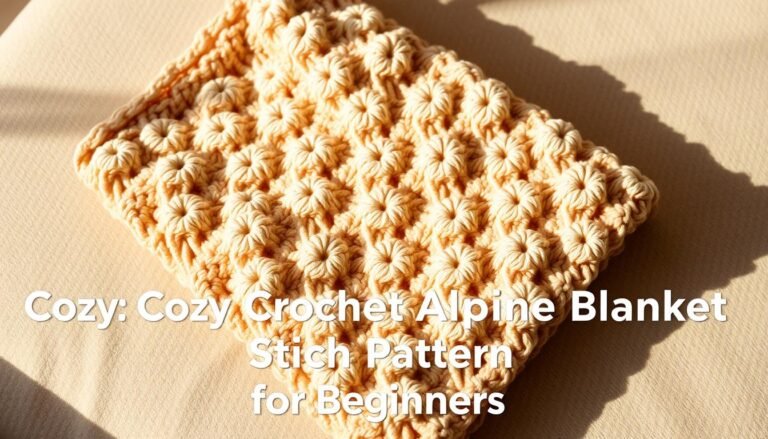
Why Create Crochet Maple Leaves for Fall Decor
Crocheting maple leaves adds a cozy touch to your fall decor. These charming creations bring the beauty of autumn into your home. Each leaf takes just 10 minutes to make, allowing you to quickly craft a collection for various autumn crafts.
Crochet home decorations offer versatility and longevity. A single 4-inch maple leaf can transform into appliques, garlands, or centerpieces. Mix and match five autumn-inspired colors – pumpkin, carrot, gold, burgundy, and brown – to mimic nature’s palette.
Fall decor enthusiasts love these leaves for their adaptability. Use them to:
- Create seasonal garlands
- Craft unique table settings
- Design festive wreaths
- Accent throw pillows
The easy skill level makes this project perfect for beginners and experienced crafters alike. With over 10,000 views, this popular pattern proves its appeal. Start crocheting today and fill your space with the warm hues of fall!
Essential Supplies and Materials
Gathering the right crochet supplies is key to making beautiful maple leaves. Let’s look at the main items you’ll need for your fall project.
Yarn Selection and Recommendations
Choosing the right yarn for maple leaves is important. Go for medium/light weight yarn in autumn colors like yellows, oranges, reds, and browns. Premier Yarns Minikins Yarn is a good choice. For a fun twist, try brighter colors or metallic thread for extra shine.
Crochet Hook Sizes
The best crochet hook size for this pattern is 3.5mm. This size works well with medium/light yarn. It makes leaves about 4.5 x 2 inches when finished.
Additional Tools Needed
To finish your crochet maple leaves, you’ll need a few more things:
- Scissors for trimming yarn
- Tapestry needle for weaving in ends
- Stitch markers (optional, but helpful)
| Supply | Recommendation | Purpose |
|---|---|---|
| Yarn | Medium/light weight | Main material for leaves |
| Crochet Hook | 3.5mm size | Creating stitches |
| Scissors | Sharp, small | Cutting yarn |
| Tapestry Needle | Blunt tip | Weaving in ends |
With these supplies ready, you’re ready to start making your maple leaves. Remember, the yarn and hook sizes you pick can change how your project looks. Feel free to try different options to get the look you want.
Basic Crochet Stitches You’ll Need
Learning basic crochet techniques is essential for making beautiful maple leaves. This guide will teach you the basic stitches for beginners. You’ll be ready to start the maple leaf pattern.

Single Crochet (SC)
The single crochet makes sturdy parts of your leaf. Start by inserting the hook, then yarn over. Pull through, yarn over again, and pull through both loops. This stitch is used in all five lobes of the maple leaf pattern.
Double Crochet (DC)
Double crochet adds height and texture. First, yarn over, then insert the hook. Yarn over, pull through, yarn over, and pull through two loops twice. You’ll need 16 double crochets in round 2 of the pattern.
Treble Crochet (TC)
Treble crochet makes longer points. Start by yarn over twice, then insert the hook. Yarn over, pull through, yarn over, and pull through two loops three times. This stitch is key for the leaf’s points.
Slip Stitch
Slip stitch is for joining and finishing. Insert the hook, then yarn over, and pull through both loops. It’s great for smooth edges on your maple leaf.
Practice these stitches before starting your maple leaf project. Use a 5mm hook and worsted weight yarn. You’ll be able to make a stunning 5-inch leaf with different stitch counts in its five lobes.
Understanding the Maple Leaf Crochet Pattern
Crochet pattern reading is key to mastering the maple leaf design. This pattern creates a realistic leaf shape, starting from a central base and working outwards. Let’s break down the elements that bring this autumn icon to life.
The pattern begins with 12 double crochets in the first row. As you progress, you’ll use various crochet techniques to form the leaf’s distinctive shape. Row 2 expands to 25 stitches, incorporating increases to widen the leaf’s base.

Creating the leaf’s five points is key for an authentic look. The pattern guides you through forming these tips using a mix of stitches. You’ll work with double crochet, treble crochet, and even double treble crochet to achieve the right shape and texture.
| Yarn Type | Hook Size | Finished Size |
|---|---|---|
| DK | 3 mm | 10 cm x 10 cm |
| Fingering Weight | 2.2 mm | 7 cm x 7 cm |
The pattern’s versatility allows for size adjustments. By changing your yarn and hook size, you can create leaves ranging from delicate accents to bold statement pieces. Whether you’re crafting a garland, wreath, or cozy autumn-themed coaster, this maple leaf pattern has you covered.
Starting Your Leaf: Creating the Center Base
Ready to start your crochet maple leaf? We’ll show you how to make the center base using the magic ring crochet technique. This method is great for crochet in the round, making your leaf base neat and adjustable.
Making the Magic Ring
Start by making a magic ring. This special technique makes a tight, adjustable center for your work. Wrap the yarn around your fingers, insert the hook, and pull through a loop. You’re ready to start your first round of stitches.

First Round Instructions
For the first round, do 6 single crochet stitches into the magic ring. Pull the tail to close the ring tightly. This creates the foundation of your leaf, preparing it for shaping.
Second Round Details
In the second round, you’ll increase evenly to expand your leaf base. Work two single crochet stitches into each stitch from the previous round. You’ll end up with 12 stitches, doubling your stitch count. This growth sets the stage for your leaf’s distinctive shape.
Remember, each crochet leaf typically uses about 22 yards of yarn and measures 4 inches at its widest point when finished. With practice, you’ll complete a leaf in under 30 minutes, mastering the art of crochet in the round for beautiful fall decorations.
Crafting the Five Distinct Leaf Points

It’s time to make your maple leaf come to life. You’ll create five unique points, each size different to look like nature. You’ll learn how to increase stitches to get the maple leaf shape right.
Begin with the biggest point in the middle. Then, make smaller points on both sides. Use single crochet stitches to grow each point, adding more as you go. It’s important to keep everything balanced and symmetrical.
To get a natural look, change the number of stitches in each point. For instance:
- Center point: 15 stitches
- Side points: 12 stitches each
- Outer points: 10 stitches each
Keep your stitches even to keep the leaf’s shape perfect. As you work, your maple leaf will start to take shape. You’ll see five clear points.
Getting better at crochet increases takes practice. Don’t get discouraged if it’s not perfect at first. With every leaf you make, you’ll get better. Soon, you’ll be making beautiful maple leaves for all your fall crafts.
Creating the Stem and Adding Details
Now that your maple leaf’s main body is done, it’s time to add the final touches. We’ll work on making the crochet leaf stem and adding texture to make it look real.
Stem Formation Steps
To make a strong yet realistic stem, follow these steps:
- Chain 10 stitches from the base of your leaf.
- Single crochet in the second chain from the hook.
- Continue single crocheting down the chain.
- Slip stitch to secure the stem to the leaf base.

Adding Texture Details
Make your leaf look better with these texture crochet techniques:
- Use surface crochet to create veins along the leaf.
- Add ridges with slip stitches along the lobes.
- Incorporate half double crochets for a textured center vein.
These details make your leaf look like it’s from nature. With just 10-12 yards of worsted weight yarn and an H (5mm) hook, you can make a 5-inch maple leaf in about 30 minutes. Remember, the more you practice, the better you’ll get at making it look real!
| Feature | Measurement |
|---|---|
| Leaf Length | 5 inches |
| Leaf Width | 5 inches at widest point |
| Yarn Used | 10-12 yards |
| Crochet Hook Size | H (5mm) |
Color Choices for Authentic Fall Leaves

Choosing the right colors for your crochet maple leaves brings autumn to life. Yarn colors range from warm reds to deep oranges, just like nature. Use shades like rust, tangerine, and brick red to get the look right.
To look natural, mix different colors in your leaves. Start with a golden base and add burgundy or brown edges. This captures the color change of real maple leaves. Many yarn brands have colors perfect for fall projects.
Try these autumn colors to make your leaves pop:
- Deep crimson
- Pumpkin orange
- Mustard yellow
- Chocolate brown
- Forest green (for leaves just starting to turn)
Your crochet maple leaves can be as unique as those in nature. Mix colors to create a beautiful fall display. Every stitch will capture the essence of the season.
Blocking and Finishing Techniques
Crochet blocking is key to finishing your projects. It keeps your maple leaves in shape and makes stitches clearer. Let’s look at how to block and weave in ends for a neat finish.
Proper Blocking Methods
Choose the right blocking method for your yarn. Wet blocking is best for natural fibers like wool or cotton. Soak your leaves for 10-15 minutes, then pin them to shape on blocking mats.
Acrylic yarns do well with steam blocking. This method sets the shape without soaking the yarn.

Use rust-proof pins to avoid stains and a measuring tape for the right size. Let your blocked leaves dry completely, which takes 24-48 hours.
Weaving in Ends
Weaving in ends is the last step in finishing your crochet. Thread loose yarn tails onto a tapestry needle. Then, work the needle through several stitches on the wrong side of your leaf.
Trim any excess close to the work for a clean finish.
Mastering these techniques will make your crochet maple leaves look professional. Remember, patience during blocking makes your leaves impressively shaped. They’ll be a hit at any fall decoration.
Size Variations and Adjustments

Crocheting maple leaves lets you make different sizes for your projects. You can make tiny decorations or big pieces. The secret is knowing how yarn weight, hook size, and stitch count work together.
For big leaves, use thick yarn and a big hook. Try a 6mm hook with worsted weight yarn for leaves about 4 inches wide. For even bigger leaves, switch to bulky yarn and an 8mm hook. This makes leaves up to 6 inches wide, great for wall hangings or centerpieces.
For smaller leaves, choose sport weight yarn and a 3.5mm hook. This makes leaves 2-3 inches wide, perfect for garlands or scrapbooking. Always keep the proportions right by adjusting the stitch count. For example, double the leaf size by adding about 50% more stitches in each round.
| Leaf Size | Yarn Weight | Hook Size | Approx. Width |
|---|---|---|---|
| Small | Sport | 3.5mm | 2-3 inches |
| Medium | Worsted | 6mm | 4 inches |
| Large | Bulky | 8mm | 6 inches |
Try these size changes to make many maple leaves for your fall projects. With practice, you can make leaves of any size you want.
Creative Ways to Use Your Crochet Maple Leaves
Your crochet maple leaves are great for fall home decor. This tutorial has 17 leaf patterns for all skill levels. It has been shared 5761 times.
Home Decor Applications
Make your space pop with these crochet leaf projects:
- Create a vibrant wreath for your front door
- Scatter leaves along your mantelpiece or dining table
- Use as coasters or placemats for a cozy autumn feel
- Arrange in a bowl as a colorful centerpiece

Seasonal Garland Ideas
String your crochet leaves together for stunning decorations:
- Drape a leaf garland across windows or doorways
- Create a festive table runner for holiday gatherings
- Hang leaves from chandeliers or light fixtures
- Make a photo backdrop for autumn-themed pictures
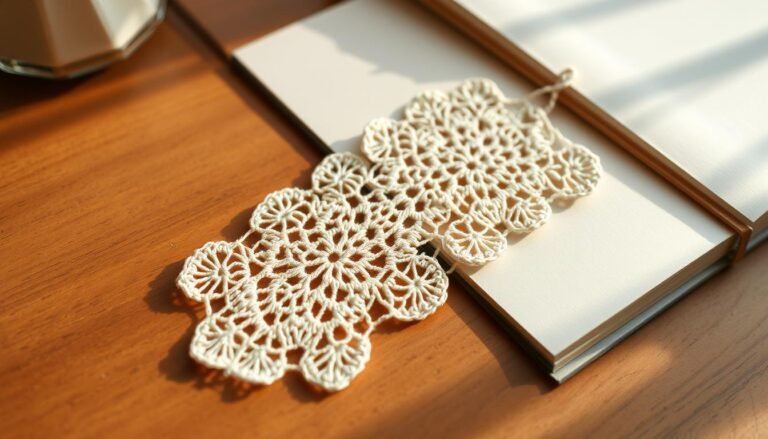
Gift-Giving Suggestions
Share the warmth of the season with these thoughtful ideas:
- Attach leaves to gift wrap for a personal touch
- Create leaf-themed bookmarks for book lovers
- Make a set of autumn-inspired coasters as a housewarming gift
- Craft a leaf-adorned picture frame for cherished memories
With these ideas, your crochet maple leaves will add beauty to your home and make great gifts.
Troubleshooting Common Issues
Crocheting maple leaves can be tricky, but don’t worry! Let’s tackle some common hurdles you might face. Uneven edges often result from inconsistent tension. Try using stitch markers to keep track of your rounds and maintain even stitches.
If your leaf points look misshapen, double-check your stitch counts and make sure you’re increasing correctly at each point.
Fixing crochet mistakes is part of the learning process. If you notice an error a few rows back, you can carefully unravel your work to that point and redo it. For minor mistakes, like a missed stitch, you can sometimes add or remove stitches in the next row to compensate without starting over.
Here are some crochet tips and tricks to prevent issues:
- Count your stitches regularly
- Use a stitch marker at the beginning of each round
- Practice the pattern with scrap yarn before using your good yarn
- Take breaks to avoid fatigue, which can lead to mistakes
Remember, crochet troubleshooting gets easier with practice. Don’t be discouraged if your first leaf isn’t perfect – each attempt will improve your skills and help you create beautiful maple leaves for your fall decor.
Tips for Perfect Leaf Shaping
Mastering crochet shaping techniques is key to creating realistic maple leaves. By focusing on symmetrical crochet and proper crochet edging, you’ll craft leaves that look amazingly lifelike. Let’s explore some essential tips to elevate your leaf-making skills.
Maintaining Symmetry
Symmetry is key for authentic-looking leaves. Count your stitches carefully and use stitch markers to keep track of your pattern. This ensures all leaf points are balanced and evenly spaced. Remember, practice makes perfect, so don’t get discouraged if your first attempts aren’t quite symmetrical.
Edge Finishing Techniques
The right edging can make your leaves pop. Try a slip stitch border for a smooth edge, or add picot stitches for extra texture. These crochet edging methods not only improve appearance but also help maintain the leaf’s shape.
| Edging Technique | Difficulty Level | Effect on Leaf |
|---|---|---|
| Slip Stitch Border | Beginner | Smooth, defined edge |
| Picot Edging | Intermediate | Textured, realistic look |
| Reverse Single Crochet | Advanced Beginner | Rope-like edge |
Remember, blocking is your friend when it comes to leaf shaping. It helps achieve crisp edges and defined points, making your crochet leaves look even more realistic. With these tips, you’ll be creating stunning maple leaf decorations in no time!
Pattern Modifications for Different Skill Levels
Crochet skill levels vary, and our maple leaf pattern can be adapted to suit everyone. For beginners, start with a simplified version using basic stitches. You can make a charming leaf with single and double crochet, skipping the complex treble stitches. This lets you practice basic techniques while making a recognizable maple leaf shape.
As you get more confident, add advanced crochet techniques slowly. Try adding treble crochet stitches to your leaf design. Use 3 treble crochet stitches for a wider leaf pattern. This way, you can build your skills gradually, moving from simple to complex designs at your own pace.
For experienced crocheters looking for a challenge, try the bigger leaf pattern. It uses 3 treble crochet and 2 double crochet stitches for a more complex design. You can also try the long & wider leaf pattern with 9 double crochet stitches. This creates different leaf sizes and shapes. Remember, mastering these variations makes you more versatile in crochet projects, allowing you to make diverse and realistic fall decor.