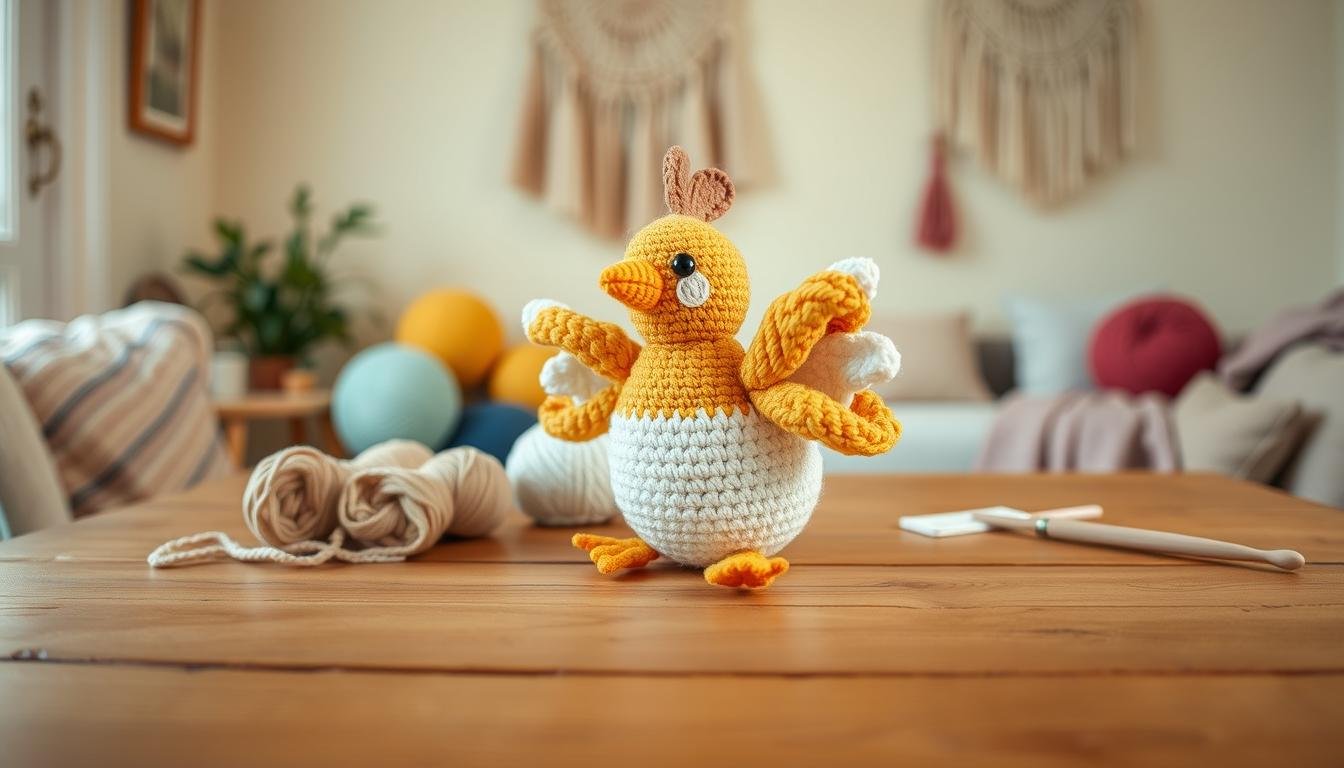
Want to add some farm charm to your crochet collection? Our free chicken pattern is great for all skill levels. In about an hour, you can make a 6 cm (2 inch) keychain chicken or a 12 cm (5 inch) cuddly one with chenille yarn.
This project is part of an Easter Craft Challenge, making it a fun seasonal activity. You’ll need a 100g skein of Toucan yarn (120m, 100% polyester) and 3mm safety eyes to make your chicken come alive.
Our pattern takes you through 15 rounds for the body, starting with 6 stitches in a magic ring and ending with 9 stitches. You’ll make details like a 6-stitch beak, a two-part comb, and wings. It’s a great addition to your crafting, whether you love Fuppy’s (UK) or Woobles (USA) amigurumi patterns.
Essential Materials and Supplies for Your Chicken Project
Are you excited to start your crochet chicken project? Let’s get all the supplies you need. This guide will show you the best yarn and tools to make your chicken come to life.
Recommended Yarn Types and Colors
For your chicken, choose cotton or acrylic yarn. These are great for amigurumi. Use white as the main color, with yellow and red for details. You’ll need one skein of super bulky yarn (170g/106 yards) to make a big chicken about 8.5 inches long.
Required Crochet Hook Sizes
Use hooks from 2.5mm to 5.0mm for a dense fabric. Choose a hook one to two sizes smaller than the yarn label suggests. This makes tight stitches, ideal for amigurumi.
| Yarn Weight | Suggested Hook Size |
|---|---|
| Sport | 2.5 – 3.0 mm |
| DK | 3.0 – 3.25 mm |
| Worsted | 3.75 – 4.5 mm |
| Bulky | 5.0 mm |
Additional Tools and Notions
Here are more items you’ll need for your crochet chicken:
- Polyester fiberfill (5-10 ounces)
- Safety eyes (8-12mm) or black yarn for eyes
- Tapestry needle
- Stitch markers
- Scissors
Now that you have everything, you’re ready to start crocheting your cute chicken!
Basic Crochet Techniques You’ll Need to Know
Ready to start your crochet chicken adventure? Let’s explore the essential crochet techniques for chicken projects. These beginner crochet skills are the foundation for creating your adorable feathered friend.

First, you’ll learn the magic ring. This technique creates a tight center for your chicken, keeping stuffing inside. Then, you’ll use single crochet stitches to build the body. This stitch is great for beginners and makes your chicken sturdy.
Shaping your chicken involves increasing and decreasing stitches. Increases add volume for a plump body, while decreases shape the neck and tail. Working in continuous rounds ensures a seamless look, without visible seams.
- Magic ring for a secure start
- Single crochet for the main body
- Increases and decreases for shaping
- Continuous rounds for a seamless finish
Don’t worry if these techniques seem hard at first. With practice, these skills will become easy. Remember, your finished chicken is only about 8 cm (2.5 inches) tall. This makes it a quick project to master these techniques.
Step-by-Step Body Construction Guide
Ready to bring your crochet chicken to life? Let’s start with the body, the foundation of your feathered friend. We’ll guide you through creating a plump, adorable chicken shape using simple crochet techniques.
Creating the Magic Ring Base
Begin your crochet chicken body with a magic ring. This technique creates a tight center, perfect for the chicken’s rounded bottom. Work 6 single crochet stitches into the ring, then pull it closed. This forms the base of your chicken.
Working the Body Rounds
Continue crocheting in rounds to build up the chicken’s form. Increase stitches in each round to create the plump shape. By round 10, you’ll have about 32 stitches. Use a stitch marker to keep track of your rounds. This method ensures your crochet chicken body grows evenly.

Shaping the Chicken’s Form
As you progress, the chicken’s shape will emerge. Around round 11, you’ll start decreasing stitches to form the neck. This is how to crochet chicken shape effectively. Keep working until you reach round 17, where you’ll close off the top. Your chicken body should now measure about 3 inches tall.
Remember, tight stitches are key for amigurumi. Use a hook one size smaller than your yarn suggests for a sturdy crochet chicken body. With these steps, you’re well on your way to crafting an adorable chicken!
Free Crochet Chicken Pattern

Ready to make your own cute chicken? This free pattern is for everyone, from beginners to pros. The chickens are about 8 inches tall for roosters and 7 inches for hens. They’re great as cuddly friends.
To make a hen, you’ll need 60g of Premier Basix Chenille yarn. Roosters need 30g each of two colors, like Teal and Rust. You can mix colors for a unique look. These chickens are meant to be soft and floppy.
Here’s a quick overview of the pattern:
- Use a 4.5mm crochet hook
- Choose between four-point or three-point leg versions
- Incorporate 12mm safety eyes or embroider eyes for younger children
- Follow along with three helpful instructional videos
This pattern is part of our “squishies” series. It’s great for beginners, who make up about 60% of crochet fans. Make sure to stuff your chicken lightly for that squishy feel. Happy crocheting!
Crafting the Perfect Chicken Head and Beak
Ready to bring your crochet chicken to life? Let’s dive into creating the crochet chicken head and beak. This step is key for giving your feathered friend its unique personality.

Attaching Safety Eyes
Start by crocheting the head using your chosen yarn. Work in rounds, increasing stitches until you reach about 40 stitches at round 5. This is where you’ll attach the safety eyes. Place them between rounds 5-8 for the best expression. Use stitch markers to ensure perfect symmetry.
Forming the Beak
Now, let’s tackle how to make crochet chicken beak. Switch to yellow yarn for a pop of color. Create a small triangle shape starting with 4 stitches, increasing to 8 by the second round. Work 4 rounds total, decreasing back to a point. Once complete, sew the beak onto the face, positioning it between the eyes for that classic chicken look.
Remember, the head and beak are key to your chicken’s charm. Take your time shaping the head and positioning features. With about 16 yards of body yarn and 9 yards each of red and yellow for details, you’ll craft a crochet chicken head full of personality. Your 3.5-inch tall friend is sure to steal hearts!
Adding Character with Wings and Tail

Your crochet chicken is coming together! It’s time to add wings and a tail. These will make your chicken look like it’s ready to move around the farm.
To make the wings, you’ll need 15 grams of your main color yarn. Use double crochet stitches in a fan shape. Start with 6 stitches and increase to 24 over 4 rounds. This makes a small, flat piece that fits well on your chicken.
Now, let’s make the tail. You’ll need about 20 grams of contrast color yarn. Start with a chain of 18 stitches. Work 12 rounds, then decrease to form a triangular shape. On the 13th round, join the 18 stitches to make a curved tail.
| Feature | Yarn Amount | Starting Stitches | Ending Stitches | Total Rounds |
|---|---|---|---|---|
| Wings (each) | 15g | 6 | 24 | 4 |
| Tail | 20g | 18 | 18 (joined) | 13 |
Attach your wings about 14 stitches apart on the body. Place the tail at the back, slightly raised. These small details really bring your crochet chicken to life!
Making the Distinctive Comb and Wattles
The comb and wattles make your crochet chicken come alive. They add personality and charm. Let’s explore how to create these eye-catching details.
Color Choices for Realistic Features
Red yarn is perfect for a lifelike crochet chicken comb. You’ll need about 9 yards for both the comb and wattles. This vibrant color will make your chicken stand out.
If you’re feeling creative, try different shades of red or even pink. This can give your chicken a unique twist.

Attachment Techniques
To make crochet chicken wattles, start with a chain of 6 stitches. Work in rows, increasing at the end of each row. This creates a triangular shape.
For the comb, crochet a separate piece using 22 stitches. This allows for more detail and a fuller appearance.
When attaching these features, use a yarn needle and matching thread. Sew the comb onto the top of the head, starting from the back and working forward. For the wattles, attach them under the beak on each side.
Make sure they’re secure but have a bit of movement. This will give a realistic look.
| Feature | Stitches | Attachment Location |
|---|---|---|
| Comb | 22 | Top of head |
| Wattles | 6 (chain) | Under beak |
With these steps, your crochet chicken will have a distinctive comb and wattles. Remember, practice makes perfect. Don’t worry if it takes a few tries to get it just right!
Size Variations for Different Projects
Crocheting chickens opens up a world of possibilities. You can make tiny chicks or big decorative pieces for your home. The size of your chicken depends on the yarn and hook you use.
With Super Bulky #6 Yarn, you can make a cute chicken about 5.5 inches tall in 45 minutes. For smaller projects, try Worsted Weight Yarn. This change lets you make a whole flock of chickens in one afternoon.

Try different sizes by changing your gauge. For example, 6 single crochets for 5 rounds can make a 3.5-inch diameter chicken. This flexibility means you can make chickens of all sizes for various uses:
- Tiny amigurumi (2 inches tall)
- Keychain-sized chickens (3-4 inches)
- Standard decorative pieces (5-8 inches)
- Large, huggable hens (12 inches or more)
| Project Type | Approximate Size | Recommended Yarn |
|---|---|---|
| Amigurumi | 2-3 inches | Fine or Sport Weight |
| Keychain | 3-4 inches | DK or Worsted Weight |
| Decorative | 5-8 inches | Worsted or Bulky Weight |
| Large Plush | 12+ inches | Super Bulky Weight |
Keep proportions right as you change your project size. Adjust the number of stitches and rows to keep your chicken looking balanced. This is true whether you’re making a small or large chicken.
Stuffing and Assembly Tips
Learning how to stuff and assemble crochet chicken parts is key to making a cute, lasting toy. Let’s explore the best ways to bring your chicken to life.
Proper Stuffing Techniques
Use polyester fiberfill for a soft, plump crochet chicken. Start by adding small amounts of stuffing to the body. Work it into the corners and crevices.
Gradually add more stuffing, making sure it’s evenly spread. Stuff firmly but not too tightly. This keeps the chicken’s shape and prevents stitches from stretching too much.

Securing All Components
Assembling the chicken parts needs careful attention. Use strong thread or yarn that matches the chicken’s color for a seamless look. Place the wings about 7 stitches apart on the body.
Sew the head securely, with safety eyes 5 stitches apart for a cute look. Attach the legs about 7 stitches apart at the body’s base.
For a polished finish, carefully weave in all loose ends. This is vital for durability, making your chicken a favorite toy. With these tips, your 3.5-inch tall chicken (4 inches including the comb) will be ready to delight in no time!
Customization Options and Color Combinations

Ready to elevate your crochet chicken game? Let’s dive into exciting customization options! You can turn a simple 4-inch chicken into a unique masterpiece with endless color choices and creative tweaks.
Begin by experimenting with yarn colors. Mix vibrant hues to create standout chickens. Try a red body with yellow wings for a bold look, or opt for pastels for a spring chick. You can also change the size by using different yarn weights, from tiny to tall.
Accessories add a fun twist to your crochet chicken. Add a tiny hat or scarf for whimsy. You can even make themed chickens for holidays or seasons. Imagine a patriotic chicken for the 4th of July!
- Experiment with different comb and wattle shapes
- Modify the pattern to create various chicken breeds
- Add embroidered details for extra character
- Create a chicken family with varying sizes
The world of custom crochet chickens is vast. Whether it’s a keychain, ornament, or pincushion, your personal touches will make it special. So, grab your hook and let your creativity soar!
Troubleshooting Common Issues
Crochet chicken troubleshooting can be tricky, but don’t worry! Even seasoned crocheters face challenges. Let’s tackle some common issues you might encounter while crafting your feathered friend.
Fixing Uneven Stitches
Uneven stitches can make your chicken look wonky. To fix this, try these tips:
- Count your stitches regularly. Use stitch markers every 10 stitches to keep track.
- Practice maintaining consistent tension. This skill improves with time.
- If you spot a mistake, don’t hesitate to unravel and redo that section.
Adjusting Tension Problems
Tension issues can affect your chicken’s size and shape. Here’s how to address them:
- Make a gauge swatch before starting. This helps ensure your stitches match the pattern.
- If your chicken is too small, try using a larger hook.
- For a chicken that’s too big, switch to a smaller hook.
Remember, fixing crochet mistakes is part of the learning process. With practice, you’ll become a pro at crochet chicken troubleshooting. Don’t get discouraged if your first attempt isn’t perfect. Each stitch brings you closer to mastering this adorable project!
Converting the Pattern for Different Yarn Weights
Adjusting crochet chicken patterns for different yarn weights opens up a world of possibilities. There are 8 standard yarn weights, from lace (0) to jumbo (7). This lets you create chickens of various sizes and textures. The key to success is understanding how yarn weight affects your project and making the necessary adjustments.
When crocheting a chicken with different yarn, remember that heavier yarns result in larger chickens. Lighter yarns create smaller ones. For example, using a super bulky yarn (weight 6) instead of the recommended medium weight (4) will significantly increase your chicken’s size. On the other hand, a fine yarn (weight 2) will produce a more delicate, miniature version.
To maintain proper proportions when changing yarn weights, adjust your hook size. A larger hook is needed for thicker yarns, while a smaller hook works best with finer yarns. Don’t forget to make a gauge swatch to ensure your stitches match the pattern’s intended size.
Experiment with yarn substitutions to achieve unique textures and styles. Online yarn substitution tools can help you find alternatives if the recommended yarn isn’t available. By mastering these techniques, you’ll be able to create a flock of chickens in various sizes and styles, all from the same basic pattern.
Creative Ways to Use Your Crocheted Chicken
Your new crochet chicken opens up a world of fun. These cute creations are great for adding charm to your home or as gifts.
Crochet chickens are perfect toys for kids. Their soft texture and cute design are loved by all ages. You can create a farmyard scene with other crocheted animals, making playtime more fun.
Home decor fans will love crochet chickens. Use them as quirky decorations or bookends. For a cozy kitchen, turn your chicken into a unique egg cozy or potholder.
Here’s a table showing popular uses for crochet chickens:
| Use | Description | Popularity |
|---|---|---|
| Keychain | Mini 3″ chicken for bags or keys | High |
| Kitchen Decor | Towel topper or bowl cozy (6″ diameter) | Medium |
| Gift Topper | Adorable addition to presents | Medium |
| Seasonal Display | Easter or spring decorations | High |
| Egg Holder | Mama Mabel with pocket for 3 eggs | Medium |
Be creative with your crochet chicken projects. Make a chicken hat for a unique accessory, or craft chicken and egg coasters for a charming gift. These cute creations offer endless possibilities for your crochet skills.
Care Instructions for Your Finished Chicken
Your crochet chicken needs the best care to stay cute and cuddly. Washing it gently is key to keep its shape and softness. Fill a sink with cool water and add a bit of mild detergent.
Gently submerge your chicken and squeeze the soapy water through the fabric. Then, rinse it well with clean, cool water until all soap is gone.
After washing, squeeze out excess water without wringing. Lay your chicken flat on a clean towel and reshape it. Let it air dry completely, which can take 24-48 hours. Avoid using a dryer, as heat can damage the fibers and change the chicken’s shape.
To keep your crochet toys clean between washes, store them in a cool, dry place. Keep them away from direct sunlight to prevent fading. Brush them gently with a soft-bristled brush to remove dust and fluff up the yarn. For stubborn dirt, spot clean with a damp cloth and mild soap.
| Care Aspect | Recommendation |
|---|---|
| Washing Method | Hand wash in cool water |
| Detergent Type | Mild, wool-safe |
| Drying Method | Air dry, reshape while damp |
| Storage | Cool, dry place away from sunlight |
| Regular Maintenance | Gentle brushing, spot cleaning |
By following these care instructions, your 8 x 7.5-inch crochet chicken will be a cherished friend for years. Always supervise children when they play with crochet toys because of small parts like safety eyes.
Tips for Selling Your Crocheted Chickens
Want to make money from your crochet chicken hobby? The Mabel Chicken pattern by Oak & Marlow is a big hit. With the right strategy, you can sell your crochet chickens and make a profit.
First, get better at crocheting. The Mabel chicken pattern is simple and fast. You can also make bigger chickens or baby chicks in sets of three. Keychain versions are also popular.
Think about how much to charge. Consider your materials, time, and what people are willing to pay. Starting a business might cost money at first, but with good planning, you can make money. Try selling at local markets to show off your work.
How you display your chickens is important. Use attractive displays like galvanized tiered trays. Add extras like adoption certificates or stickers to increase sales. With hard work and creativity, your business can grow and cover costs.