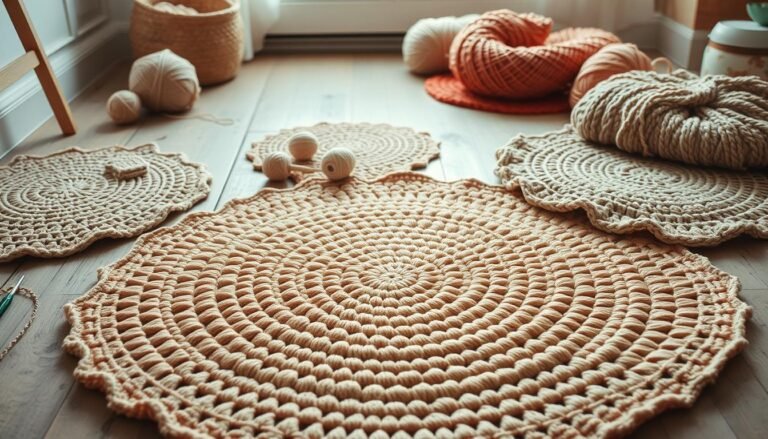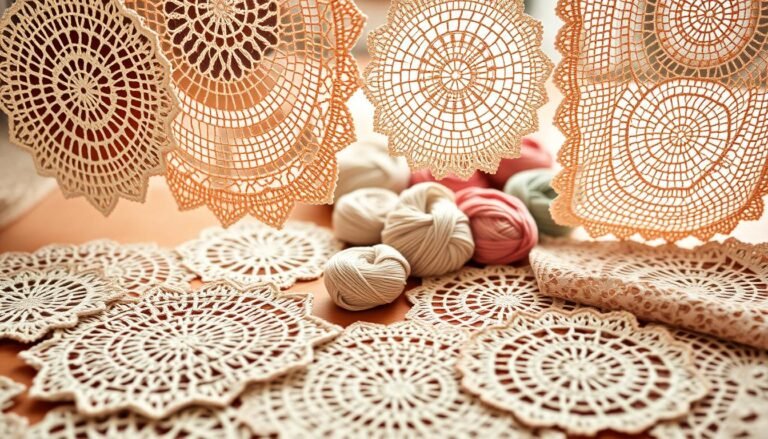
Explore the world of handmade socks with our easy crochet sock pattern guide! You’ll learn to make snug, personalized footwear that’s both functional and stylish. With 25 free crochet sock patterns available, you’re sure to find one that fits your taste and skill level.
Crocheting socks is a rewarding project that doesn’t take long to complete. Intermediate crocheters can make a single sock in 1-3 hours, or a pair in 2-6 hours. It’s great for cozy evenings or crafting on the go.
Your handmade socks will need about 250 yards of yarn for ankle length, or 600 yards for mid-calf styles. Most patterns use fingering-weight yarn, but some may suggest DK or worsted. Always check your gauge for a proper fit – it’s key for comfortable socks.
Ready to start your crochet sock journey? Let’s dive into the materials, techniques, and tips you’ll need. You’ll create cozy, handmade socks that will keep your feet warm and your heart happy.
Why Handmade Crochet Socks Are Worth Your Time
Making your own socks is more than a hobby. It’s a journey into comfort, creativity, and sustainability. Handmade socks have unique benefits that mass-produced ones can’t offer. Let’s see why making socks with a crochet hook is a rewarding activity.
Customizable Comfort and Fit
When you crochet socks, you control every stitch. This lets you tailor the fit to your foot shape. Unlike store-bought socks, which often have limited sizes, handmade socks can fit perfectly.
They can be made with negative ease. This means they’re a bit smaller than your foot. So, they fit snugly when you wear them.
Therapeutic Crafting Benefits
Crocheting socks is about the journey, not just the end result. The repetitive crochet can be calming. It takes about 3-6 hours to make a pair, giving you plenty of time to relax.
This meditative craft lets you unwind while making something beautiful and useful.
Sustainable Fashion Choice
Handmade socks are a step towards sustainable fashion. Unlike fast fashion socks, crocheted ones can last for years with care. Using quality yarns like Patons Kroy Socks, which is 75% washable wool and 25% nylon, makes them durable.
This means they won’t need to be replaced often. This reduces waste and your environmental impact.
Crocheting socks lets you express your creativity, enjoy the calming benefits, and choose sustainability. With each stitch, you’re not just making socks. You’re creating comfort, reducing waste, and enjoying a fulfilling hobby.
Essential Materials and Tools for Crocheting Socks
Ready to start your crochet sock adventure? Let’s get the right tools and yarn. A good toolkit makes your project smooth.
Choose hooks between 2.75mm and 3.50mm. These sizes are perfect for sock yarn. They make a tight, durable fabric. Sock yarn is 75% superwash wool and 25% polyamide, for comfort and durability.

- Scissors for trimming ends
- Tapestry needle for weaving in loose threads
- Stitch markers to track your progress
- Measuring tape for sizing
- Work bag to keep everything organized
For soft, odor-resistant socks, try Merino wool. Fingering weight yarn is best for comfy socks. Brands like West Yorkshire Spinners Signature 4 Ply ($10.39) or Paintbox Yarns Socks ($8.05) are great choices.
With these tools and yarn, you’re ready to make cozy socks. They’ll keep your feet happy for years.
Understanding Yarn Selection for Durable Socks
Choosing the right sock yarn is essential for making comfy, long-lasting socks. Your selection affects warmth, durability, and how easy they are to care for. Let’s look at the best yarn types, weights, and fibers for crochet socks.
Best Yarn Types for Socks
Wool blends are top picks for sock making. A mix of merino wool and nylon is soft, elastic, and durable. For vegan choices, cotton-acrylic blends are good. They offer stretch and last long, but they don’t have wool’s natural benefits.
Yarn Weight Considerations
Yarn weight is key for sock comfort and fit. For everyday socks that fit most shoes, choose fingering weight (4-ply) yarn. DK or worsted weight is better for cozy boot socks or slippers.
| Yarn Weight | Best Use | Thickness |
|---|---|---|
| Fingering (#1) | Regular socks | Thin |
| Sport (#2) | Year-round socks | Medium-thin |
| DK (#3) | All-season socks | Medium |
| Worsted (#4) | Boot socks, slippers | Thick |
Fiber Content Recommendations
Wool-nylon blends are the best choice. Wool keeps you warm, breathes well, and wicks moisture. Nylon adds strength and stretch. For summer socks, choose lightweight cotton blends. They’re breathable and keep their shape better than pure cotton.

Remember, your sock yarn should be durable, elastic, and easy to care for. By picking the right yarn type, weight, and fiber, you’ll make socks that last and keep your feet happy.
Basic Crochet Sock Pattern for Beginners
Are you ready to start making beginner crochet socks? This easy pattern will help you create your first pair. Just follow a few simple steps, and you’ll soon have handmade socks to keep your feet warm.

First, pick the right yarn. For a standard pair, you’ll need about 100 grams of sock wool for sizes up to EU 38/39. Bigger sizes might need 110-150 grams. Also, remember that crocheted socks use more yarn than knitted ones.
Next, choose your hooks. Use a 2.5mm hook for the cuff and a 4.0mm for the rest of the sock. This combo ensures a snug fit at the top and comfort all over.
| Size | Shoe Size (US) | Heel to Toe Length | Total Rounds |
|---|---|---|---|
| Small | 4 – 6.5 | 8.5 inches | 38 |
| Medium | 7 – 9.5 | 9.5 inches | 43 |
| Large | 10 – 12.5 | 10.5 inches | 48 |
Start with a magic ring for the toe. Increase stitches until your sock’s diameter is 2.5 inches. Then, work on the foot section. Next, tackle the heel with 12 rows, starting with 27 stitches. Finish with the cuff, using about 36 stitches for even distribution.
Remember, being precise is important! Use a flexible measuring tape with centimeter markings for accuracy. With practice, you’ll soon be making cozy socks easily.
Mastering the Toe-Up Sock Technique
Toe-up socks are a great way to make custom-fit shoes. You can try them on as you crochet, ensuring they fit perfectly. Here’s how to make cozy toe-up socks.
Starting with the Magic Ring
Start with a magic ring crochet. It makes a tight circle that is the toe of your sock. This method helps avoid gaps and gives a clean finish.

Toe Increases
Next, add toe increases to shape the sock. Start with 16 to 28 stitches, depending on the size. Then, increase to 44-84 stitches. This makes the sock fit comfortably over your toes.
Foot Shaping Methods
As you continue, shape the foot of your sock. Crochet until it’s 1.5 to 2.5 inches shorter than your foot length. Use a 3.5mm to 4mm hook for the best stitch density. Remember, crochet socks don’t stretch as much as knitted ones, so fit is key.
| Sock Size | Foot Circumference | Actual Sock Measurement | Yarn Balls Needed |
|---|---|---|---|
| Small | 6-7 inches | 5.5-6.5 inches | 2 |
| Medium | 8-9 inches | 7.5-8.5 inches | 2 |
| Large | 10-11 inches | 9.5-10.5 inches | 3 |
Creating the Perfect Heel Construction
The crochet sock heel is often seen as the most challenging part of making socks. With the right techniques, you can make heels that fit perfectly. Let’s look at different heel construction methods and learn how to shape them for a snug fit.
Two common heel shaping techniques are the afterthought heel and the short-row heel. The afterthought heel is added after the sock body is done. The short-row heel is worked as you go. Each method has its own benefits, depending on your skill and preference.

For beginners, the short-row heel is easier to learn. It involves crocheting shorter rows, then longer ones again. This creates a curved shape that fits well around your heel.
| Heel Type | Setup Stitches | Decrease To | Increase Back To |
|---|---|---|---|
| Short-row | 22 sc | 7-8 sc | 22 sc |
| Traditional | 34 sc | 18 sc | 34 sc |
When shaping the heel, remember to make the area stronger. You can do this by using a tighter stitch or a double strand of yarn. With practice, you’ll make socks that are both comfortable and show off your skills.
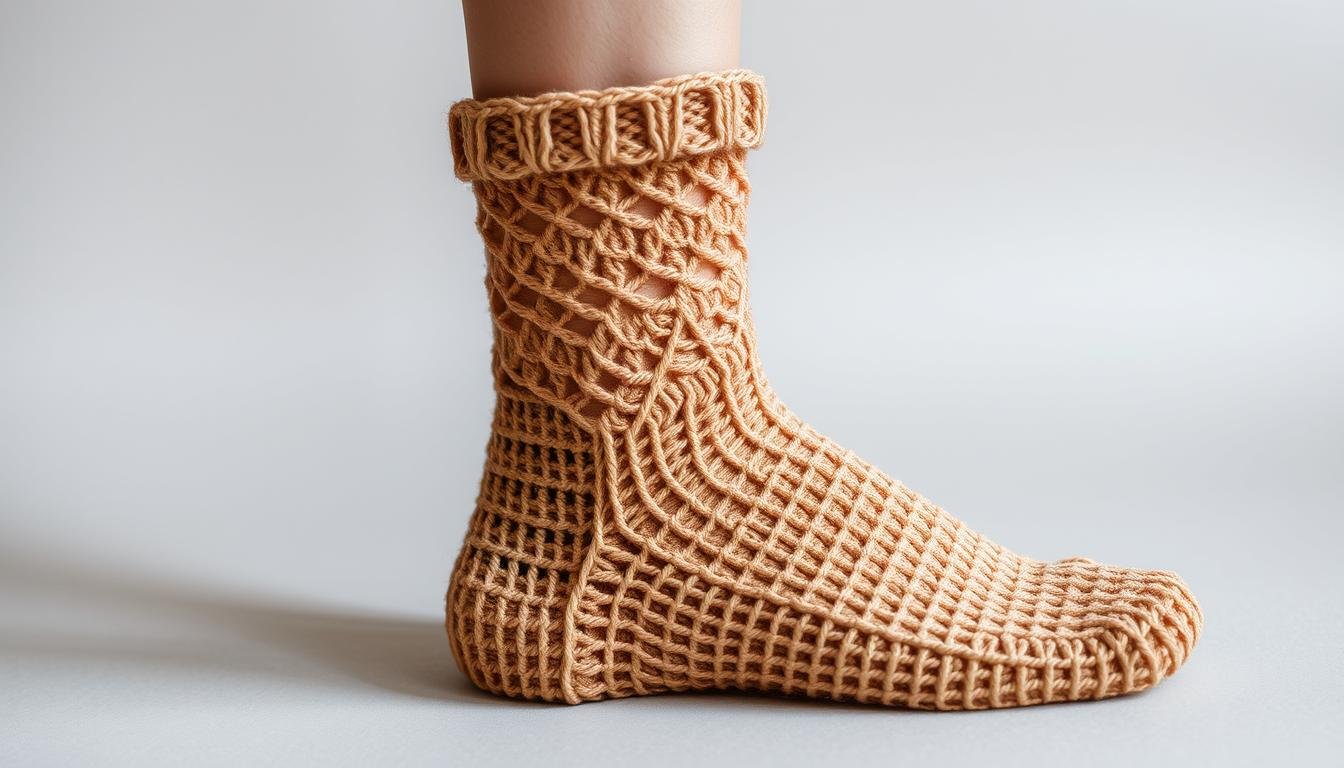
Essential Stitches for Sock Making
Learning key crochet stitches is key for making comfy, long-lasting socks. Let’s dive into the main techniques that will boost your sock-making skills.
Split Single Crochet Technique
The split single crochet stitch makes a fabric like knit, great for sock bodies. It’s fast to make and stretches well. For the right fit, aim for 6 stitches per inch with a 4 mm hook.
Back Loop Only Stitches
Back loop only stitches make your socks more flexible. They’re perfect for heel turns and toe shaping. For the heel, skip 24 stitches to make space, then keep going in the pattern.
Ribbing Variations
Sock ribbing is key for a tight fit. Use a 3.5 mm hook for the cuff to get tighter stitches. Here are some popular ribbing styles:
- 1×1 rib (alternate front and back post stitches)
- 2×2 rib (two front post, two back post stitches)
- Twisted rib (work in back loop only)
To get a perfect fit, adjust your sock as you make it. The finished size should be about ½ to 1 inch less than your foot. With these stitches down, you’re ready to make cozy, custom socks.

Sizing Guide for Custom-Fit Socks
Getting the right sock size is essential for comfy, custom fit crochet socks. The fit depends on precise measurements and knowing how to tweak your pattern.
For a snug fit, aim for your sock to be about 10% smaller than your foot’s size. So, if your foot is 9 inches around, your sock should be 8.1 inches. This ensures they stay put without slipping or bunching.

To figure out the number of stitches, multiply your sock’s circumference by your gauge. For example, with a 8.1-inch circumference and a gauge of 5 stitches per inch, you need about 40 stitches.
Sock length should be about ½ inch shorter than your foot. Try on your sock often as you work to check the fit. To get a snug toe, decrease stitches slowly. Adding ribbing stitches can make the cuff elastic.
Remember, crochet socks stretch less than knitted ones. Keep your tension even for a balanced fit. With these tips, you’ll make perfectly sized, cozy socks.
Working the Ankle and Cuff Section
The ankle and cuff are key parts of your crochet socks. They add comfort, style, and keep your socks in place. Let’s dive into making these sections both stylish and functional.
Ribbing Techniques
Ribbing makes your crochet sock cuff stretchy and snug. You can use single crochet ribbing or front post/back post ribbing. Single crochet is easy and works well. Front post/back post gives a textured look and is very elastic.

Cuff Height Options
The height of your cuff impacts both look and use. Ankle socks have a 1-2 inch cuff, while crew socks are 6-8 inches. To fit perfectly, measure from your ankle to your desired height. Socks are made with negative ease, so your cuff should be 10% shorter than your measurements.
When shaping the ankle, decrease stitches as you go down from the cuff. This makes the fit snug around the ankle. A good way to do this is to decrease one stitch every few rows until you reach your ankle size.
| Cuff Style | Height (inches) | Recommended Ribbing |
|---|---|---|
| Ankle | 1-2 | Single crochet |
| Crew | 6-8 | Front post/back post |
| Knee-high | 14-16 | Alternating patterns |
Try out different ribbing and cuff heights to find your favorite style. Remember, the more you practice, the better you’ll get at shaping the ankle and making the perfect cuff.
Troubleshooting Common Sock Issues
Crocheting socks can be tricky, even for experienced crafters. Let’s tackle some common problems and learn how to fix them. One issue is holes at the heel join. To avoid this, work your stitches tightly and evenly there.
If you see a small gap, use a darning needle to fix it with spare yarn.

Loose stitches can be a problem too. Try using a smaller hook size, like 3.5mm to 4mm, for most sock projects. This helps tighten your stitches and makes the sock more durable.
Remember, crochet socks don’t stretch as much as knitted ones. So, getting the tension right is key.
Improper sizing is another common challenge. Here’s a size guide for better-fitting socks:
| Size | Foot Length | Foot Circumference | Leg Circumference |
|---|---|---|---|
| Small | 9 inches | 8.5 inches | 13 inches |
| Medium | 9.5 inches | 9 inches | 14 inches |
| Large | 10 inches | 9.5 inches | 15 inches |
If you’re having trouble with tight cuffs, try ribbing stitches like single crochet or half double crochet. They add more elasticity. For misshapen toes, gradually decrease stitches as you approach the toe area for a snug fit.
With practice and these tips, you’ll overcome common crochet sock problems. You’ll create cozy, well-fitting socks.
Adding Decorative Elements and Patterns
Elevate your crochet sock designs with eye-catching decorative elements. Once you’ve mastered basic construction, it’s time to unleash your creativity. Let’s explore exciting ways to make your socks stand out.
Color Work Options
Colorwork crochet is a fantastic way to add visual interest to your socks. Try stripes, Fair Isle patterns, or intarsia techniques. With 437 yards of main yarn and an 87-yard mini skein, you have plenty to work with. Remember, crochet socks use about 1.5 times more yarn than knitted ones, so plan appropriately.
Texture Patterns
Create depth and interest with textured stitches. Ribbing, cables, or popcorn stitches can transform plain socks into works of art. Aim for 5 stitches per inch to ensure density and quality. Use a hook one or two sizes larger than usual to maintain even tension throughout your textured sections.
Lace Designs
Delicate lace patterns add a touch of elegance to your crochet socks. When working lace, pay extra attention to your gauge. Remember, 19 double crochets x 13 rounds should equal 4 inches when worked in continuous rounds. This precision ensures your lace socks fit perfectly, with the foot circumference about 5% larger than the ankle.
Whether you choose colorwork, textures, or lace, these decorative elements will take your crochet sock designs to the next level. Just remember to balance creativity with comfort for truly wearable art.
Tips for Even Tension and Durability
Making cozy, long-lasting socks begins with mastering crochet tension. Did you know 80% of sock issues come from bad tension? To make durable socks, keep your pressure steady as you crochet. Spend a few hours each week to get better at it.
Here are some tips for even tension:
- Use a yarn bowl to pull from the outside of the skein
- Experiment with different gripping techniques
- Make a gauge swatch before starting your project
- Practice with 6″-12″ cotton squares
To make socks last longer, use strong yarns like nylon blends in high-wear spots. Aim for 5 stitches per inch for quality socks. Feet are usually 5% wider than shoe size, so adjust your pattern.
Blocking is key for a perfect fit. It can shrink sock size by 1.25-2.5 cm. For swatching, use a 4mm hook to check your gauge. By focusing on these tips, you’ll make socks that are both comfy and durable.
Finishing Techniques for Professional Results
Learning to finish crochet socks makes them look like they were made by a pro. We’ll look at two key methods to get that polished finish.
Weaving in Ends Securely
Weaving in ends is key for durability and comfort. Use a tapestry needle to thread yarn ends through nearby stitches. Follow the yarn’s path for 2-3 inches, then cut off the excess. This stops unraveling and keeps your feet comfortable.
Blocking Methods
Blocking your crochet socks changes everything. For wool or wool-blend socks, wet blocking is the best choice. Soak them in lukewarm water with a mild detergent for 30 minutes.
After, squeeze out water and lay them flat on a towel. Pin them to the shape you want and let them air dry.
For synthetic fibers, steam blocking is better. Hold a steamer or iron on steam close to the socks without touching. This relaxes the fibers and sets the shape. Always block after washing to keep the shape.
With these techniques, your crochet socks will look and feel professional. They’ll keep their shape and comfort for many wears. Happy crocheting!
Care Instructions for Crocheted Socks
Proper care of your handmade crochet socks makes them last longer. They stay cozy and comfortable. Washing them right is key, depending on the yarn used.
Wool-blend socks need cool or room temperature water and gentle soap. Hot water and agitation can cause felting. Superwash wool makes sock care easier. Acrylic yarn socks can handle regular machine washing.
Don’t wring out your socks after washing. Gently squeeze out water and lay them flat to dry. Avoid hanging or using a dryer to keep their shape.
Storing your crochet socks flat in a drawer helps keep their shape. If you see loose threads, weave them back in. This stops them from unraveling.
Wool socks naturally resist odors and can be worn many times before washing. This means you wash them less often. Your handmade socks will last longer.
By following these care tips, your crochet socks will stay cozy and durable for years.
Pattern Modifications for Different Sizes
Making custom-fit socks is easy with the right resizing tricks. You can change crochet patterns to fit any foot size, from kids to adults. The secret is in tweaking stitch counts and row numbers.
To adjust width, start by changing the initial stitch count. Adult socks usually start with 20-24 stitches. To fit different foot sizes, add or subtract 2 stitches at a time. Remember, socks should be a bit smaller than your foot, about 5-10% off.
Changing the length is also simple. In toe-up designs, try on the sock as you go. Adjust the foot and leg rounds for the perfect fit. For example, our pattern suggests a 7-inch leg, but you can change it to fit your needs.
When resizing patterns, watch your gauge. A 4″ x 4″ swatch should have 16 single crochets and 19 rows. This keeps the proportions right as you scale up or down. With these tips, you’ll be able to make custom sock sizes for your whole family!
Advanced Techniques for Experienced Crocheters
Ready to take your sock-making to the next level? Advanced crochet socks open up a world of creativity. You can try complex patterns with detailed colorwork, tricky stitch mixes, and new ways to build. These skills help you make unique, eye-catching shoes that beat store-bought ones.
For those who’ve got the basics down, try cables, mosaic crochet, or 3D elements in your socks. The “toe-up” method is a favorite, letting you adjust the fit as you go. You can also play with yarn weights, from thin to thick, for different seasons and uses.
Feel free to design your own advanced crochet socks. Mix textures, shapes, and colors to create unique patterns. Remember, practice is key – even if you face the “one sock blues,” keep going. Your skills will grow with each stitch, leading to amazing, wearable art for your feet.