Ready to dive into the world of fruit-themed amigurumi? Our crochet banana pattern is perfect for beginners and experts alike. You’ll love making this adorable DIY plushie as much as you’ll enjoy showing it off!
This amigurumi banana pattern is in US terms and has ads on our blog. Did you know bananas share about 50% of their DNA with humans? That’s one of the fun facts that makes this project special!
You can make your crochet banana your own way. Use typical amigurumi yarn with a 2.5-3.5 mm hook for a banana under 5 cm tall. For a tiny banana, try lace yarn with a 1.25-1.5 mm hook for a banana under 2.5 cm!
In this guide, we’ll show you how to make your own banana amigurumi. We’ll cover everything from picking the right materials to getting the banana shape just right. You’ll have all you need to make a cute addition to your crochet collection. Let’s start this fun journey together!
Why Make a Crochet Banana Amigurumi
Crocheting a banana amigurumi is more than a fun project. It’s a way to connect with nature and make a sustainable toy. Here are some reasons why you should make this cute banana toy.
The Fascinating Banana-Human DNA Connection
Did you know humans share about 50% of our DNA with bananas? This fact makes your banana amigurumi even more interesting. As you crochet, you’re creating a symbol of our close bond with bananas.
Perfect for Sustainable Crochet
Making your own banana toy supports sustainable crafting. Using eco-friendly materials like organic cotton yarn helps the environment. This aligns with the Slow Yarn Movement, making your banana toy a great choice.
Ideal Gift for Children and Collectors
Banana plushies are great gifts for kids and collectors. They’re about 7 inches, perfect for small hands. You can crochet them in two styles, peeled or unpeeled, adding an educational twist.
Whether you’re new to crochet or experienced, this pattern is rewarding. It lets you make a unique, educational, and whimsical toy.
Essential Materials and Tools List
Ready to start your crochet banana adventure? Let’s gather the crochet banana materials and amigurumi supplies you’ll need. With the right tools, you’ll be crafting adorable banana amigurumis in no time!
Recommended Yarn Options
For a realistic banana look, choose Rico Essentials Organic Cotton DK yarn. This eco-friendly option comes in perfect banana hues:
- Mustard (for the ripe banana color)
- Cream (for the banana flesh)
- Brown (for spots and stem)
- Green (for an unripe version)
Required Crochet Tools
Gather these essential amigurumi supplies:
- 3.00 mm / US C crochet hook
- Tapestry needle
- Stitch markers
- Measuring tape
- Scissors

Stuffing Alternatives
For an eco-friendly touch, consider these stuffing options:
- Organic cotton batting
- Wool roving
- Bamboo fiber fill
With these crochet banana materials and amigurumi supplies, you’re all set to create a 10-inch long banana that’s both cute and sustainable. Remember, this intermediate-level pattern takes about an hour to complete, perfect for a fun afternoon project!
Skill Level and Techniques Overview

Are you ready to start your amigurumi adventure? Our crochet banana pattern is great for beginners! You’ll learn key amigurumi skills while making a fun fruit friend. You can choose between an unpeeled banana or a peeled one with a removable peel.
Don’t worry about the skill level. This pattern is for beginners, even though it’s rated intermediate. You’ll first learn the magic ring, a basic amigurumi technique. Then, you’ll get better at working in continuous rounds to shape your banana.
Here’s a quick rundown of the skills you’ll develop:
- Creating a magic ring
- Working in continuous rounds
- Increasing and decreasing stitches
- Color changes (for the peel)
- Stuffing techniques
Remember, practice makes perfect! Our step-by-step instructions will help you through each beginner crochet banana technique. By the end of this project, you’ll have gained valuable amigurumi skills and a cute banana to show for it!
Understanding Yarn Selection for Your Banana
Choosing the right yarn for your crochet banana is key. It makes your banana look real and feel cuddly. We’ll look at organic cotton yarns, great for your banana project.
Organic Cotton Options
Organic cotton yarn is perfect for toys because it’s durable and soft. It’s a bit harder to work with than wool. But, it’s great for making bananas that are both sturdy and huggable.
| Yarn Brand | Composition | Weight |
|---|---|---|
| Rico Essentials Organic Cotton DK | 100% Organic Cotton | 3/DK/Light Worsted |
| Deramores Studio Organic Cotton DK | 100% Organic Cotton | 3/DK/Light Worsted |
| Stylecraft Naturals Organic Cotton | 100% Organic Cotton | 3/DK/Light Worsted |
| Paintbox Yarns Cotton DK | 100% Cotton | 3/DK/Light Worsted |
Color Choices and Combinations
For a realistic banana, pick yellow, brown, and green shades. Lighter yarns are better for seeing stitches. Make sure all yarns have the same dye lot for even colors.
Yarn Weight Guidelines
Yarn weights range from 1 to 7, with 1 being the thinnest. DK weight yarn (number 3) is best for bananas. It’s thin enough for details but easy for beginners.

The Craft Yarn Council has a guide for yarn weights and hooks. It helps pick the right yarn for your banana.
Basic Crochet Banana Pattern Steps

Are you ready to start your crochet banana journey? Let’s get into the basic steps of this fun amigurumi pattern. You’ll soon have a cute fruit friend!
Begin with a magic ring and work in continuous rounds. This method makes your banana look smooth and seamless. Remember to stuff your banana as you go. This makes it plump and even.
Here’s a quick breakdown of the main rounds:
- Rounds 1-2: Start with 8 stitches
- Rounds 3-7: Increase to 20 stitches
- Rounds 8-16: Maintain 20 stitches
- Rounds 17-30: Decrease back to 8 stitches
To make the banana peel, you’ll create three sections. Each starts with 8 stitches and gets smaller. This design looks like a real banana peel.
Use a 3.00 mm (US C) hook and organic cotton yarn. Your banana will be about 7 inches long. That’s as big as a 20-week-old baby! Follow these steps, and you’ll have a charming amigurumi in no time!
Creating the Perfect Banana Shape
Mastering the art of crochet banana shaping is essential for creating realistic amigurumi fruits. The banana’s iconic curved shape brings your creation to life. Let’s dive into techniques for achieving those perfect amigurumi curves.
Working in Continuous Rounds
Continuous rounds are key for seamless banana shaping. This method removes visible seams, giving a smooth surface. Begin with a magic circle of 6 single crochets. Then, keep crocheting in a spiral, adding stitches to form the banana’s body.
The pattern usually includes 46 rounds. This allows for gradual growth and shaping of the banana.

Mastering the Curve Technique
To get those signature amigurumi curves, use a clever trick. Start by leaving a long yarn tail when you begin crocheting. This tail will help you shape the banana perfectly.
After stuffing the banana, use the tail to pull one side. This will naturally curve the fruit. Adjust the tension to get the shape just right.
| Banana Feature | Technique | Benefit |
|---|---|---|
| Body | Continuous rounds | Seamless appearance |
| Curve | Long yarn tail | Adjustable shaping |
| Peel | Separate sections | Realistic texture |
Remember, practice is key in crochet banana shaping. Don’t hesitate to try different tensions and curves. With these tips, you’ll soon be making perfect amigurumi bananas!
Crafting the Banana Peel Details
The crochet banana peel is what brings your amigurumi to life. Let’s dive into creating a realistic and fun peel. This will make your banana stand out. You’ll learn how to make a split peel that opens to reveal the fruit inside, adding a playful touch to your creation.
Split Peel Construction
To craft your crochet banana peel, divide it into 3 sections, each with 8 stitches. Work these sections in turning rows to achieve the right shape. Remember to chain 1 and turn at the end of each row. This technique creates a peel that can be opened, revealing the banana inside.
Textural Elements
To enhance the amigurumi texture, use a combination of stitches. Single crochet creates a firm base, while bobble stitches add bumps that mimic a real banana’s surface. For the peel’s edge, try a picot stitch to give it a slightly frayed look.

| Peel Section | Stitches | Rows | Special Techniques |
|---|---|---|---|
| Top | 8 | 10 | Bobble stitch every 3rd stitch |
| Middle | 8 | 12 | Alternating sc and hdc |
| Bottom | 8 | 8 | Picot edge on final row |
By following these steps, you’ll create a crochet banana peel with stunning detail and texture. Your amigurumi will look so real, you might be tempted to peel it!
Size and Gauge Information
When making a crochet banana, knowing about size and gauge is very important. Your banana will be about 7 inches long. It’s perfect for decoration or a child’s toy. You can change the size by using different hooks or yarn weights.
The amigurumi gauge is about 28 stitches by 30 rows in a 4-inch square with single crochet. While gauge is not as important for toys, keeping the tension even is key. It makes your banana look just right.

| Item | Quantity |
|---|---|
| Yellow Yarn | 150 yards |
| Tan Yarn | 100 yards |
| Brown Yarn | 50 yards |
| Crochet Hooks | Sizes H and I |
You can make your banana bigger or smaller by changing your hook size. A bigger hook makes a larger banana, and a smaller one makes it more compact. Try different sizes to find the perfect one for you!
Sustainable Crochet Practices
Crafting sustainable amigurumi is a growing trend among eco-conscious crocheters. By choosing eco-friendly crochet materials and methods, you can create adorable toys while minimizing your environmental impact.
Eco-friendly Material Choices
Opt for natural fibers like organic cotton, bamboo, or hemp for your banana amigurumi. These materials are biodegradable and require less energy to produce than synthetic alternatives. Look for yarns certified by GOTS or OCS to ensure responsible production practices.
Consider using recycled yarns like Paintbox Yarns Recycled Cotton Worsted or Lion Brand Re-Up. These options keep materials out of landfills and support a circular economy. For dyeing, explore plant-based techniques or low-impact synthetic dyes to reduce water pollution.
Waste Reduction Tips
Minimize yarn waste by planning your project carefully. Use leftover yarn scraps as stuffing for your banana amigurumi. Transform old t-shirts into unique yarn for creative, eco-friendly crochet projects. Support local yarn brands to reduce transportation-related carbon emissions.
- Repurpose materials for stuffing (e.g., yarn scraps, old fabric)
- Use every bit of yarn by incorporating small leftovers into details
- Share or donate excess materials to fellow crafters
By embracing these sustainable practices, you’ll create charming banana amigurumi while contributing to a more environmentally responsible crafting community.
Adding Character with Facial Features
Bringing your crochet banana to life is all about crafting adorable amigurumi faces. The right facial features can transform your creation from a simple fruit to a charming character. Let’s explore how to add those cute crochet banana eyes and expressions that will make your amigurumi irresistible.
Start by positioning the eyes between rounds 19 and 20. You can use safety eyes or create embroidered eyes, depending on your preference and the banana’s intended recipient. For a playful touch, consider adding rosy cheeks or eyebrows to enhance your banana’s expression.

To create a sweet smile, use crochet thread to make a “V” shape centered between the eyes. Place it one stitch down for the perfect grin. This simple technique adds instant personality to your amigurumi banana.
| Feature | Placement | Technique |
|---|---|---|
| Eyes | Between rounds 19 & 20 | Safety eyes or embroidery |
| Smile | 1 stitch below eyes | “V” shape with crochet thread |
| Optional extras | Varies | Rosy cheeks, eyebrows |
Remember, the key to creating expressive amigurumi faces lies in the details. Experiment with different eye sizes, smile shapes, and additional features to give each banana its unique personality. With these techniques, you’ll be crafting a bunch of cheerful crochet bananas in no time!
Color Changes and Transitions
Learning how to change colors in crochet is key for a realistic banana amigurumi. This skill lets you show the fruit’s natural look, from the brown stem to the green and yellow parts.
Working with Multiple Colors
Tapestry crochet is great for using many colors in your banana project. It uses two or more yarn strands for bright, smooth designs. It’s easy for beginners because it mainly uses single crochet stitches.
- Use smooth, non-splitty yarn for cleaner color transitions
- Maintain consistent tension to prevent puckering
- Practice with simple geometric shapes before attempting complex patterns

Seamless Color Joining
To get smooth color changes in your amigurumi, change colors at certain rounds. For example, go from brown to green, then to yellow for the banana body. The trick is to drop the old color and yarn over with the new one before finishing the stitch.
| Color | Section | Technique |
|---|---|---|
| Brown | Stem | Back loop single crochet |
| Green | Unripe banana | Waistcoat stitch |
| Yellow | Ripe banana | Single crochet |
By mastering these crochet color change techniques, you’ll make a beautiful banana amigurumi. You’ll also get skills for future projects with many colors.
Stuffing Techniques for Perfect Shaping
Mastering amigurumi stuffing is key to creating a well-shaped crochet banana. The right stuffing technique ensures your banana looks great and lasts through playtime. Let’s explore some effective methods for stuffing your amigurumi banana.
Start by choosing the right material. Polyester fiberfill is popular, but eco-friendly options like cotton or bamboo work well too. When stuffing, use more than you think you need. Your banana should feel firm without stretching the stitches or showing holes.
Distribute the stuffing evenly throughout your banana. Pay extra attention to curves and corners. For hard-to-reach areas, use a chopstick or crochet hook to push the filling into place. This ensures a smooth, uniform shape.
Consider adjusting firmness for different parts of your banana. A slightly softer middle can create a realistic “bendable” effect. Remember, proper stuffing is key for your amigurumi’s longevity and appeal.
| Stuffing Material | Pros | Cons |
|---|---|---|
| Polyester Fiberfill | Lightweight, washable | Not eco-friendly |
| Cotton | Natural, breathable | Can be heavy |
| Bamboo | Sustainable, soft | More expensive |
By following these amigurumi stuffing tips, you’ll create a perfectly shaped crochet banana. It will be both visually appealing and durable. Remember, practice makes perfect when it comes to crochet toy filling techniques!
Two Banana Style Options
Crochet banana variations let crafters try out different amigurumi fruit styles. You can make two banana designs: one with the peel on and another with the peel off.
Peeled Banana Version
The peeled banana design is a fun twist for your project. It involves making two parts: the banana and a removable peel. Use yellow yarn for the banana and cream-colored yarn for the peel.
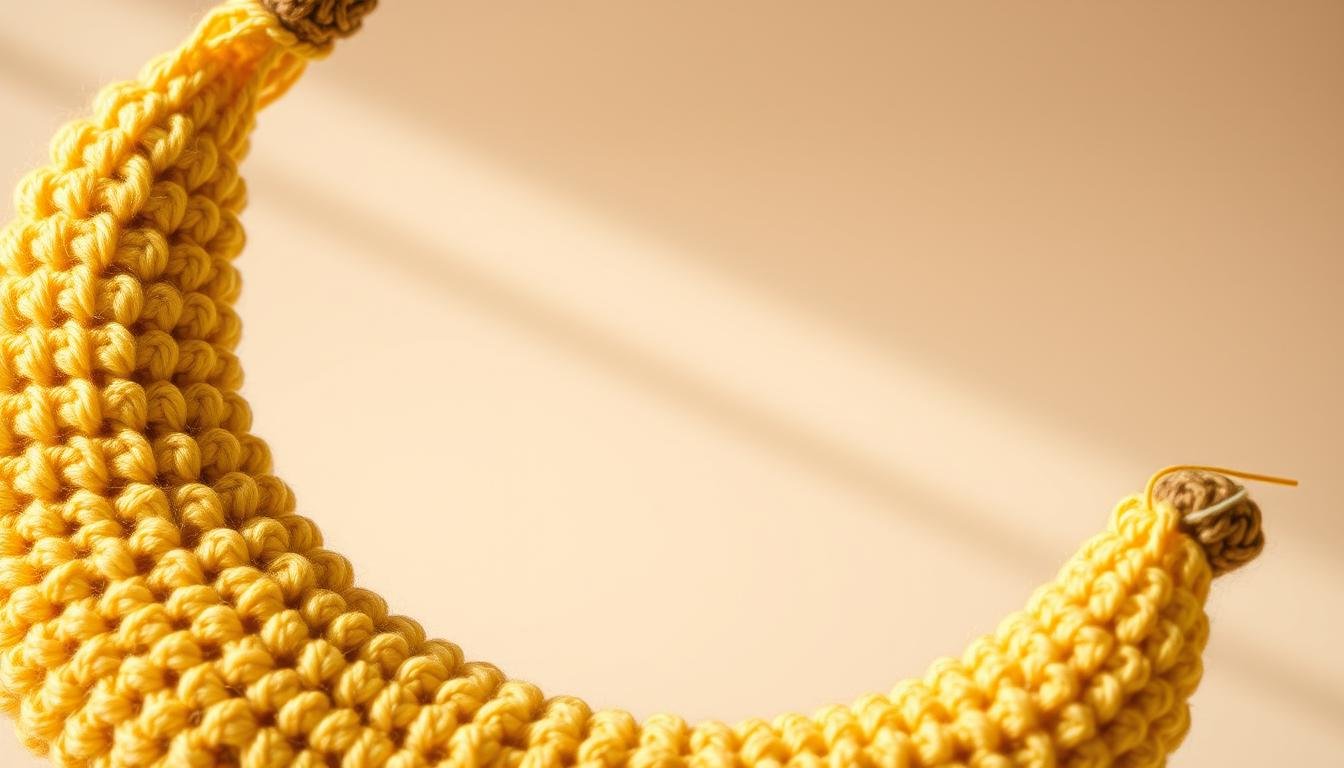
Unpeeled Banana Design
The unpeeled banana style looks like a real banana. You’ll crochet it all in one piece with yellow yarn. It’s perfect for beginners because it’s simpler.
This banana can be about 38 cm (15 inches) long. It’s big and cuddly.
Both styles have their own challenges and rewards. The peeled version is more detailed but fun to play with. The unpeeled design is easier but just as charming. Either way, these bananas will make your amigurumi fruit collection better.
Stem and Final Details
It’s time to finish your crochet banana amigurumi. The stem is key to making it look real. Start by making a small circle with a slip stitch to the first stitch of row 19. This circle should close inside the peel.
For a natural look, use green yarn for rounds 2-4, then switch to brown for round 5. Your banana stem will grow over 7 rounds. It will be about 17 cm tall when done.
Remember, the magic ring technique is used 5 times in the pattern. It helps with different parts of your banana.
After attaching the stem, work on other details. Add color spots to make it look like a real banana. Use 6 single crochets for 2 small spots and 1 large spot starting with 6 and growing to 12 in the second round.
These spots make your banana look more real. It’s perfect for play or as a decoration.