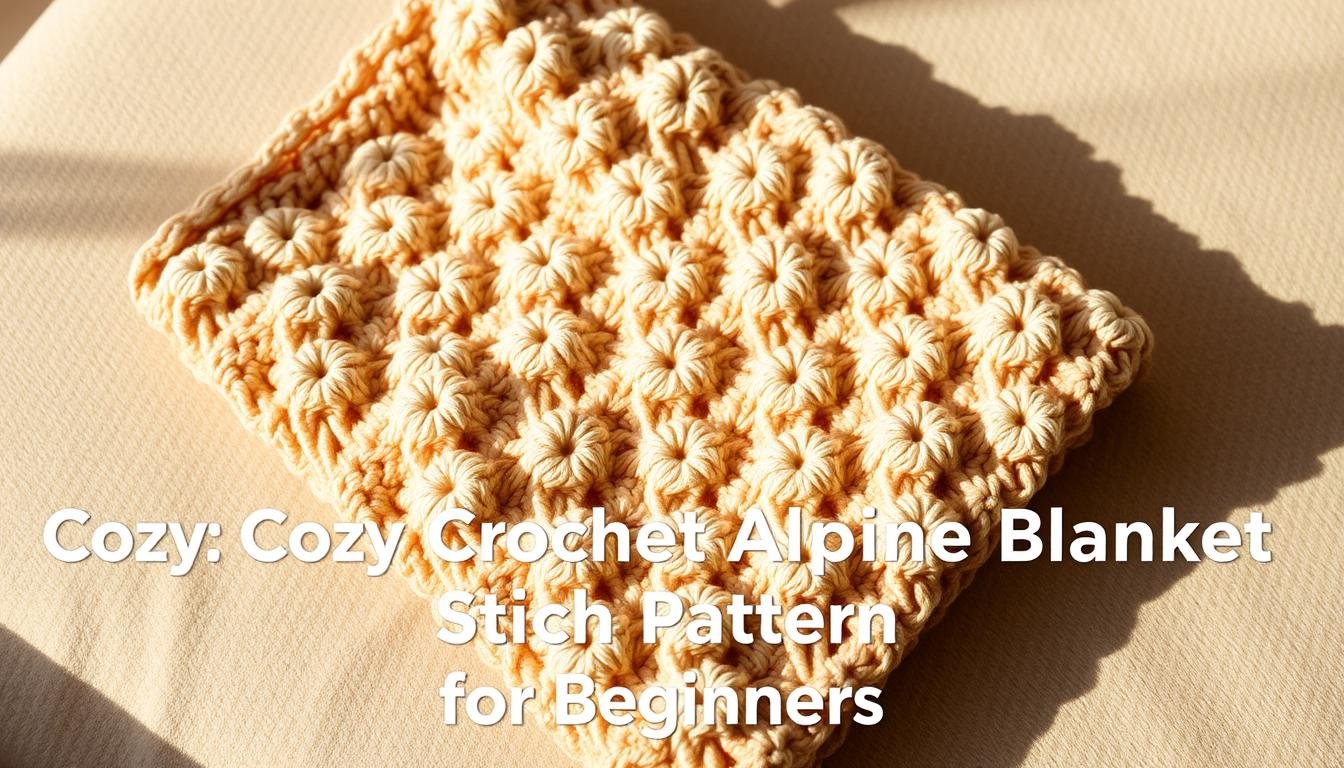
Are you ready to improve your crochet skills? The crochet alpine stitch blanket pattern is a great choice. It’s easy to follow and makes a beautiful, cozy blanket.
The alpine stitch makes a thick, strong fabric perfect for blankets. Use a 6.5 mm hook and light to medium-weight yarn. This way, you’ll get a soft, plush blanket that’s great for snuggling.
Don’t worry if you’re new to crochet. This pattern is made for beginners. You’ll need an even number of stitches to start. Just repeat rows 3-6 until your blanket is the right size. In just a couple of days, you’ll have a beautiful, handmade blanket to cherish or gift.
Ready to start your cozy crochet alpine stitch blanket? Let’s dive into the details and get you crocheting!
Understanding the Alpine Stitch Texture and Appeal
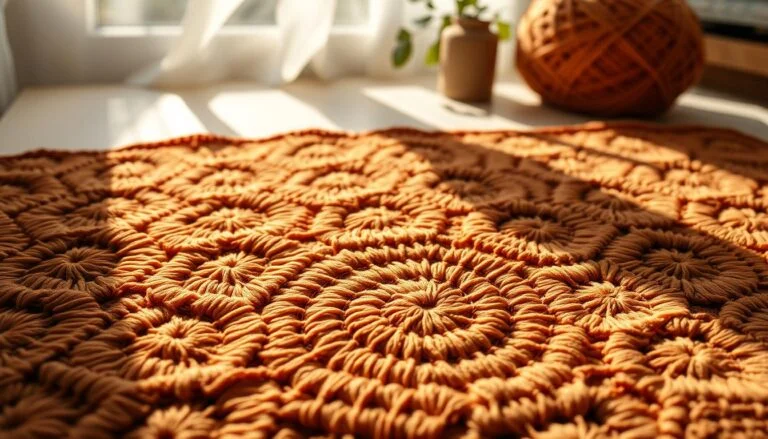
The alpine stitch texture is a captivating crochet stitch design. It creates stunning dimensional crochet effects. This unique stitch has gained popularity among crocheters for its versatility and eye-catching appearance.
Origins of the Alpine Stitch Design
The Alpine stitch got its name from its resemblance to the rugged, textured landscape of alpine regions. It features raised stitches that mimic mini crochet cables. These add depth and interest to any project.
What Makes Alpine Stitch Special
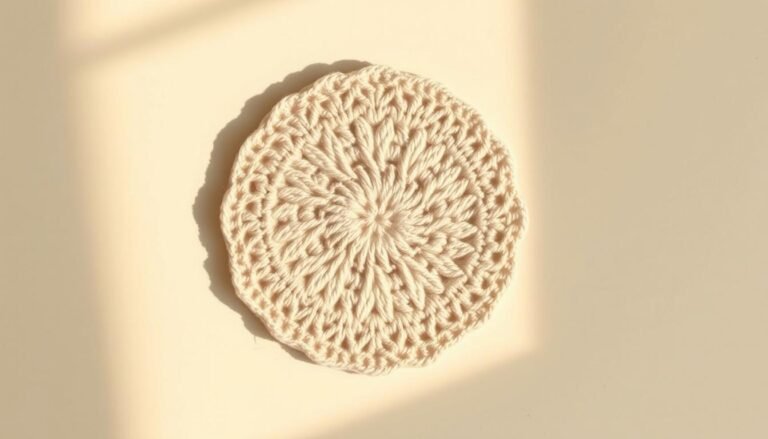
The Alpine stitch stands out for its intricate texture and versatility. It’s a four-row repeat pattern, making it accessible for advanced beginners. This stitch works well with various yarn weights, allowing for diverse project possibilities.
- Skill level: Advanced Beginner to Easy Intermediate
- Yarn compatibility: Any weight
- Common projects: Blankets, washcloths, cowls, leg warmers
Texture and Dimensional Effects
The alpine stitch texture creates a highly textured and thick fabric. It’s perfect for cozy blankets and warm accessories. It alternates between double crochet and front post treble crochet stitches.
This results in a 50% alternation rate that produces striking dimensional crochet effects. Interestingly, the visual appeal of the Alpine stitch improves with the width of the piece. This means wider projects showcase the stitch’s beauty even more effectively.
The stitch is also known as a “yarn eater” due to its textured nature. It consumes more yarn than simpler stitches.
Essential Materials and Tools
Ready to start your Alpine stitch blanket? Let’s look at the crochet materials you’ll need. The right supplies make crocheting smooth and fun.
Recommended Yarn Selection
Choose a medium-weight yarn for this cozy blanket. The Alpine stitch works with many yarn types. Think about softness and durability, especially for a baby blanket.
Crochet Hook Sizing Guide
The pattern suggests using a 4mm crochet hook. This size is perfect for medium-weight yarn and the Alpine stitch. Using the right hook size is key for a great result.
| Yarn Weight | Recommended Hook Size |
|---|---|
| Light | 3.5mm – 3.75mm |
| Medium | 4mm – 5mm |
| Heavy | 5.5mm – 6.5mm |
Additional Supplies Needed
Don’t forget these essential tools:
- Scissors for cutting yarn
- Stitch markers to keep track of your pattern
- Tapestry needle for weaving in ends
- Measuring tape to check your gauge
With these materials ready, you’re ready to start your Alpine stitch blanket adventure!

Skill Level and Prerequisites
The Alpine stitch blanket pattern is great for those wanting to improve their crochet skills. It might look hard, but it’s perfect for beginners who know a few basic stitches. Make sure you’re good at chain stitches, single crochet, and double crochet before starting.
To begin this cozy blanket, you’ll need about 1500 yards of worsted weight yarn. The pattern calls for a 5.5MM hook and aims for a gauge of 3 stitches x 2.5 rows per inch. These skills will help you make a beautiful, textured blanket in various sizes, from a small 30″ x 36″ baby blanket to a big king-size.

- Understanding how to read basic crochet patterns
- Ability to maintain consistent tension
- Familiarity with changing colors (for striped versions)
- Basic knowledge of increasing and decreasing stitches
If you’re still learning, don’t worry. The pattern has 92 rows for lots of practice. Plus, there’s a video tutorial to help with the Alpine stitch and fix common problems like curling edges.
Gauge and Measurements
Knowing your crochet gauge is key to making a blanket the right size. We’ll look at how to measure gauge, figure out blanket sizes, and tweak your pattern for a perfect fit.
Creating Your Gauge Swatch
Begin by crocheting a 6″ x 6″ swatch with the Alpine stitch. Count the stitches and rows in a 4″ x 4″ part of your swatch. Aim for 17 stitches and 16 rows. If your gauge is off, try different hook sizes until it’s right.

Final Blanket Dimensions
This pattern comes in various sizes to fit your needs:
- Baby: 36″ x 36″
- Lapghan: 36″ x 54″
- Throw: 36″ x 60″
The sample blanket is about 50″ x 50″ (127 x 127 cm) in size.
Adjusting Size Guidelines
To change your crochet pattern size, remember the stitch multiple is 2. For a bigger blanket, add more stitches in multiples of 2 to your starting chain. To make it longer or shorter, just add or subtract pattern repeats. Changing size might also change how much yarn you need.
| Size | Starting Chain | Pattern Repeats |
|---|---|---|
| Baby | 146 | 18 |
| Lapghan | 146 | 27 |
| Throw | 146 | 30 |
Crochet Alpine Stitch Blanket Pattern
The alpine stitch pattern makes a beautiful, textured blanket perfect for beginners. This guide will help you make a cozy 36-inch by 45-inch throw using Bernat Baby Blanket yarn. It’s easy to follow with a simple 2-row repeat.
You’ll need 2-1/2 skeins of Vanilla, 2 skeins of Taupe, and 2 skeins of Baby Pink yarn. Each skein has 220 yards. You’ll need about 1150 yards of yarn in total. Your gauge should be 3 front post double crochet rows and 8 stitches equaling 5 inches.

The pattern has 99 rows, each with 119 stitches. You’ll switch colors every row for 98 rows, then finish with the main color. Here’s a breakdown of the stitch pattern:
| Row | Stitch Count |
|---|---|
| 1, 3, 5 | 55 single crochet (sc) |
| 4 | 28 double crochet (dc), 27 front post double crochet (fpdc) |
| 6 | 29 double crochet (dc), 26 front post double crochet (fpdc) |
This alpine stitch pattern is loved by many crocheters, with 6769 shares online. It’s great for advanced beginners who want to learn more stitches.
Basic Stitch Techniques and Abbreviations
Learning crochet abbreviations and techniques is key to reading patterns well. We’ll cover the basic terms and special instructions for the Alpine Stitch Blanket pattern.
Common Crochet Terms Used
Get to know these crochet abbreviations to make your project easier:
| Abbreviation | Meaning |
|---|---|
| ch | Chain |
| dc | Double Crochet |
| fpdc | Front Post Double Crochet |
| sc | Single Crochet |
| sl st | Slip Stitch |
| sk | Skip |
Special Stitch Instructions
The Alpine Stitch pattern combines unique crochet techniques. Focus on the front post double crochet (fpdc) for its special texture. To do an fpdc, yarn over, then insert the hook from front to back around the post of the stitch below. Yarn over again, pull up a loop, and finish as a regular double crochet.

Reading Pattern Notations
When reading patterns, remember asterisks (*) mark repeated sections. Brackets [ ] group stitches for the same space. The Alpine Stitch pattern repeats every 4 rows, mixing double crochet and front post treble stitches. Begin with an odd number of chain stitches for a balanced blanket.
Practice these abbreviations and techniques. Soon, you’ll make beautiful Alpine Stitch projects with confidence!
Step-by-Step Pattern Instructions
Welcome to our alpine stitch tutorial! This guide will help you make a cozy blanket with this textured stitch. We’ll go through each row’s detailed instructions.
Begin with an even number of chain stitches. For our blanket, we’ll start with 56 chains for a 36-inch width. Remember, your turning chain is a stitch in each row.
Follow this pattern repeat:
- Row 1: Single crochet (sc) in each stitch across (55 sc)
- Row 2: Double crochet (dc) in each stitch across (55 dc)
- Row 3: Single crochet (sc) in each stitch across (55 sc)
- Row 4: *1 dc, 1 front post double crochet (fpdc)* repeat to end (28 dc, 27 fpdc)
- Row 5: Single crochet (sc) in each stitch across (55 sc)
- Row 6: *1 fpdc, 1 dc* repeat to end (29 dc, 26 fpdc)
- Row 7: Single crochet (sc) in each stitch across (55 sc)
Keep repeating rows 1-7 until your blanket is 45 inches long. The mix of sc and dc rows gives the Alpine texture. Make sure to focus on the fpdc stitches for extra depth.
| Color | Skeins | Total Yardage |
|---|---|---|
| Vanilla | 2-1/2 | 550 |
| Taupe | 2 | 440 |
| Baby Pink | 2 | 440 |
This alpine stitch tutorial makes a blanket perfect for snuggling. With practice, you’ll get better at these steps and make beautiful projects!
Working the Foundation Chain and First Row
Starting your crochet foundation chain is key to beginning your Alpine Stitch blanket. Make sure you have an even number of stitches for your foundation chain. This makes your pattern line up right as you go along.
Starting Chain Tips
Keep your tension even when working your foundation chain. This makes your blanket’s edge smooth. Count your stitches carefully to get an even number. If you’re new, practice your chain stitch first.

First Row Setup
For your first row, you can choose two ways. You can work double crochet stitches into each chain, or use the foundation double crochet method. This method makes your edge look neater.
- Traditional method: Chain your foundation, turn, and double crochet into each chain
- Foundation double crochet: Create your foundation and first row in one step
Your first row is crucial for your whole project. Take your time and keep your tension even. This makes your next rows easier and your final product better.
Creating the Alpine Stitch Pattern Repeat
The alpine stitch repeat is the heart of this cozy blanket pattern. It follows a four-row crochet pattern repetition. This repetition gives the alpine stitch its unique textured look.
To keep the stitch pattern going, focus on these key rows:
- Row 1: 192 single crochet stitches
- Row 2: 96 alpine stitches alternating with 96 double crochet
- Row 3: 192 single crochet stitches
- Row 4: 96 double crochet alternating with 96 alpine stitches
The magic happens in rows 2 and 4. Here, you’ll create the raised texture by working front post double crochet stitches. These stitches form the alpine stitch’s characteristic ridges.

As you work, check your progress often. Count your stitches at the end of each row. This ensures you’re maintaining the correct number. It helps keep your alpine stitch repeat consistent across the entire blanket.
| Row | Stitch Count | Stitch Types |
|---|---|---|
| 1 | 192 | Single crochet |
| 2 | 192 | Alpine stitch + Double crochet |
| 3 | 192 | Single crochet |
| 4 | 192 | Double crochet + Alpine stitch |
Remember, practice makes perfect. Soon, you’ll find yourself effortlessly creating beautiful alpine stitch textures in your crochet projects.
Border Options and Finishing Touches
Finishing your Alpine stitch blanket means adding crochet borders and the final touches. These steps make your blanket look better and last longer. We’ll look at simple border designs, how to weave in ends, and blocking to make your blanket perfect.
Simple Border Designs
Crochet borders give your blanket a finished look. Here are some popular ones:
- Braided border: A classic choice for any blanket size
- Ribbing border: Adds texture and fits different stitch counts
- Picot dots border: Fast and uses little yarn
- Granny stitch border: Uses double crochet stitches efficiently
- Beaded tassel border: A fun option with customizable tassels
To get a clean edge, start with a round of single crochet. Then, pick your border. Aim for a border that’s 2-3 inches wide for a balanced look.
Weaving in Ends
Weaving in yarn ends makes your blanket look neat. Use a tapestry needle to hide the ends in your stitches. This keeps your blanket from unraveling and looks professional.

Blocking Instructions
Blocking your blanket makes it look even and textured. To block:
- Dampen your blanket with water or steam
- Gently stretch it to the size you want
- Pin edges to keep the shape
- Let it dry completely before taking out the pins
This makes your Alpine stitch blanket look polished and professional. With these steps, your blanket is ready to use and enjoy!
Troubleshooting Common Issues
Crochet troubleshooting is key for those working on the Alpine Stitch Blanket. Uneven edges are common, but there are many ways to fix them. Even skilled crocheters sometimes deal with wavy edges.
One good fix for mistakes is adding a single crochet border. This simple step can make uneven edges look much better. For yarns that can be machine washed, a wash and dry can also help even out the stitches.

Wet blocking is a great method to straighten out wavy blankets. For bigger projects, steam blocking might be easier. If you’re having trouble with tension at the bottom, try a chainless foundation row.
Incorrect stitch counts can also cause wavy edges. Using stitch markers can help keep stitches in the right place, especially for beginners. Tension issues are another common problem. If your grip changes due to hand fatigue, take breaks to keep your tension even.
Lighter yarns can be harder to work with because they require even tension. If you’re finding it tough, try using a thicker yarn or changing your hook size. By learning these troubleshooting tips, you’ll be ready to handle any issues in your Alpine Stitch Blanket project.
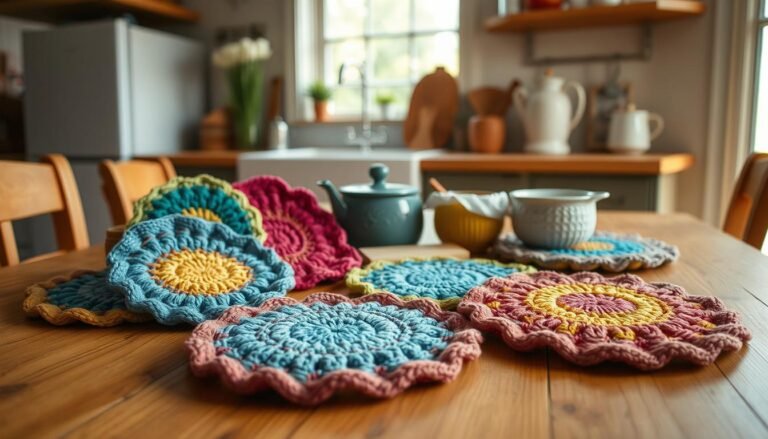
Color Variation Suggestions
Exploring different crochet colors can make your Alpine stitch blanket truly stand out. You can go for a single color or mix and match. The right colors can really bring out the texture and beauty of your blanket.
Single Color Projects
Choosing one yarn color for your blanket gives it a classic feel. The Alpine stitch’s texture shines through. Soft neutrals like cream or gray are timeless, while bold colors like navy or burgundy make a bold statement.
Multi-Color Combinations
Multi-color crochet lets you explore endless options for your Alpine stitch blanket. Here are some yarn color combinations to try:
- Ombre effect: Use shades of the same color, transitioning from light to dark
- Complementary colors: Pair opposite hues on the color wheel for a vibrant look
- Nature-inspired: Combine earthy tones like green, brown, and blue
When using multiple colors, change yarn every 7-10 rows for balanced stripes. This adds interest without overwhelming the pattern. Your color choices can turn a simple blanket into a unique piece.
Care and Maintenance Instructions
Your new Alpine stitch blanket needs proper care to stay cozy. Wash it in cool water with a gentle detergent. Don’t scrub hard or wring it, as this can harm the stitches.
If your blanket is made from WeCrochet Dishie 100% Cotton Yarn, you can machine wash it. But hand washing is even gentler.
To dry your blanket, lay it flat on a clean towel. While it’s still damp, reshape it to keep its size. For blankets made from acrylic yarns like Mary Maxim Maximum Value, dry them on low heat in the tumble dryer. Cotton blends should air dry to avoid shrinkage.
Keeping your crochet project in good shape is simple. Store it in a cool, dry place, away from sunlight to prevent fading. A light steam iron on the wool setting can refresh the texture of your stitches. Follow these steps to keep your handmade blanket a treasured part of your home.