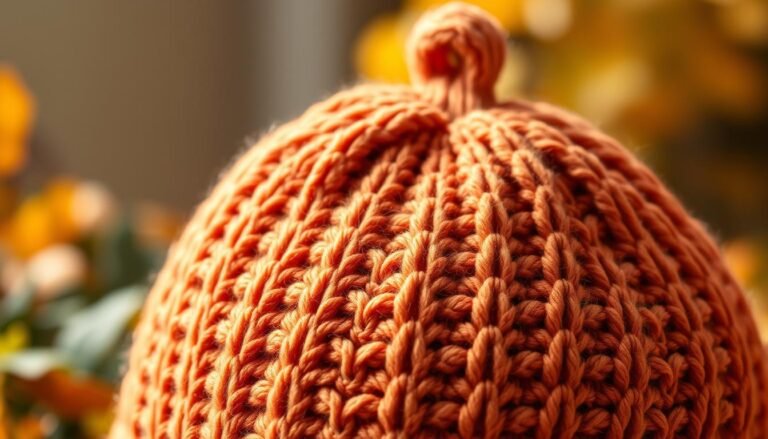
Ready to join the crochet messy bun hat craze? This DIY pattern guide will help you craft the hottest trend in crochet. With just a 5.5 mm hook and worsted weight yarn, you’ll create a stylish hat that’s perfect for ponytails and buns.
Our easy-to-follow guide covers sizes from toddler to adult, with circumferences ranging from 18 to 23 inches. You’ll learn to work in rounds, starting with 33 double crochets and increasing to 66 by the final rounds. The pattern includes 21 rounds total, creating a cozy hat with a 7.5-inch crown height for adults.
Whether you’re a beginner or an experienced crocheter, this DIY pattern guide has you covered. We’ll walk you through color changes, increasing stitches, and achieving the perfect fit. Get ready to create your own crochet messy bun hat that’s both functional and fashionable!
Essential Materials and Tools for Your Messy Bun Hat
Making a messy bun hat is a fun project. You’ll need specific crochet materials. Let’s look at what you’ll need to make your cozy accessory.
Recommended Yarn Types and Weights
The best yarn for messy bun hats is bulky weight #6. WeCrochet Alla Prima, a 100% Merino Wool yarn, is a great pick. You’ll need about 58 yards for an adult hat, which is one to two hanks.
| Size | Yardage Needed | Hanks Required |
|---|---|---|
| Baby | 32 yards | 1 hank |
| Toddler | 44 yards | 1 hank |
| Child/Adult | 58 yards | 1-2 hanks |
| Large Adult | 72 yards | 2 hanks |
Required Crochet Hooks and Sizes
You’ll need a US M/N/13 (9mm) crochet hook. This size is perfect with bulky yarn. It gives your hat the right texture and drape.
Additional Notions and Tools
To finish your hat, you’ll need a few more things:
- Scissors for cutting yarn
- Tapestry needle for weaving in ends
- Stitch markers to keep track of rounds
- Measuring tape for sizing
With these materials, you’re all set to start your messy bun hat. Remember, the right yarn is crucial for a comfy and stylish hat.
Understanding the Basics of Crochet Messy Bun Hat
Crochet messy bun hat basics start with understanding the structure. These hats have a crown, body, and brim. The crown starts with 30 half double crochet stitches around a hair elastic.
As you work up, the number of stitches increases to 72 by round 6. This creates the signature bun opening.
Key crochet techniques for this project include half double crochet, single crochet, and working in rounds. The pattern typically consists of 23 rounds. The last few rounds repeat to achieve the desired length.
Gauge is crucial – aim for 3.5 half double crochet stitches per inch. Use an I/9 (5.50 mm) hook and #4 worsted weight yarn.
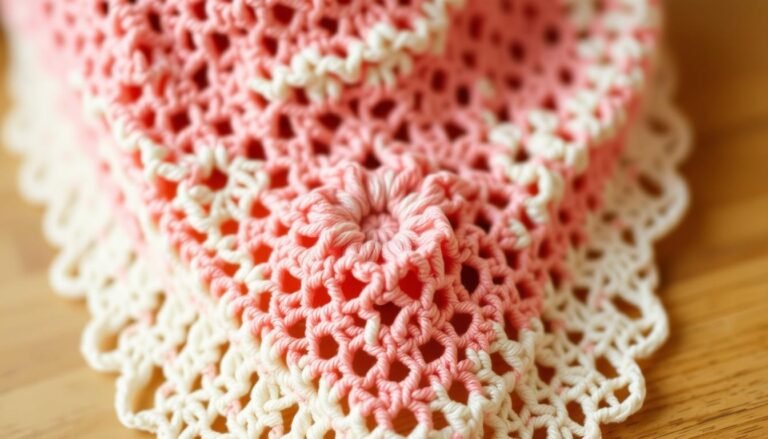
The ribbed brim adds texture and style. It’s created using front post and back post half double crochet stitches. This technique gives the hat its snug fit and fashionable look.
Remember, maintaining consistent tension throughout your work ensures a well-fitted hat.
Mastering these crochet messy bun hat basics allows you to create a trendy accessory. It’s both functional and stylish. With practice, you’ll be able to customize the pattern, experiment with colors, and even sell your creations at craft fairs.
Sizing Guide and Measurements
Getting the right size is key to making a perfect messy bun hat. Adult crochet hat measurements are important for a good fit. Let’s explore the details of messy bun hat sizes and how to adjust them for different head sizes.
Adult Size Specifications
Adult messy bun hats usually range from 21 to 24 inches in circumference. Women’s hats are 21 to 23 inches, while men’s hats are 22 to 24 inches. To fit snugly, subtract 1-2 inches from your head’s actual measurement.
| Gender | Head Circumference | Hat Circumference |
|---|---|---|
| Women | 21-23 inches | 19-21 inches |
| Men | 22-24 inches | 20-22 inches |
Adjusting for Different Head Sizes
To adjust hat sizes, think about the yarn’s stretchiness. Wool and acrylic stretch more than cotton. Always make a gauge swatch for accurate sizing. For smaller or larger heads, add or subtract rounds in the crown area.
Bun Opening Measurements
The bun opening is crucial for messy bun hats. Aim for a 3-4 inch diameter opening. This size fits most hair buns securely. Adjust the opening by changing stitches in the first few rounds.

Remember, precise measurements are essential for a well-fitting messy bun hat. Always double-check your measurements and round up to avoid a too-small hat. With these tips, you’ll make comfy and stylish messy bun hats for all head sizes.
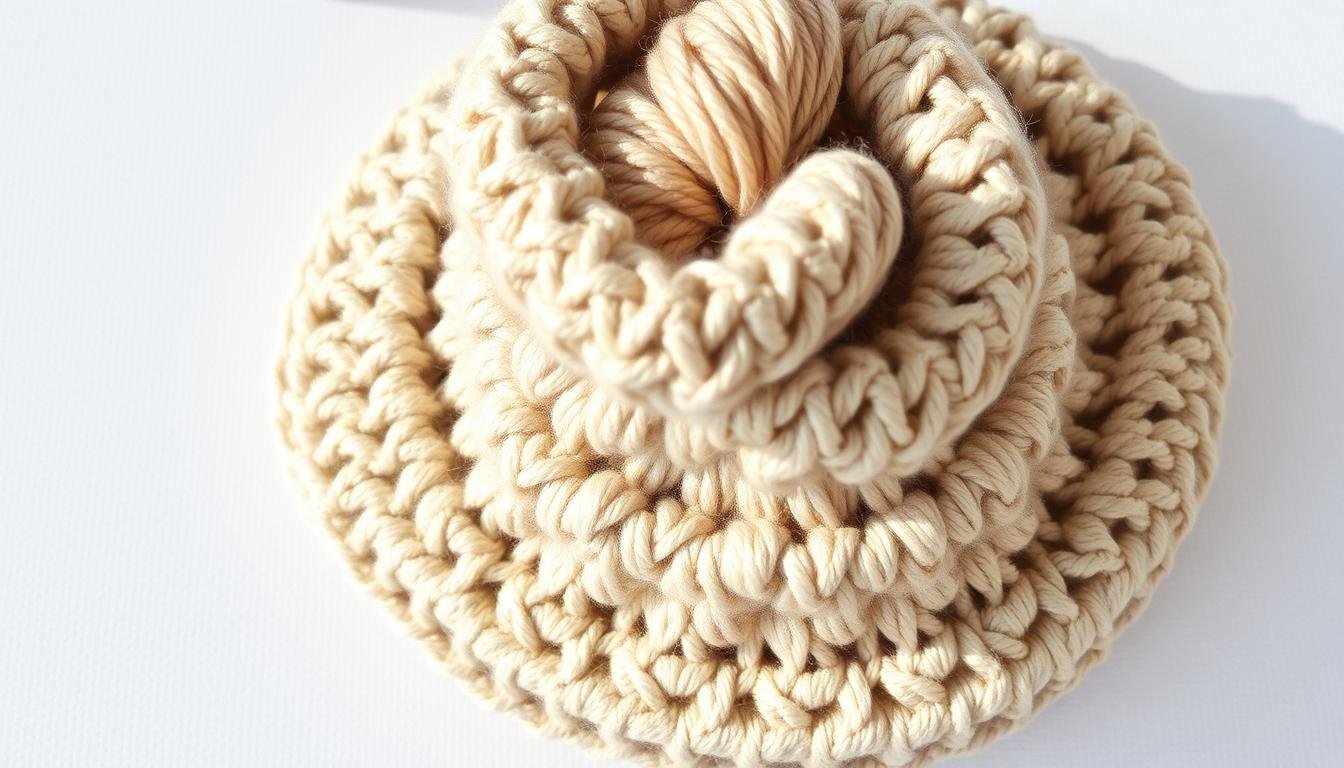
Step-by-Step Crown Construction
Ready to start your messy bun hat? Let’s dive into the crown construction. This is the key to a well-fitting and stylish hat. It starts with crocheting around a hair elastic, making a secure and flexible opening for your bun.
Starting with the Hair Elastic
To crochet around hair elastic, pick a sturdy elastic band that matches your yarn color. Wrap the yarn around the elastic, securing it with a slip knot. Then, work single crochet stitches evenly around the band until it’s fully covered. This forms the foundation of your bun opening.

Crown Increase Rounds
Once you’ve established your base, it’s time to start messy bun hat crown increases. Work in rounds, adding stitches evenly to create a flat circle. The number of increases depends on your desired hat size. For a typical adult size, increase by 6-8 stitches per round until your circle measures about 5-6 inches across.
Establishing the Bun Opening
As you work the crown, the bun opening naturally forms. Keep the center stitches loose to allow easy hair passage. Continue increasing until the hat fits comfortably around your head with the bun opening centered. Remember, you can adjust the size by adding or reducing increase rounds.
With these steps, you’ve created the foundation of your messy bun hat. The crown construction sets the stage for a comfortable, well-fitting hat that showcases your unique style.
Creating the Perfect Ribbed Brim

The crochet ribbed brim is a key feature of your messy bun hat. It adds style and functionality. This edge makes the hat look great and fits snugly.
To make the perfect ribbed brim, you need to learn a few techniques. These will take your hat from basic to breathtaking.
First, pick the right yarn weight. For an adult-sized hat, use bulky weight (category 5) yarn. You’ll need about 2 skeins, each with 124 yards. This ensures your hat is warm and covers well.
When crocheting the ribbed brim, aim for a gauge of 10 stitches equals 4 inches. This keeps the size right. The hat should be a bit smaller than your head for a snug fit.
- Use a 5 mm (US H-8) crochet hook for consistent stitching
- Work in continuous rounds for a seamless look
- Aim for 80 double crochets at the end of the first body round
For a unique touch, add Marly Bird’s signature crochet bill to your design. This feature is loved by many and adds character to your hat. With these tips, you’ll make a stylish and functional ribbed brim, perfect for any time.
Essential Stitch Techniques
Learning crochet stitch techniques is crucial for a stunning messy bun hat. Let’s explore some key stitches to make your project stand out.
Front Post Half Double Crochet
The front post half double crochet adds texture to your hat. Start by yarn over and then insert your hook from front to back around the post of the stitch below. Finish with a half double crochet. This stitch makes a raised ridge on the right side.

Back Post Half Double Crochet
The back post half double crochet also adds depth to your pattern. Insert your hook from back to front around the post of the stitch below. It creates a raised ridge on the wrong side, great for ribbed textures.
Basic Foundation Stitches
Foundation stitches are a good alternative to starting chains. They make your hat base stretchier, perfect for a snug fit. Practice these stitches to boost your crochet skills and enhance your messy bun hat design.
Remember, mastering these stitches takes time. Don’t worry if you’re not perfect at first. With practice, you’ll make beautiful messy bun hats that wow everyone!
Working in Rounds and Pattern Repeats
Crocheting in rounds is essential for making your messy bun hat round. This method lets you start at the top and work down. It helps you keep the hat’s shape and design.
When you’re working on your hat, watch the stitch counts. For example, Round 1 starts with 56 stitches for an adult size. Then, Round 2 might have 48 stitches, and Round 3, 40 stitches. These changes help shape the hat to fit right.

To keep your stitches even, crochet with consistent tension. Use stitch markers to mark each round’s start. This helps you stay on track and ensures your pattern repeats correctly. Most patterns have about 15 rounds for the main body, then more for the brim.
Pattern repeats are often in parentheses in your instructions. For example, you might see (HDC, DC, HDC) around the hat. Following these repeats carefully will give you the right texture and design. With practice, crocheting in rounds and following pattern repeats will become easy. You’ll make beautiful messy bun hats with ease.
Pattern Modifications and Style Variations
Customizing your striped messy bun hat is a fun way to express your creativity. You can easily modify the basic pattern to create unique looks that suit your style or the preferences of your gift recipients.
Adding Stripes and Color Work
Incorporating stripes into your messy bun hat is a simple yet effective way to add visual interest. You can create bold contrasts or subtle ombre effects using different yarn colors. Colorwork crochet techniques like Fair Isle or tapestry crochet can elevate your hat design to new levels of complexity and beauty.

Texture Modifications
Experiment with different stitch patterns to add texture to your hat. Try incorporating the wattle stitch or star stitch for unique textures. You can also mix and match stitches within the same hat for a more dynamic look.
Decorative Elements
Adding decorative elements can transform your basic messy bun hat into a statement piece. Consider attaching crocheted flowers, buttons, or pom-poms. You can even embroider simple designs for a personalized touch.
| Modification | Difficulty Level | Time Added |
|---|---|---|
| Stripes | Easy | 15-30 minutes |
| Colorwork | Intermediate | 30-60 minutes |
| Texture Changes | Easy to Intermediate | 20-45 minutes |
| Decorative Elements | Easy | 10-20 minutes |
Remember, these modifications can increase your project time but result in a unique, personalized striped messy bun hat. With practice, you’ll master these colorwork crochet techniques and create stunning, one-of-a-kind designs.
Troubleshooting Common Issues
Having trouble with your crochet hat? We’ve got solutions for you. Let’s solve some common problems you might face while making your cozy hat.

Uneven edges can be frustrating. To fix this, count your stitches at the end of each round. Use stitch markers to keep track. If you find an error, just unravel and start again.
Having sizing issues? Always check your gauge first. If your hat is too small or large, adjust your hook size. A smaller hook makes it tighter, and a larger one makes it looser.
Problems with the bun opening are common. If it’s too tight, add more stitches in the first rounds. If it’s too loose, reduce stitches or use a smaller hook for the opening.
- Tension issues: Practice keeping your tension even
- Yarn troubles: Pick the right yarn weight for your pattern
- Stitch confusion: Double-check your pattern and practice new stitches before starting
Remember, practice makes perfect. Don’t worry if you run into problems. With patience and these tips, you’ll fix your messy bun hat issues and make beautiful hats soon!
Finishing Touches and Seaming
You’re almost done with your messy bun hat! Now it’s time to add the final touches. We’ll cover how to weave in crochet ends and finish your hat like a pro.
Weaving in Ends
To weave in crochet ends, follow these steps:
- Thread your yarn tail through a tapestry needle.
- Work the needle through the back loops of stitches, moving in the same direction as the row.
- Weave for about 2 inches, then change direction and weave back.
- Trim the excess yarn close to the fabric.

Blocking Methods
Blocking helps shape your hat and even out stitches. Here’s a simple wet blocking method:
- Soak your hat in lukewarm water with a gentle detergent.
- Gently squeeze out excess water.
- Shape the hat on a towel or blocking mat.
- Pin in place if needed and let dry completely.
Your finished messy bun hat should have a circumference of 20 inches when unstretched. The body stitch pattern gauge is 16 stitches by 12 rounds in a 4-inch square. These measurements ensure a perfect fit for an adult head size of 22 inches.
| Feature | Measurement |
|---|---|
| Hat Circumference | 20 inches (unstretched) |
| Gauge | 16 stitches x 12 rounds = 4-inch square |
| Adult Head Size | 22 inches |
Care Instructions and Maintenance
Your crochet messy bun beanie is a cozy accessory that deserves proper care. To keep it looking fresh and fabulous, follow these simple guidelines for cleaning and storing your hat.
When it’s time to clean your messy bun beanie, hand washing is the gentlest method. Fill a sink with cool water and add a small amount of mild detergent. Gently submerge your hat and swish it around. Rinse thoroughly with cool water until all soap is gone. Avoid wringing or twisting the hat, as this can damage the fibers.
To dry your hat, lay it flat on a clean towel. Reshape it gently and let it air dry completely. Never use a dryer, as heat can shrink or distort your crochet creation.

Between wears, store your messy bun beanie in a cool, dry place. Avoid hanging it, which can stretch the fabric. Instead, fold it gently and place it in a drawer or on a shelf.
To refresh your hat’s shape, dampen it slightly and reshape it by hand. Let it dry flat. This technique is especially useful if your beanie has lost its form over time.
| Care Aspect | Recommendation |
|---|---|
| Washing Method | Hand wash in cool water |
| Drying Technique | Air dry flat |
| Storage | Fold and place in drawer |
| Reshaping | Dampen and reshape by hand |
By following these care instructions, your crochet messy bun beanie will stay beautiful and functional for many seasons to come. Remember, proper maintenance extends the life of your handmade creations, allowing you to enjoy them for years.
Creative Color Combinations
Discover the world of seasonal crochet colors and messy bun hat color ideas. Bernat Super Value Yarn comes in 74 shades, offering endless possibilities. Let’s explore some color schemes that will make your messy bun hats pop.
Seasonal Color Schemes
Let the seasons guide your color choices:
- Spring: Soft pastels like mint green, lavender, and peach
- Summer: Bright coral, turquoise, and sunny yellow
- Fall: Rich burgundy, mustard, and deep forest green
- Winter: Icy blue, crisp white, and silver gray
Ombre Effects
Make stunning ombre messy bun hats with gradient shades. Start with a light color at the brim and move to a darker shade at the crown. Try a sunset look with peach, coral, and magenta or a cool ocean theme with aqua, teal, and navy.
Multi-color Options
Try bold color combinations for standout messy bun hats. Mix contrasting hues like purple and yellow or complementary shades like blue and orange. Use school colors or your favorite team’s palette for a personal touch. With less than half a skein needed per hat, you can make many color variations.
Advanced Design Elements
Ready to take your crochet messy bun hat to the next level? Let’s explore some advanced crochet techniques that will elevate your creations. With over 5699 shares of crochet messy bun hat content, it’s clear these patterns are hot right now!
Complex messy bun hat patterns often include cables, lace, or tapestry crochet. These elements add texture and visual interest to your hat. Cables create a stunning twisted rope effect, while lace patterns introduce delicate, airy designs. Tapestry crochet allows you to work intricate color patterns into your hat.
To master these advanced crochet techniques, practice is key. Start with simple cable or lace patterns before moving on to more complex designs. Remember, even experienced crocheters with 40+ years of experience began as beginners. With dedication, you’ll soon be creating stunning, unique messy bun hats that stand out from the crowd.
- Experiment with cable patterns for a textured look
- Try lace designs for a delicate, feminine touch
- Use tapestry crochet to create colorful motifs
- Combine techniques for truly unique hats
As you explore these advanced design elements, don’t forget to consider practical aspects. The popularity of messy bun hats stems from their functionality. Ensure your complex patterns still allow for a comfortable fit and easy bun access. With practice, you’ll find the perfect balance between style and practicality in your crochet creations.
Making Your Hat Gift-Ready
Turn your crochet messy bun hat into a thoughtful gift with these creative ideas. Wrap your hat in a special way to make it extra special for the recipient. Here are some fun ways to present your messy bun beanie as a memorable gift.
Packaging Ideas
Wrap your gift wrap crochet hat in eco-friendly materials like kraft paper or fabric. Use ribbons made from natural fibers to tie a bow around the package. For a rustic touch, add a sprig of dried flowers or a small pine cone to the wrapping.
Adding Personal Touches
Make your present messy bun beanie unique with these personal touches:
- Attach a handwritten care instruction card
- Include a small bag of lavender to keep the hat fresh
- Add a matching crochet flower pin
- Wrap the hat around a pretty mug filled with hot cocoa mix
These thoughtful additions will make your gift wrap crochet hat stand out. They show the recipient how much you care. Your handmade present messy bun beanie will be cherished for years to come.
| Packaging Material | Eco-Friendly Option | Personal Touch |
|---|---|---|
| Kraft Paper | Recyclable | Stamped design |
| Fabric Wrap | Reusable | Embroidered recipient’s initials |
| Gift Box | Biodegradable | Hand-painted lid |
Time-Saving Tips and Tricks
Want to make your messy bun hat faster? Try these quick crochet tips. Use stitch markers to keep track of your rounds, especially in Round 1 with 54 to 66 stitches. This trick helps avoid counting mistakes and saves time.
Plan your color changes ahead of time to avoid breaks. If your hat is striped, sort your yarn before starting. For a medium hat needing 230 yards, divide your yarn into sections. This makes color changes smooth and keeps your crochet going without pause.
Learn to control your tension for faster crochet without losing quality. Aim for 5 1/2 rows and 6 back post double crochet (bpdc) stitches per 4 inches. Practice with scrap yarn first. Once you master it, your hook will move smoothly, saving you lots of time.