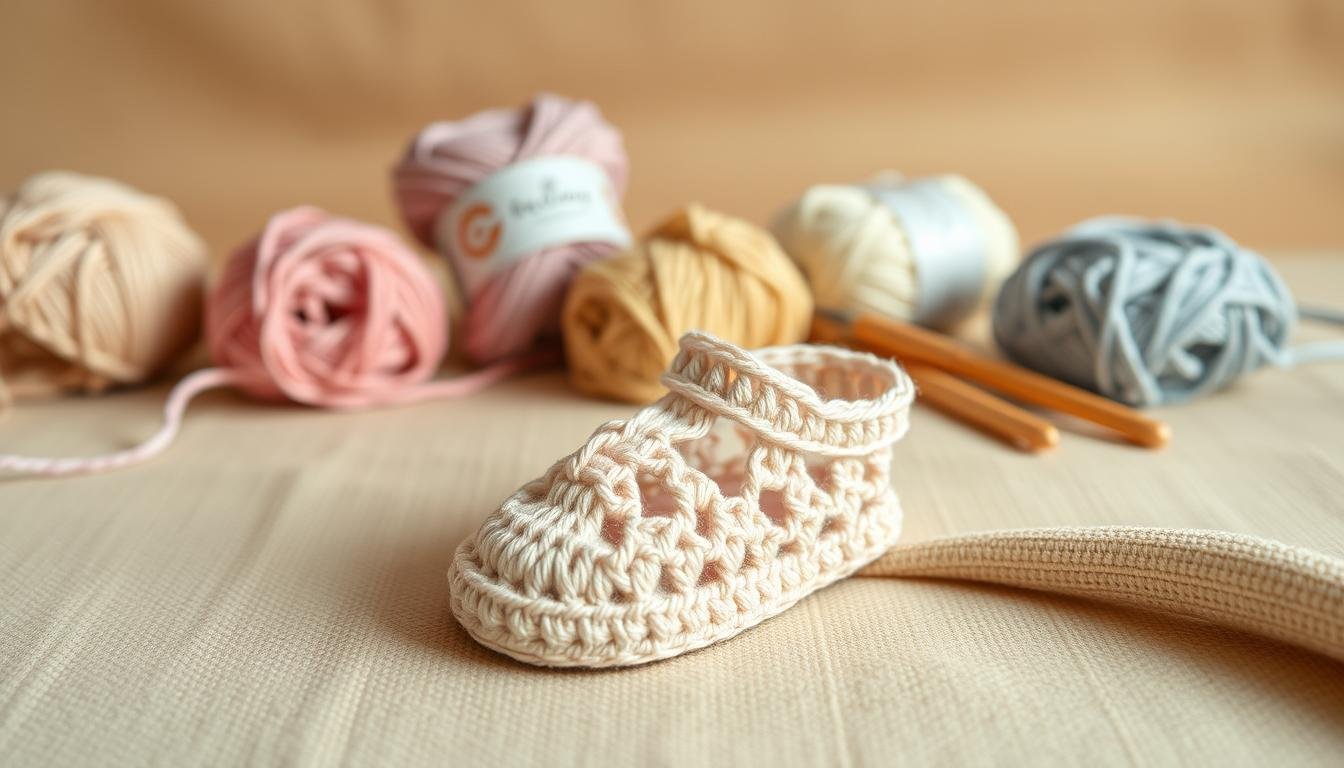
Want to make cute shoes for your baby? A free baby sandal crochet pattern is perfect. You’ll find 18 patterns for all skill levels and styles.
DIY baby sandals are fun and save money. They fit sizes from newborn to 12 months. You only need 30-40 yards of yarn for most designs.
Crocheting baby sandals is easy. Many patterns have step-by-step guides and photos. You can choose designs for both boys and girls, or add fun embellishments.
Ready to start crocheting baby sandals? With the right pattern and practice, you’ll make custom shoes soon. Let’s begin your DIY baby sandals adventure!
Getting Started with Baby Sandal Crochet
Ready to make adorable baby sandals? Let’s get the essential tools and materials ready. Crocheting baby sandals is fun and rewarding. It lets you create unique footwear for little ones.
Essential Tools and Materials
To start your baby sandal crochet journey, gather these key items:
- Crochet hooks (sizes 2.75 mm to 5 mm)
- Yarn for baby sandals (light DK to worsted weight)
- Scissors
- Stitch markers
- Tapestry needle
Choosing the Right Yarn Type
When picking yarn for baby sandals, choose soft, durable fibers. Cotton or acrylic blends are good choices. Lion Brand Baby Soft and Red Heart Super Saver are popular options.
The yarn weight affects the sandal’s texture and size. So, pick based on your pattern’s needs.
Understanding Hook Sizes
Crochet hook sizes are key to your project’s success. Smaller hooks (2.75 mm to 3.5 mm) make tighter stitches, perfect for newborns. Larger hooks (4 mm to 5 mm) are better for older babies.
Always check your pattern for recommended hook sizes. This ensures the perfect fit.
With these basics, you’re ready to start your baby sandal crochet project. Remember, practice makes perfect. So, don’t worry if your first try isn’t perfect. Happy crocheting!
Basic Crochet Techniques for Baby Sandals
Starting to make cute baby sandals means learning a few key stitches. Let’s explore the basic crochet techniques needed for these tiny shoes.
The single crochet stitch is the base for most baby sandal patterns. It makes a strong, tight fabric for the soles. Double crochet stitches are great for straps, giving a softer, more flexible feel. Slip stitches are used to join pieces and make smooth edges.

To shape your sandals, you’ll need to increase and decrease stitches. To increase, you work two stitches into one. Decreases are done by combining two stitches into one. These steps help you create the curved soles and tapered straps.
It’s important to keep your tension even for a neat look. Practice holding your yarn the same way to get consistent stitches. Don’t worry if it takes time to get faster and more consistent.
| Stitch Type | Common Use | Recommended Hook Size |
|---|---|---|
| Single Crochet | Soles | 3.5 mm (E) |
| Double Crochet | Straps | 3.75 mm (F) |
| Slip Stitch | Joining | 3.0 mm (D) |
Learning these basic stitches will prepare you for any baby sandal pattern. Practice each stitch, and soon you’ll be making adorable shoes for little ones.
Free Baby Sandal Crochet Pattern
Want to make adorable shoes for your little one? This free crochet pattern for baby sandals is great for beginners and experts. It’s quick and easy to make these cute summer shoes!
Pattern Difficulty Level
This pattern is for beginners. If you know basic stitches like single crochet and double crochet, you’re ready to go. Even if you’re new, we’ll help you through each step.
Size Guidelines
Our pattern has sizes from newborn to 24 months. Here’s a quick guide to help you choose the right size:
| Age | Sole Length |
|---|---|
| Newborn | 3 inches (8 cm) |
| 0-3 months | 3.5 inches (9 cm) |
| 3-6 months | 4 inches (10 cm) |
| 9-12 months | 4.5 inches (11.5 cm) |
| 12-24 months | 5 inches (12-13 cm) |
Step-by-Step Instructions
First, make the sole. You’ll need Light Weight #3 yarn and a 3.00 mm crochet hook. Start with a magic ring and work in rounds:
- Round 1: Make 28 single crochet stitches in the ring
- Round 2: Increase to 40 stitches
- Round 3: Increase to 52 stitches
For the straps, chain 8 for each front strap. The back heel uses 24 stitches. Remember to skip 1 stitch in rounds 2 and 3 of the heel part.

Follow these instructions carefully, and you’ll have a pair of cute baby sandals soon. Don’t forget to add some beads for extra sparkle!
Creating Perfect Soles for Baby Sandals
Making crochet sandal soles for your little one is a fun project. The secret to comfort is getting the baby foot measurement right and picking the best stitch techniques. Let’s explore how to make the best base for your baby’s summer shoes.
Measuring for the Right Fit
Getting the size just right is key for your baby’s comfort. Use a soft measuring tape to measure from heel to toe. For 0-6 months, aim for a sole length of about 9.5 cm (3.75 inches). For 6-12 months, increase to 11.0 cm (4.25 inches).

Sole Stitch Techniques
When crocheting baby sandal soles, use a tight stitch for a strong base. Single crochet is a good choice, with about 9 stitches equaling 2 inches. For a 3-6 month size, you’ll need up to 42 stitches in the final round of the sole.
| Age Range | Sole Length | Final Round Stitches |
|---|---|---|
| 0-6 months | 9.5 cm (3.75 inches) | Approx. 42 stitches |
| 6-12 months | 11.0 cm (4.25 inches) | Adjust according |
Don’t forget to use elastic yarn thread for extra stretch and comfort. This thin yet strong material keeps your crochet sandal soles secure on your baby’s feet. With these tips, you’ll make perfect soles for cute and useful baby sandals.
Designing Comfortable Straps

Making crochet sandal straps for your baby is a fun and creative task. You’ll want to focus on both style and comfort. Let’s look at some popular strap designs and techniques to keep your baby’s feet snug and secure.
Crisscross and gladiator styles are popular in baby sandal designs. They look cute and support active little feet. Use soft yarn that’s gentle on delicate skin. Aran or DK weight yarns are good choices for baby sandals.
Adding adjustable baby sandal straps is a smart idea. They let the sandals grow with your baby, making them last longer. Use button closures or small loops for adjustable straps.
| Strap Style | Features | Recommended Yarn |
|---|---|---|
| Crisscross | Secure fit, stylish look | Aran weight |
| Gladiator | Multiple straps, decorative | DK weight |
| T-strap | Simple, classic design | Worsted weight |
Before you start, measure your baby’s foot carefully. Most patterns for 0-6 month babies need a sole size of about 9.5 cm (3.75 inches). For a secure fit, aim for snug but not tight straps. Happy crocheting!
Adding Decorative Elements
Crochet sandal decorations can turn your baby’s shoes into cute fashion statements. Let’s look at some lovely embellishments for baby sandals to make them special.

Flower Embellishments
Crochet flowers are a favorite for baby sandal decorations. Use light yarn in different colors to make small flowers. Stick them on the straps or sides for a lovely summer vibe.
Bow Attachments
Bows bring elegance to baby sandals. Crochet small bows with thin yarn and put them on the sandals. Make sure they’re stuck well to avoid any safety issues.
Button Selection
Buttons are both useful and pretty. Pick flat, smooth buttons that won’t hurt baby’s feet. Sew them on tightly, matching your sandal’s colors.
| Decoration | Difficulty | Time to Make | Safety Considerations |
|---|---|---|---|
| Crochet Flowers | Easy | 15-20 minutes | Secure attachment |
| Bows | Medium | 10-15 minutes | Avoid loose ends |
| Buttons | Easy | 5 minutes | Choose flat, smooth types |
Always put safety first when decorating baby sandals. Make sure all decorations are stuck well and won’t be a choking risk. With these creative ideas, your handmade sandals will be both cute and one-of-a-kind!
Summer-Ready Baby Sandal Styles
Summer baby sandals are essential for your little one’s wardrobe. Crochet sandal designs mix style with comfort for tiny feet. You can find many options to make cute and practical footwear.
Look for various styles to fit your baby’s needs. You can choose from simple slip-ons to fancy gladiator designs. Popular colors include pink, blue, brown, and red, making it easy to match with any outfit.

Over 200,000 baby sandal patterns have been shared by crochet fans. With 27 free patterns, you can find something that matches your skill and style.
| Style | Features | Difficulty Level |
|---|---|---|
| T-strap Sandals | Adjustable fit, secure closure | Beginner |
| Flip-flops | Easy to slip on, perfect for beach days | Beginner |
| Gladiator Sandals | Intricate design, multiple straps | Intermediate |
| Flower Sandals | Decorative blooms, girly charm | Beginner to Intermediate |
These crochet sandal designs are both cute and practical. They’re great for outdoor play and can handle a bit of rough play. Make matching pairs for you and your baby to follow the mini fashionista trend this summer!
Customizing Colors and Patterns
Get creative with your baby sandal color schemes and make unique footwear for your little one. Customizing crochet patterns allows you to craft sandals that perfectly match any outfit or occasion. Let’s explore some exciting ways to personalize your baby’s sandals.
Color Combination Ideas
Try different yarn colors to create eye-catching baby sandal color schemes. Soft pink and mint green make a sweet look. For a bold style, mix bright yellow with navy blue.
You can also use variegated yarn to add a playful touch to your sandals.

Pattern Modifications
Customizing crochet patterns is easy and fun. Change up the sole design by using a different stitch pattern or adding texture. Modify the straps by making them thinner or wider.
You can even add cute details like tiny flowers or bows for extra flair.
Remember, when customizing crochet patterns, gauge is important. If you switch yarn weights, adjust your hook size to maintain the right fit. With 18 free baby sandal patterns available, you have plenty of options to inspire your creativity. Most patterns work well with DK or worsted weight yarn, giving you flexibility in your color choices.
By customizing colors and patterns, you’ll create one-of-a-kind sandals that reflect your baby’s personality. Don’t be afraid to mix and match ideas from different patterns to design the perfect pair of summer-ready baby sandals.
Troubleshooting Common Issues
Crochet troubleshooting is key when making baby sandals. Uneven stitches are a common issue. To fix this, keep your tension even. It’s okay if you’re new to crochet and your stitches vary a bit.
Sizing problems can also happen. A baby’s foot is about 15.5 cm long and 7.3 cm wide. If your sandal doesn’t fit, adjust your gauge. Make a gauge swatch first to match the pattern’s size.

Attaching straps can be tricky. Check that you’re hooking into the right stitch. You can also add extra stitches or use thicker yarn for the straps.
Don’t worry if you run into problems. Troubleshooting is all part of learning. With time, you’ll get better at fixing mistakes and making perfect sandals. It usually takes 1 to 2 hours to finish a pair, so enjoy the journey!
Size Adjustments and Modifications
Resizing crochet patterns for baby sandals can be tricky. But with the right approach, you can make perfect footwear for your little one. Let’s see how to adjust our pattern for different age groups using a baby sandal size chart as a guide.
Newborn Sizes
For newborns, use an F hook with fingering baby weight yarn. This combo makes tiny sandals that fit snugly on those precious little feet. Reduce the stitch count in each round by about 20% from the base pattern to get the right size.
3-6 Months Adjustments
To fit babies aged 3-6 months, try different hook and yarn combinations. A G hook (4.0mm) with light worsted weight yarn often works well. Increase the stitch count slightly from the newborn size, focusing on lengthening the sole by adding 1-2 extra rounds.
6-12 Months Modifications
For older babies, stick with the G hook but use a slightly thicker yarn. Increase the stitch count in each round by about 15% from the base pattern. Pay special attention to the strap length, making it adjustable with two buttons for a perfect fit as your baby grows.
Remember, every baby is unique. Always measure your little one’s feet and compare them to a reliable baby sandal size chart when resizing crochet patterns. This ensures comfortable, adorable sandals that fit just right.
Care Instructions for Crocheted Sandals
Washing and keeping up your crochet sandals is key for their life span. Your little one’s handmade shoes need special care to stay cute and fresh. Here are some easy tips to keep your crochet sandals looking great.
When washing, use lukewarm water and a soft detergent. Stay away from harsh chemicals that can harm the fibers. Gently hand wash the sandals, squeezing out water without wringing. This keeps their shape and prevents them from stretching.

Drying is just as important for baby footwear. Let the sandals air dry flat on a towel, away from sunlight or heat. This stops colors from fading and the fabric from weakening. While damp, reshape the sandals to keep their original shape.
Storing your crochet sandals right is also vital. Keep them in a cool, dry spot when not wearing. Don’t use plastic bags, as they can hold moisture. Instead, use breathable bags or shoe boxes with tissue paper inside.
By following these simple care tips, your crochet baby sandals will be a treasured keepsake for years. Remember, gentle care and proper maintenance are the secrets to beautiful, long-lasting baby footwear.
Tips for Perfect Finishing
Finishing your crochet projects is key to making baby sandals special. With a few simple steps, you can turn your creations into something truly unique. Let’s look at some important steps to improve your crochet skills.
Weaving in Ends
Loose ends can mess up your hard work. Use a tapestry needle to weave yarn tails into stitches. Move in one direction, then reverse for extra security. Cut any leftover yarn close to the fabric. This small step makes a big difference in your sandals’ look.
Blocking Techniques
Blocking your baby sandals is essential for a professional finish. Gently wash them in lukewarm water with mild detergent. Then, reshape and pin them to a foam board, matching the size you’re making:
- 0-3 months: 3 3/4 inches long, 2 inches wide
- 3-6 months: 4 1/4 inches long, 2-1/4 inches wide
- 6-9 months: 4 1/2 inches long, 2-1/4 inches wide
- 9-12 months: 5 inches long, 2-1/4 inches wide
Let them air dry completely. This even out stitches and sets the shape, giving your sandals a polished look.
Remember, these finishing touches can make your crochet baby sandals go from cute to irresistible. With 1641 shares of popular crochet baby sandal patterns, it’s clear that paying attention to detail is important. Happy crocheting!
Creating Sets and Matching Accessories
Expand your crochet skills by making adorable baby sets and matching accessories. These charming items make your handmade gifts special, perfect for any occasion.
Start with a cozy baby coat. Use 200 grams of King Cole Big Value Baby DK yarn in your main color and 100 grams in a contrasting shade. You can make a 16-inch chest coat for a 0-3 month baby. The coat is about 11 inches from shoulder to hem, with 6-inch sleeves.
Match the coat with a ski hat. Start with 70 double crochet stitches and work 11 rows to shape it. For tiny feet, crochet booties starting with 27 double crochet stitches. Work 8 rows for the upper part, then shape the sole with 45 single crochet stitches, decreasing to 37 stitches by the fifth row.
Don’t forget practical accessories like bibs and pacifier clips. These items make daily life easier and add a personal touch to your baby’s outfit. With 8337 social media shares, these crochet baby sets are clearly loved by crafters and parents alike.
Remember, creating matching baby accessories is not just about style. It’s about crafting treasured keepsakes that may become family heirlooms. So grab your hooks and yarn, and let your creativity shine in these delightful baby projects!
Gift Packaging and Presentation Ideas
Make your crochet gifts stand out with creative packaging. Your handmade baby sandals need a special touch. Wrap them in soft tissue paper and put them in a DIY crochet gift box.
For a small box, you’ll need about 120 yards of yarn and a 3.5 mm hook. The box is 4″ x 5″ x 4″, perfect for these tiny treasures.
Think outside the box when presenting your handmade baby items. Create a diaper bouquet with rolled-up diapers as “flowers.” Place your crocheted sandals in the center. This gift is both practical and a lovely decoration for the baby shower.
It’s a favorite among new parents, blending usefulness with beauty.
For an eco-friendly choice, make a reusable gift basket. Use soft, washable fabric to create a divided caddy. Fill each section with baby essentials like wipes, lotion, and your crocheted sandals.
This thoughtful packaging shows you care for the baby and the environment. Your presentation can be as unique and personal as the sandals themselves.