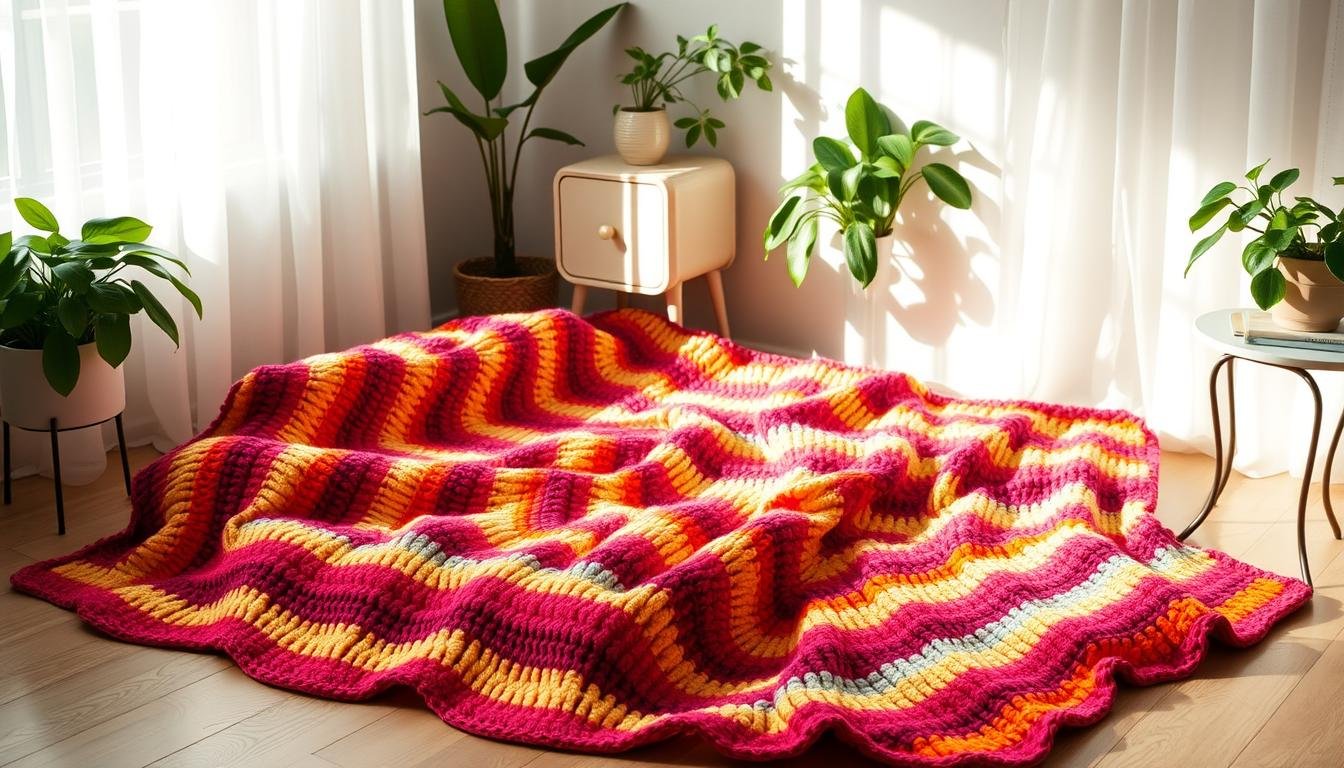
Welcome to the world of rainbow crochet blankets! Start a colorful journey with our free Piper Rainbow Blanket pattern. It’s great for adding a splash of color to your home or making a special gift.
This pattern is inspired by a child’s love for drawing rainbows. It brings joy and warmth to any room. Our rainbow collection has over 30 crochet patterns to inspire your next project.
The Piper Rainbow Crochet Blanket is for all crocheters. It doesn’t matter if you’re experienced or just starting. This free pattern helps you make a beautiful 50-inch blanket with seven bright colors.
Big Twist Soft yarn makes the blanket cozy and durable. The pattern has 57 rows, with stitch counts that grow to form the rainbow shape. Get ready to explore a world of color and creativity with this easy DIY guide!
Introduction to Rainbow Blanket Crochet Magic
Rainbow crochet projects add joy and color to any room. The Piper Rainbow design is a standout, loved by many. It combines half double crochet and puff stitches for a special texture.
The Joy of Rainbow Crochet
Crocheting with rainbow colors is fun. Each stitch adds a new color, making a happy palette. The Piper Rainbow blanket is 105 cm x 140 cm, great for snuggling or as a throw.
Why Choose Piper Rainbow
The Piper Rainbow design is a new twist on classic crochet. It uses 75 different yarn colors for a rich look. You can get creative with color placement, making each blanket unique.
Skill Level and Time
This project is for all skill levels. Beginners can practice basic stitches, while experts enjoy the color play. The blanket has 165 squares, each 9.5 cm x 9.5 cm. It takes several weeks to complete, depending on your speed.
- Total weight: Approximately 1 kilogram
- Yarn usage: 1-5 times per color
- Hook size: 3.25 mm (US 3)
Start a colorful crochet journey with the Piper Rainbow blanket. It’s a mix of skill-building and creativity.
Required Materials and Tools
To make your Piper Rainbow Blanket, you need the right crochet materials. Let’s look at what you’ll need for this colorful project.
Yarn Selection and Quantities
Big Twist Soft yarn is recommended for this pattern. It’s a medium-weight, 100% acrylic yarn great for blankets. You’ll need seven colors: violet, rose, blush, light grey, charcoal, taupe, and cream. Each color brings a unique touch to your rainbow.
Hook Size and Additional Supplies
A size J crochet hook is best for this project. It works well with medium-weight yarn, making a nice texture. You’ll also need scissors for cutting yarn ends and a tapestry needle for weaving them in.
Color Combinations Guide
The rainbow effect comes from choosing the right yarn colors. Here’s a quick guide to help you plan:
- Start with violet for a bold beginning
- Transition to rose and blush for softer tones
- Use light grey as a neutral break
- Add depth with charcoal
- Blend in taupe for warmth
- Finish with cream for a light, airy touch

You can adjust these colors to fit your taste. The goal is to create a pleasing gradient effect that captures the essence of a rainbow. With these materials ready, you’re all set to start your crochet journey!
Piper Rainbow Crochet Blanket Free Pattern
Get ready to dive into the colorful world of rainbow crochet with our Piper Rainbow Blanket pattern! This eye-catching design brings joy and warmth to any room. Our step-by-step crochet pattern instructions make creating this stunning piece a breeze.
Start by chaining 150 stitches using your first color. Work a row of single crochet, then switch to half double crochet for the body of the blanket. Change colors every two rows to create the rainbow effect. The pattern uses a simple repeat of 2 rows per color: 1 row of half double crochet, followed by 1 row of puff stitches.

Continue this pattern, switching colors in this order: red, orange, yellow, green, blue, indigo, and violet. Repeat the color sequence four times for a full-sized blanket. End with a row of single crochet in your final color. Add a simple border by working two rounds of single crochet around the entire blanket.
This rainbow blanket pattern is perfect for beginners and experienced crocheters alike. It’s a great way to practice color changes and basic stitches while creating a beautiful, functional piece. Happy crocheting!
Essential Stitch Techniques
Mastering crochet techniques is key to creating a stunning Piper Rainbow Crochet Blanket. Let’s dive into the essential stitches you’ll need for this project.
Half Double Crochet Method
The half double crochet is a versatile stitch that creates a firm fabric. To work this stitch:
- Yarn over
- Insert hook into next stitch
- Yarn over and pull through
- Yarn over again
- Pull through all three loops on your hook
Puff Stitch Tutorial
The puff stitch adds texture and dimension to your blanket. Here’s how to create it:
- Yarn over
- Insert hook into stitch
- Yarn over and pull through
- Repeat steps 1-3 three more times
- Yarn over and pull through all 9 loops on your hook
- Chain 1 to secure the puff

Back Loop Stitching Guide
Back loop stitching creates a ribbed texture. To work this technique:
- Identify the back loop of the stitch
- Insert your hook into only the back loop
- Complete your chosen stitch as normal
Practice these crochet techniques to ensure even stitches and consistent tension. With these skills, you’ll be ready to tackle the Piper Rainbow Crochet Blanket pattern with confidence.
Pattern Abbreviations and Terms
Learning crochet abbreviations and terms is crucial for making your Piper Rainbow Crochet Blanket. Let’s explore the key crochet abbreviations found in this pattern.

Crochet terminology might seem like a secret code at first. But don’t worry! We’ve got a handy guide to common crochet abbreviations for you.
| Abbreviation | Meaning |
|---|---|
| bl | back loop |
| ch | chain |
| hdc | half double crochet |
| ps | puff stitch |
| sc | single crochet |
Knowing these crochet abbreviations will make following the pattern easier. Remember, the more you practice, the better you’ll get! As you work on your rainbow blanket, you’ll get more comfortable with these terms. Soon, reading crochet patterns will feel natural to you.
This pattern has been shared over 1049 times, helping many crocheters make stunning rainbow blankets. Whether you’re making a small blanket for a newborn or a bigger one for a toddler, these abbreviations will help you through each colorful row.
Color Planning and Organization
Crochet color planning is key for a stunning Piper Rainbow Crochet Blanket. The right colors can make your project stand out. Let’s look at planning your rainbow colors and mastering color transitions.
Rainbow Color Sequence
The classic rainbow color sequence is at the heart of this blanket. You’ll use seven colors: violet, rose, blush, light grey, charcoal, taupe, and cream. This mix gives a soft, modern twist to the traditional rainbow.
| Color | Yarn Brand | Shade Name |
|---|---|---|
| Violet | Paintbox Yarns | Wisteria Purple |
| Rose | Paintbox Yarns | Dusty Rose |
| Blush | Paintbox Yarns | Peach Blossom |
| Light Grey | Paintbox Yarns | Stormy Grey |
| Charcoal | Paintbox Yarns | Granite Grey |
| Taupe | Paintbox Yarns | Coffee Bean |
| Cream | Paintbox Yarns | Vanilla Cream |
Alternative Color Schemes
You can make your blanket your own with different color schemes. Try a monochromatic palette or colors that match your home. The 30 Day Craft Project has ideas like “Whatever the Weather” and “Sensational Stripes.”
Color Transition Tips
Smooth color transitions are essential for a professional look. Start each new color at the row’s start. Weave in ends as you go to reduce finishing work. Use a color planning app to see your transitions before starting.

Your color choices can show themes like “Love Letters” or “Family Ties.” This adds personal meaning to your project. With these tips, you’re set to make a beautiful, unique Piper Rainbow Crochet Blanket.
Step-by-Step Rainbow Construction
Ready to make your Piper Rainbow Crochet Blanket? Let’s start the assembly! This journey will turn your yarn into a colorful masterpiece. It’s perfect for brightening any room or as a special gift.
Begin with a foundation chain, the right length for your blanket. Aim for 36 inches wide for a standard baby blanket. Start your first row with half double crochet stitches across the chain.
As you go, add new colors for the rainbow effect. Keep your stitches even for a neat look. Change colors at the end of each row for clean transitions.

To make the rainbow’s arch, increase stitches in certain rows. Follow the pattern and count your stitches for accuracy. The puff stitch sections add texture and depth to your blanket.
As you near the end, your rainbow will start to show. Take breaks if needed, but enjoy watching it grow. Soon, you’ll have a beautiful rainbow blanket ready for its final touches!
Border Creation and Finishing
The last steps to finish your Piper Rainbow Crochet Blanket include adding a crochet border, weaving in ends, and blocking. These steps make your blanket look amazing.
Border Pattern Instructions
The pattern has a two-round border with cream-colored yarn. It’s simple yet beautiful, matching the rainbow design perfectly. For the first round, crochet single crochet stitches around the blanket. In the second round, add a picot edge for texture.
Weaving in Ends
Weaving in ends is key for a neat and durable finish. Use a tapestry needle to thread yarn tails through several stitches. Make sure to weave ends in the same color section to hide them.

Blocking Techniques
Blocking crochet makes your stitches even and looks better. Pin your blanket flat, spritz with water, and let it dry. This will give your blanket a professional look, about 50 inches wide and tall.
| Finishing Step | Technique | Purpose |
|---|---|---|
| Crochet Border | Two-round edge in cream | Frame the blanket design |
| Weaving in Ends | Use tapestry needle | Secure loose yarn tails |
| Blocking | Pin, dampen, and dry flat | Even out stitches and shape |
Customization Options and Size Modifications
The Piper Rainbow Crochet Blanket lets you add your own touch. You can make it smaller or bigger, from a cozy throw to a large bedspread. It starts at 50″ across and 50″ tall, but you can change these sizes to fit your space.
To change the blanket’s size, start with the number of starting chains. For a bigger blanket, add more chains. To make it taller, add more rows. Keep the rainbow’s look as you adjust the size.
| Size | Starting Chains | Total Rows | Approx. Dimensions |
|---|---|---|---|
| Baby Blanket | 120 | 60 | 30″ x 30″ |
| Throw | 180 | 90 | 45″ x 45″ |
| Standard (Original) | 200 | 100 | 50″ x 50″ |
| Twin Bed | 240 | 120 | 60″ x 60″ |
| Queen Bed | 320 | 160 | 80″ x 80″ |
Think about your yarn and hook size when customizing. These can change the blanket’s size. Always make a gauge swatch first. This way, you can make a rainbow blanket that’s just right for your space.
Care Instructions and Maintenance
Your Piper Rainbow Crochet Blanket needs the right care to stay bright and soft. Let’s look at how to keep it in top shape.
Washing Guidelines
When washing crochet items, be gentle. For your Big Twist Soft yarn blanket, use cool water and a mild detergent. You can hand wash it or use a delicate cycle in your machine.
Don’t use harsh agitation to avoid stretching or damaging the stitches.
Storage Recommendations
Storing crochet items right is key to keeping them lasting. Fold your blanket loosely to avoid creases. Store it in a cool, dry place, away from direct sunlight.
Use a breathable cotton bag or pillowcase to keep it dust-free and pest-free.
Long-term Care Tips
To keep your crochet blanket in great shape, air it out regularly. Clean small stains right away. Don’t hang heavy blankets, as they can lose their shape.
By following these easy steps, your Piper Rainbow Blanket will stay a vibrant comfort for many years.

| Care Aspect | Recommendation |
|---|---|
| Washing Frequency | Every 3-4 months or as needed |
| Drying Method | Lay flat to air dry |
| Storage Container | Cotton bag or pillowcase |
| Maintenance Schedule | Monthly inspection for repairs |
Troubleshooting Common Issues
Crochet troubleshooting is key for making your Piper Rainbow Blanket. Even pros face new pattern challenges. Let’s look at common problems and how to solve them to keep your project going.

Uneven edges can be a pain. To fix, count your stitches at the end of each row. Make sure you’re working into the right stitch, especially the first and last ones. If your blanket curves, try adjusting your tension or using stitch markers.
Color transitions can be tricky. Plan your color changes to end a row for a cleaner look. When switching colors, leave a longer tail to weave in later. This secures the new color and prevents gaps.
Tension issues are common in big projects. Take breaks to rest your hands and keep even pressure. If you notice differences, try blocking your work. This technique evens out stitches and can fix minor flaws.
- Count stitches regularly
- Use stitch markers for consistency
- Practice color changes before starting
- Take breaks to maintain even tension
- Block your work for a professional finish
Remember, perfection isn’t the goal. Each stitch adds character to your unique creation. With these tips, you’ll overcome obstacles and create a beautiful rainbow blanket you’ll cherish for years.
Project Inspiration and Display Ideas
Your Piper Rainbow Crochet Blanket is a vibrant masterpiece that deserves to shine. Let’s explore creative ways to showcase your colorful creation. We’ll turn it into a stunning crochet project display.
Styling Suggestions
Transform your living space with your rainbow blanket. Drape it over a neutral-colored couch for a pop of color. Or use it as a cheerful wall hanging.
In a child’s room, fold it at the foot of the bed for a cozy touch. For a playful twist, create a reading nook by hanging it as a canopy.
Gift-Giving Tips
The Piper Rainbow Blanket makes a perfect gift for various occasions. For baby showers, pair it with a matching stuffed animal. When gifting for birthdays, roll the blanket and tie it with a ribbon, adding a personalized tag.
Remember, this blanket is soft and washable. It’s ideal for children’s beds or play mats.
Photography Ideas
Capture the beauty of your creation through photographing crochet. Use natural light to showcase the vibrant colors. For texture, take close-ups of the intricate stitches.
Create a cozy scene by photographing the blanket with a cup of tea and a book. Don’t forget to share your photos online to inspire fellow crocheters!
- Use a plain background to make colors pop
- Experiment with folding techniques to highlight patterns
- Include props that complement the rainbow theme
- Try different angles to capture the blanket’s full beauty
Pattern Notes and Special Instructions
Starting your Piper Rainbow Crochet Blanket? Make sure to follow these crochet pattern notes and special instructions. The pattern is for all skill levels, making a beautiful 50-inch square blanket. You’ll need 7 skeins of Big Twist Soft yarn in different colors, each costing $4.99.
It’s important to keep the gauge right: 13 stitches by 7 rows should equal 4 inches square. The pattern has 57 rows, including the border. Start with 148 stitches in Row 1, increasing to 310 stitches by Row 56. For Row 1, work in the back bump after chaining 73. These special crochet instructions help keep your blanket’s shape and texture.
The pattern uses half double crochet and puff stitch techniques. When making the border, follow the specific stitch counts for each round. By following these crochet pattern notes, you’ll make a stunning rainbow blanket that looks just like the original. Happy crocheting!