Get ready to enjoy the cool autumn air with our pumpkin beanie crochet pattern! It’s a lovely fall accessory for all crafters. It comes in seven sizes, from premature baby to adult, so it fits everyone in your family.
This cozy beanie is made using a top-down method. It has front post stitches that give it a pumpkin-like texture. The pattern is easy to follow, even for beginners who want to learn more.
Our pumpkin beanie is a great addition to your fall crochet collection. You only need one ball of main color yarn and a little for the stalk and leaf. This makes a stylish autumn accessory that’s both useful and cute.
Whether you’re getting ready for Halloween, going to a fall festival, or just want to add some seasonal flair to your outfit, this beanie is perfect. Let’s get started on making your new favorite autumn hat!
Why This Pumpkin Beanie Is Perfect for Autumn
The Pumpkin Beanie crochet pattern is a must-have for autumn. It captures the essence of fall, making it perfect for the season. Let’s explore why this beanie is the ideal autumn companion.
Seasonal Appeal and Versatility
This pumpkin-inspired hat is versatile for fall. It’s not just for Halloween; you can wear it all autumn. The pattern comes in sizes from newborn to adult large, so everyone can enjoy it.
With 10 sizes, it fits head circumferences from 12″ to 21″. It’s perfect for family crafting.
Comfort and Style Features
This beanie is made with Big Twist Value yarn, ensuring comfort and durability. The 100% acrylic material is soft and easy to care for. The design, with a ribbed band and textured body, adds interest while keeping you warm.
It comes in heights from 5″ for newborns to 8″ for adults. This makes it perfect for autumn wear.
Customization Options
This pattern is flexible, allowing for customization. You can adjust colors to match your style. The main color can be any autumn shade, and the stem and leaf details add a playful touch.
Whether for yourself or as a gift, this pattern lets you add personal flair in every stitch.
| Size | Circumference | Height | Yarn Required |
|---|---|---|---|
| Newborn | 12″ (30.5 cm) | 5″ (13 cm) | 85 yd (78 m) |
| Adult Medium | 21″ (53.5 cm) | 8″ (20.5 cm) | 250 yd (228.5 m) |
This Pumpkin Beanie is perfect for autumn with its charm, comfort, and customization. It’s a great pattern for crafters of all levels. It adds a touch of fall to your wardrobe.
Essential Materials and Tools Needed
Getting the right crochet supplies is key for your perfect pumpkin beanie. Let’s look at what you need to start this cozy fall project.
Recommended Yarn Types
Choose a yarn that’s soft and strong for your beanie. Brava Worsted yarn is a great pick. You’ll need one ball of color A (like Persimmon) and about 10g of color B for the stalk and leaf. This yarn has clear stitch definition and comes in autumn colors.
Hook Size Requirements
The right crochet hook sizes are vital for the perfect texture. A 5mm (H/8) hook is best for this pattern. Remember, smaller hooks make tighter stitches, and larger ones make looser fabric.

Additional Notions
Don’t forget these extras for your crochet supplies:
- Stitch markers
- Tapestry needle for weaving in ends
- Scissors
- Measuring tape
With these materials, you’re ready to make a charming pumpkin beanie. Remember, gauge is important. Aim for 3 clusters x 6 rounds to equal 2 inches (5 cm). Happy crocheting!
Skill Level and Techniques Overview

The cozy pumpkin beanie pattern is great for those wanting to learn more crochet skills. It’s easy for beginners but also introduces some advanced stitches. You’ll get to practice post stitches, which give the pumpkin its unique look.
This pattern looks fancy but is easy to make. Most sizes can be done in about 1.5 hours. It uses simple stitches like the chain, single crochet, and slip stitch. This makes it easy for beginners to follow along.
Here’s a breakdown of the key techniques you’ll encounter:
- Chain stitch: Forms the foundation of your beanie
- Single crochet: Creates the main body of the hat
- Slip stitch: Used for joining rounds and creating subtle texture
- Post stitches: Adds depth and creates the pumpkin’s signature ridges
The pattern offers sizes for everyone, from preemie to extra-large adult. Each size needs a different amount of yarn. This lets you practice on different scales, improving your skills with each project.
Complete Pumpkin Beanie Crochet Pattern
Get ready to craft the perfect autumn accessory with this pumpkin hat crochet tutorial. Our pattern is for crafters of all skill levels. From beginners to seasoned pros, you’ll find it easy to follow. Let’s dive into the crochet pattern instructions that will guide you through creating a cozy and stylish pumpkin beanie.

Crown Instructions
Start your pumpkin beanie at the top. Use a 5 mm hook and orange yarn. Create a magic ring and work 6 single crochet stitches into it. Increase in each stitch around for the next round.
Continue increasing evenly until you reach the desired crown size for your chosen hat dimensions.
Body Construction
Switch to a 5.5 mm hook for the body. Work even rounds of single crochet in the back loop only. This technique creates the signature ridges that give your beanie its pumpkin-like texture.
Repeat these rounds until your hat measures about 1 inch less than the desired finished height.
Ribbing Details
For a snug fit, we’ll use ribbed crochet techniques. Change back to your 5 mm hook. Work alternating front post double crochet and back post double crochet stitches. This creates a stretchy ribbed band that hugs the head comfortably.
| Size | Circumference | Height |
|---|---|---|
| Newborn | 12″ (30.5 cm) | 5″ (13 cm) |
| Adult Large | 22″ (56 cm) | 8.25″ (21 cm) |
Remember, gauge is key for the right size. Our pattern uses Big Twist Value yarn. You’ll need about 85 yards for a newborn size and up to 250 yards for an adult large. Happy crocheting!
Size Guide and Measurements
Mastering crochet hat sizing is key for the perfect pumpkin beanie. This pattern fits everyone from tiny babies to adults. Let’s look at the measurements for each size to make sure your hat is cozy and fits well.
Baby Sizes (0-24 months)
For the littlest pumpkins, we have three sizes:
- Small (0-3 months): 12-14″ circumference, 4.5-6″ height
- Medium (3-6 months): 14-15″ circumference, 6-6.25″ height
- Large (6-12 months): 16-17″ circumference, 6.25-6.5″ height
Children’s Sizes (2-12 years)
As kids grow, so do their hats. We have two sizes for older children:
- Toddler (1-3 years): 17-18″ circumference, 7.25-7.5″ height
- Child (3-10 years): 19-20″ circumference, 7.5-8″ height
Adult Sizes (S-XL)
For grown-ups, sizes range from 20-23″ in circumference and 8-9.5″ in height. This range fits most adult head sizes comfortably.

Remember, these pumpkin beanies stretch 1-2 inches for smaller sizes and 2-4 inches for larger sizes. If you’re between sizes, size up for a cozier fit. With this guide, you’ll crochet the perfect pumpkin beanie for everyone on your fall gift list!
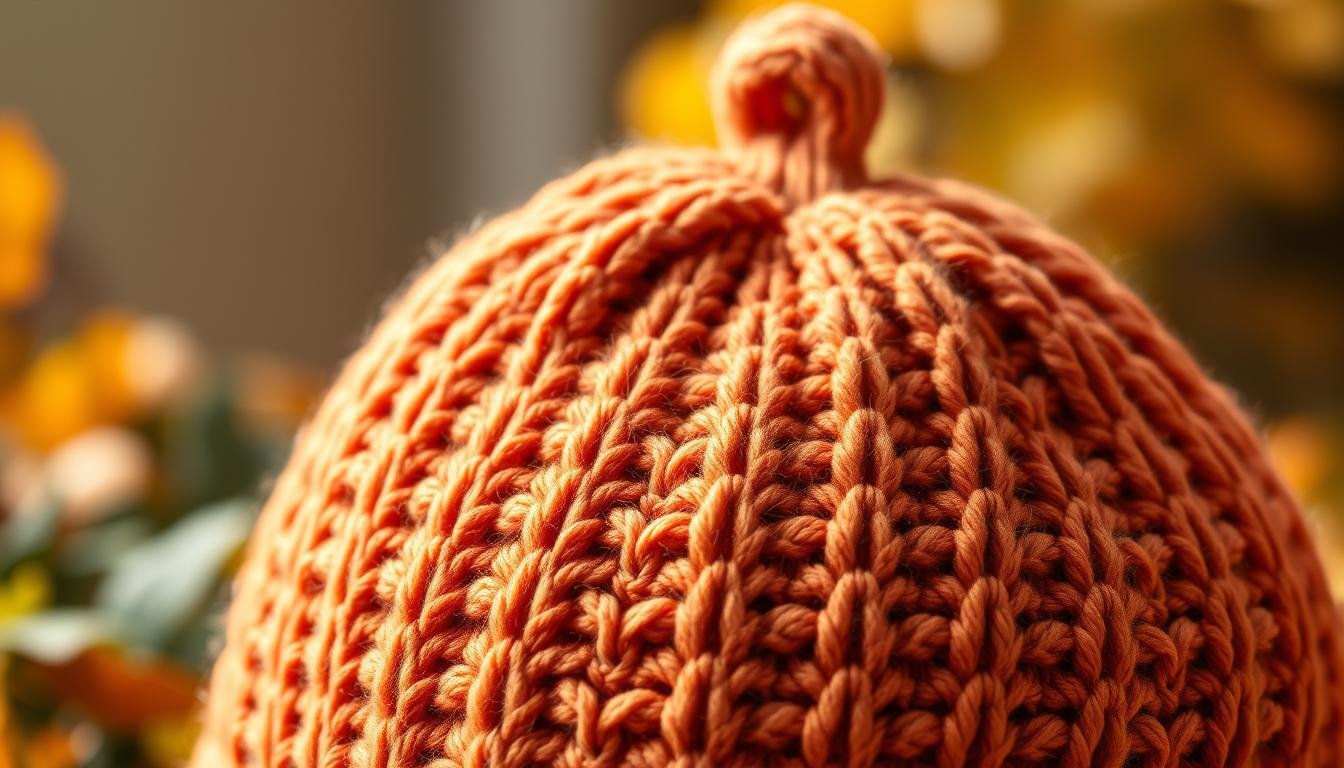
Creating the Signature Pumpkin Texture

The heart of your pumpkin beanie is its unique texture. You’ll use front post stitches to create this eye-catching look. These stitches add depth and shape your beanie into a realistic pumpkin form.
To get the perfect pumpkin texture, work front post double crochets (fpdc) around your previous row’s stitches. This creates raised ridges that look like a pumpkin’s natural grooves. Keep your tension even for the best results.
Here’s a breakdown of the stitch pattern:
- Round 1: 6 double crochets into a magic ring
- Round 2: 6 front post double crochets around
- Continue this pattern, increasing stitches as needed for size
The number of rounds changes with your chosen size. A medium adult beanie usually needs about 5 rounds for the stem. As you work these crochet stitch patterns, your pumpkin shape will emerge. It will turn a simple beanie into a charming fall accessory.
Getting good at these textured stitches takes practice. Don’t worry if your first try isn’t perfect – each pumpkin is unique, just like in nature!
Stalk and Leaf Assembly Guide
Let’s add the finishing touches to your pumpkin beanie. We’ll use crochet embellishments to bring it to life. This guide will show you how to make and attach the stalk and leaf. Your hat will then become a festive autumn accessory.
Stalk Construction
Begin by crocheting the stalk with Color A (Chocolate). Use joined rounds to create a tapered shape. For a 3-5 year size, start with 10 double crochet stitches. Work up to 55 stitches in the final round. Adjust for smaller sizes as needed.
Leaf Pattern
Make a charming leaf with this simple pattern:
- Chain 12 with Color C (Kelly Green)
- Single crochet in second chain from hook
- Half double crochet in next chain
- Double crochet in next 3 chains
- Half double crochet in next chain
- Single crochet in last 5 chains
- Chain 1 and turn
- Repeat steps 2-7 for the other side of the leaf
Attachment Methods
To secure your crochet pieces, follow these steps:
- Position the stalk at the crown of the beanie
- Use a tapestry needle and matching yarn to sew around the base of the stalk
- Attach the leaf near the stalk, angling it slightly
- Add small vine tendrils by chaining 5-7 stitches and securing them around the leaf

You can customize the size of your embellishments for different beanie sizes. A larger beanie might need a taller stalk and bigger leaf. Smaller sizes can have more delicate additions.
| Size | Stalk Height | Leaf Length |
|---|---|---|
| 0-6 Months | 1.5 inches | 2 inches |
| 1-2 Years | 2 inches | 2.5 inches |
| 3-5 Years | 2.5 inches | 3 inches |
Color Selection and Combinations
Choosing the right crochet colors for your pumpkin beanie is key. Autumn colors offer a wide range of options. From classic orange to unique hues, let’s dive into some exciting choices for your fall project.
Traditional pumpkin colors like deep orange or persimmon are iconic. For a softer look, try earthy tones like rust, terracotta, or golden yellow. These colors bring the feel of fall and add versatility to your wardrobe.
When picking yarn colors, think about colors for the stalk and leaf too. Deep greens look great with orange, and brown tones add a natural feel. For something different, try pairing purple and gold or burgundy and teal.
| Main Color | Accent Colors | Style |
|---|---|---|
| Persimmon | Dublin, Fig, Brindle | Classic Autumn |
| Deep Teal | Pumpkin, Light Grey | Modern Fall |
| Burgundy | Gold, Forest Green | Rich Harvest |
| Mustard | Cream, Rust | Vintage Inspired |
Your color choices can turn the beanie into a fall accessory, not just a Halloween item. Try out different yarn colors to make a pumpkin beanie that shows off your style and autumn spirit.
Troubleshooting Common Issues
Crochet troubleshooting is key for pumpkin beanie makers. We’ll look at common problems and how to fix them. This way, your project will be perfect.
Tension Problems
Keeping your stitches even is vital. If they’re not, try these tips:
- Practice holding your yarn with the same tension throughout
- Use stitch markers to keep track of your progress
- Take breaks to avoid hand fatigue, which can affect tension
Sizing Adjustments
Changing sizes in crochet patterns is common. If your beanie doesn’t fit right:
- Check your gauge against the pattern’s recommended 4×4 inch square
- Adjust your hook size up or down to match the gauge
- Add or reduce rounds in the body for a perfect fit
Pattern Modifications
Customizing your pumpkin beanie is fun. Here are some ideas:
- Experiment with different stitch combinations for texture
- Try color changes to create stripes or ombre effects
- Modify the stalk and leaf for a unique look

| Issue | Solution |
|---|---|
| Uneven stitches | Practice consistent tension |
| Incorrect size | Check and adjust gauge |
| Boring design | Modify pattern creatively |
Remember, getting better at crochet troubleshooting takes practice. Don’t be afraid to try new things. Make your pumpkin beanie truly unique!
Finishing Touches and Blocking

Your Cozy Pumpkin Beanie is almost ready! First, weave in all loose ends carefully. This step is key for a neat look and to stop it from unraveling. Make sure each end is well hidden in the stitches.
Now, let’s shape your crochet hat with blocking. This technique keeps your beanie in shape. Soak your beanie in lukewarm water with a bit of wool wash. Then, lay it flat on a towel and shape it as you want.
To get that pumpkin shape, stuff the beanie with a towel while it dries. This makes your stitches look better. Remember, blocking is very important for hats because they need to fit right.
- Use stitch markers to align key points during blocking
- Allow 24-48 hours for complete drying
- Avoid direct sunlight or heat sources while drying
After it dries, your Cozy Pumpkin Beanie will look amazing. It’s perfect for fall or as a gift. These finishing steps make your crochet look like it was made by a pro, showing off your skill and care.
Care Instructions and Maintenance

Your pumpkin beanie needs the right care to stay cozy and cute. Here are some yarn care tips to keep your hat looking fresh.
Washing your crochet hat is easy with the right method. Hand wash it in cool water with a gentle detergent. Don’t wring or twist it, as this can change its shape. Instead, press out water and lay it flat to dry.
To store it, stuff the hat with acid-free tissue paper to keep its shape. Store it in a cool, dry place, away from sunlight to prevent fading. These steps help keep your crochet projects looking good for a long time.
| Care Step | Instructions |
|---|---|
| Washing | Hand wash in cool water with gentle detergent |
| Drying | Press out water, lay flat to dry |
| Storage | Stuff with tissue paper, store in cool, dry place |
| Refreshing | Steam lightly to revive shape and texture |
The Brava Worsted yarn used in this pattern is durable and washable. This means your pumpkin beanie can handle regular wear and cleaning. By following these care tips, your festive hat will stay in great shape for many fall seasons.
Seasonal Styling Ideas
Your cozy pumpkin beanie is perfect for fall. It can make your autumn outfits stand out. Let’s look at some fun ways to wear it.
Halloween Outfit Pairings
Make your pumpkin beanie a key part of your Halloween look. Match it with an orange sweater and black leggings for a cute jack-o’-lantern vibe. For a garden theme, wear it with green clothes and add leaf shapes.
Fall Festival Looks
Wear your pumpkin beanie to fall events. Pair it with a chunky cardigan, jeans, and boots for a cozy look. Add a plaid scarf for extra style. For a fancier outfit, try it with a long dress and boots.
Everyday Wear Suggestions
Use your pumpkin beanie in your daily outfits. It looks great with a denim jacket, white tee, and khaki pants. For colder days, layer it over a turtleneck and corduroy pants with loafers.
| Occasion | Outfit Idea | Accessories |
|---|---|---|
| Halloween Party | Orange sweater, black leggings | Face paint, witch’s broom |
| Pumpkin Patch Visit | Flannel shirt, jeans, boots | Camera, woven bag |
| Coffee Shop Run | Oversized sweatshirt, leggings | Reusable coffee mug, book |
Be creative with your pumpkin beanie. It’s great for adding a festive touch to any fall outfit. Whether it’s for everyday wear or a Halloween costume, it’s a versatile accessory.
Gift-Giving Tips and Packaging Ideas
Your pumpkin beanie crochet creation is perfect for the fall season. It comes in sizes from baby to adult, making it a great fit for anyone. Choose warm autumn colors like deep orange, rich brown, or forest green to match the season.
Presenting your handmade item is important. Wrap it in tissue paper and put it in a kraft paper gift box. Add a rustic charm by tying it with twine and attaching a small artificial leaf. Include a care instruction card to make it last longer.
Crochet gifts show care and creativity. Pair your pumpkin beanie with fall-themed accessories like mittens or a scarf. This thoughtful combination will warm both the recipient’s head and heart. By sharing your handmade creations, you’re giving more than just a gift.